Introduction: Discover the Power of Traditional Hatha Yoga Asanas
Best Hatha Yoga Asanas Explained We believe that every yoga journey begins with understanding the body, breath, and awareness. Hatha Yoga Asanas are not simply physical exercises—they are traditional yogic practices designed to cultivate strength, flexibility, stability, mindful breathing, and inner balance.
Under the guidance of Yogini Manisha, founder of Diksha Yoga School and an experienced Hatha Yoga teacher, students learn traditional Best Hatha Yoga Asanas Explained through proper alignment, breath awareness, yogic philosophy, and safe progression. These teaching methods have helped students from around the world build a strong and sustainable yoga practice.
Learn more about our Yoga Alliance Registered Yoga Teacher Training.
Our teaching approach has been developed under the guidance of our founder, Yogini Manisha, who has dedicated years to sharing authentic Hatha Yoga with students from around the world. You can also learn more about our philosophy and teaching approach on our About Us page.
Whether you are searching for Best Hatha Yoga Asanas Explained Asanas for beginners, looking to improve your personal practice, or preparing to join our 200 Hour Yoga Teacher Training, understanding these traditional yoga poses will help you build a strong, safe, and confident foundation.
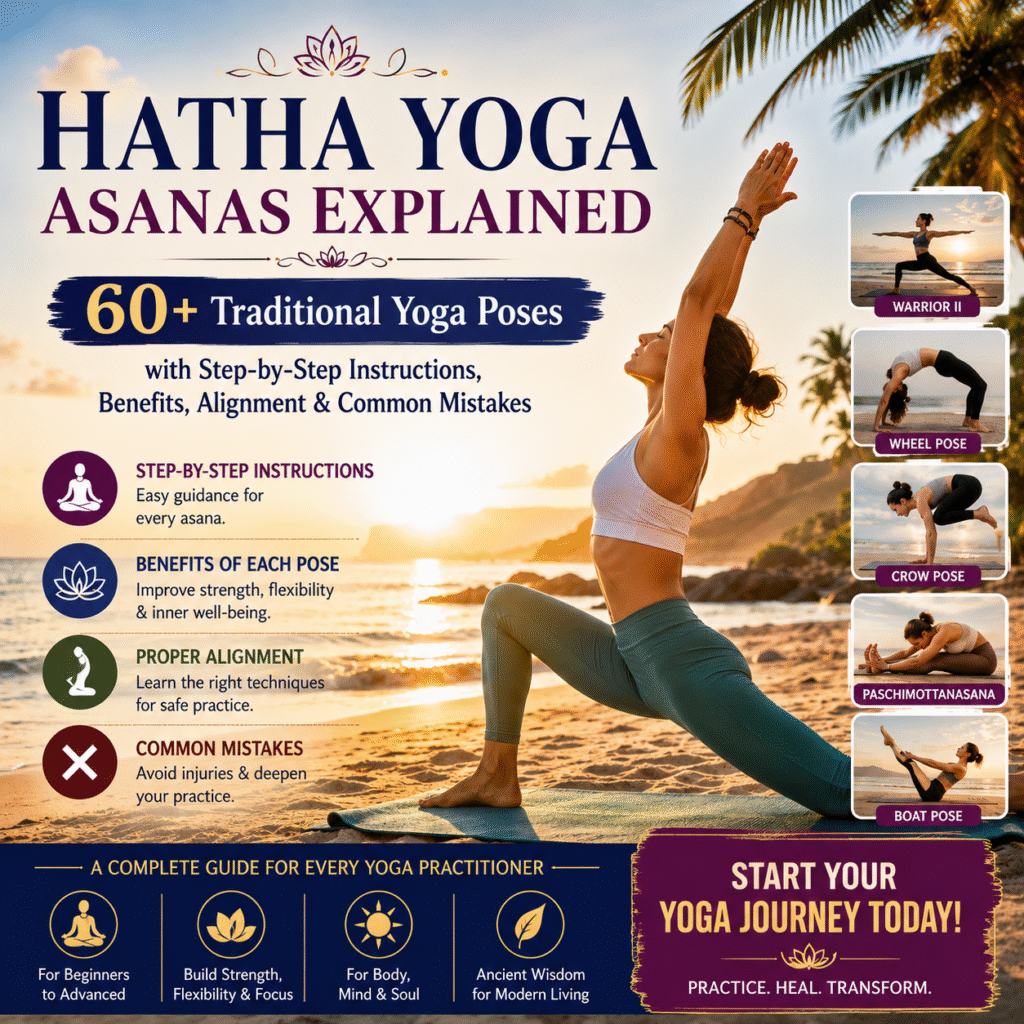
In this complete guide, you’ll discover more than 60 Best Hatha Yoga Asanas Explained, including step-by-step practice instructions, benefits, alignment cues, breathing techniques, beginner modifications, common mistakes to avoid, and practical guidance to help you deepen your yoga journey with confidence.
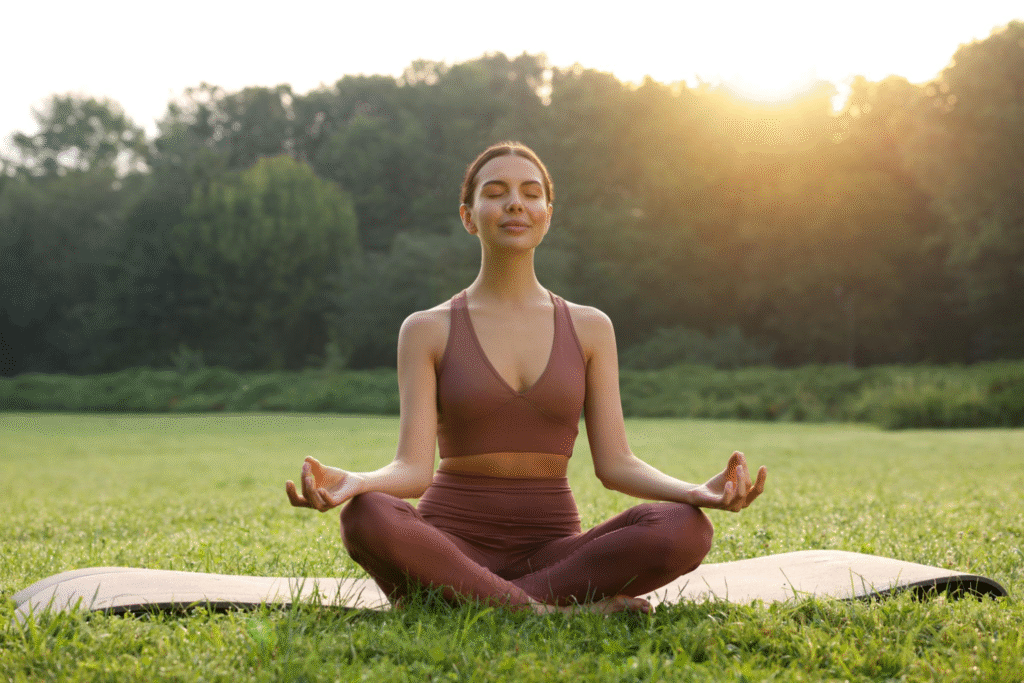
Table of Contents
What Are Best Hatha Yoga Asanas Explained Asana?
The word Hatha comes from two Sanskrit syllables:
- Ha – represents the sun energy, active force, and vitality.
- Tha – represents the moon energy, calming and receptive qualities.
Together, Best Hatha Yoga Asanas Explained represents the union and balance of opposite energies within us.
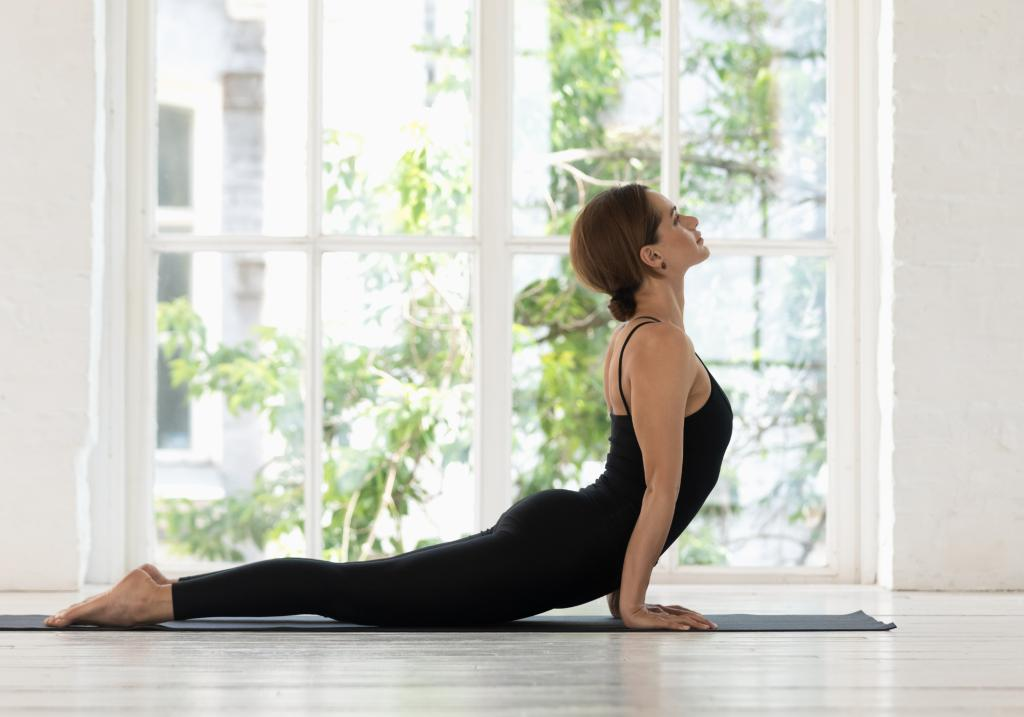
Best Hatha Yoga Asanas Explained Asanas are traditional yoga postures practiced with awareness, stability, and controlled breathing. Unlike fast-paced movement practices, Best Hatha Yoga Asanas Explained focuses on holding poses for a longer duration, allowing practitioners to develop proper alignment, improve breath awareness, and experience the deeper physical and mental benefits of each posture.
A Best Hatha Yoga Asanas Explained practice combines:
- Asanas (physical postures)
- Pranayama (breath control)
- Meditation
- Relaxation techniques
- Mindful awareness
For this reason, Best Hatha Yoga Asanas Explained remains one of the most important foundations of modern yoga practice and Yoga Alliance Registered Yoga Teacher Training. At Diksha Yoga School, students learn these traditional principles in our 200 Hour Yoga Teacher Training, where Best Hatha Yoga Asanas Explained, alignment, yoga anatomy, pranayama, meditation, yoga philosophy, and teaching methodology are taught through authentic and systematic training.
Why Are Best Hatha Yoga Asanas Explained Important?
We often see students come to yoga with different goals. Some want better flexibility, some want physical strength, while others are searching for stress relief and mental balance. Best Hatha Yoga Asanas Explained support all these areas because they work on the complete human system. At Diksha Yoga School, these benefits are experienced through consistent practice in our Yoga Teacher Training Courses, where students learn not only the postures but also proper alignment, breathing techniques, yoga anatomy, and mindful movement.
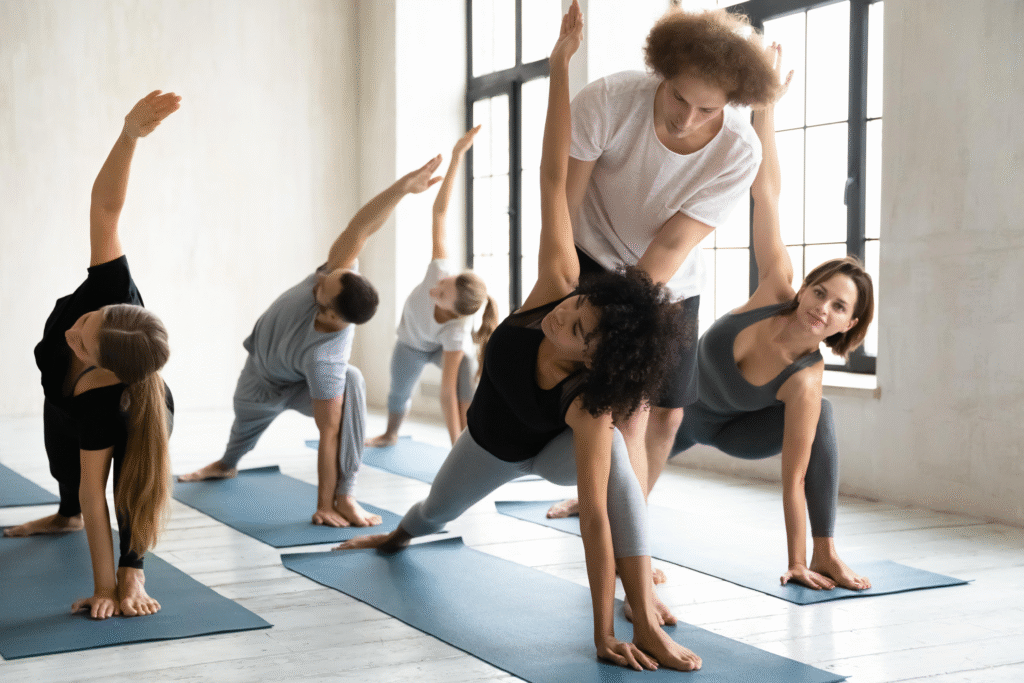
Physical Benefits of Best Hatha Yoga Asanas Explained Poses
Regular practice of Best Hatha Yoga Asanas Explained Asanas can help:
| Benefit | How It Helps |
| Improves flexibility | Creates healthy mobility in muscles and joints |
| Builds strength | Activates muscles through controlled holds |
| Improves posture | Develops awareness of spinal alignment |
| Enhances balance | Improves body coordination |
| Supports joint mobility | Encourages safe movement patterns |
| Improves breathing capacity | Creates better connection with breath |
Understanding how each posture affects the muscles, joints, and breath is essential for practicing safely and effectively. Our complete Yoga Anatomy Guide explains how the body’s structure influences movement, while our Pranayama Guide explores breathing techniques that enhance the physical and mental benefits of every Best Hatha Yoga Asanas Explained Asana.
Mental and Emotional Benefits of Best Hatha Yoga Asanas Explained
Hatha Yoga is much more than a physical practice—it is a journey toward mental clarity, emotional balance, and inner awareness. By combining mindful movement with Pranayama (breath control) and Meditation, practitioners develop a deeper connection between the body, breath, and mind.
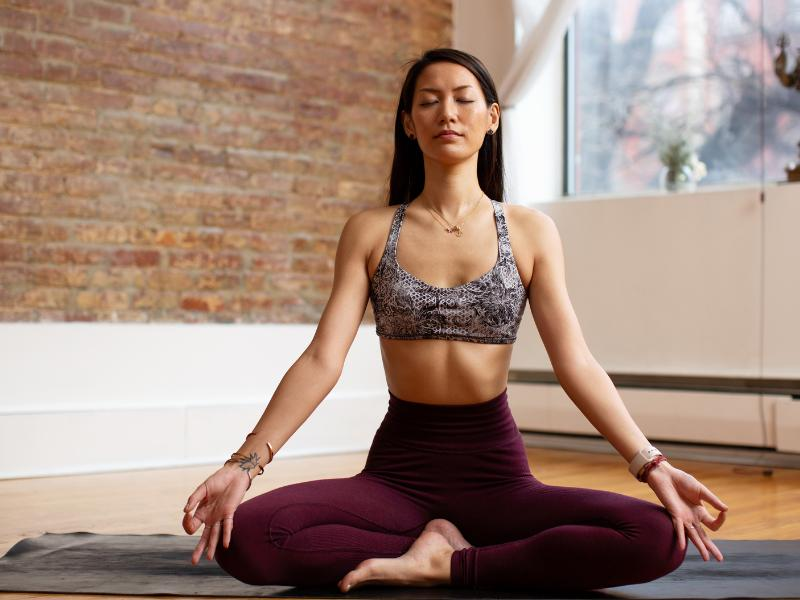
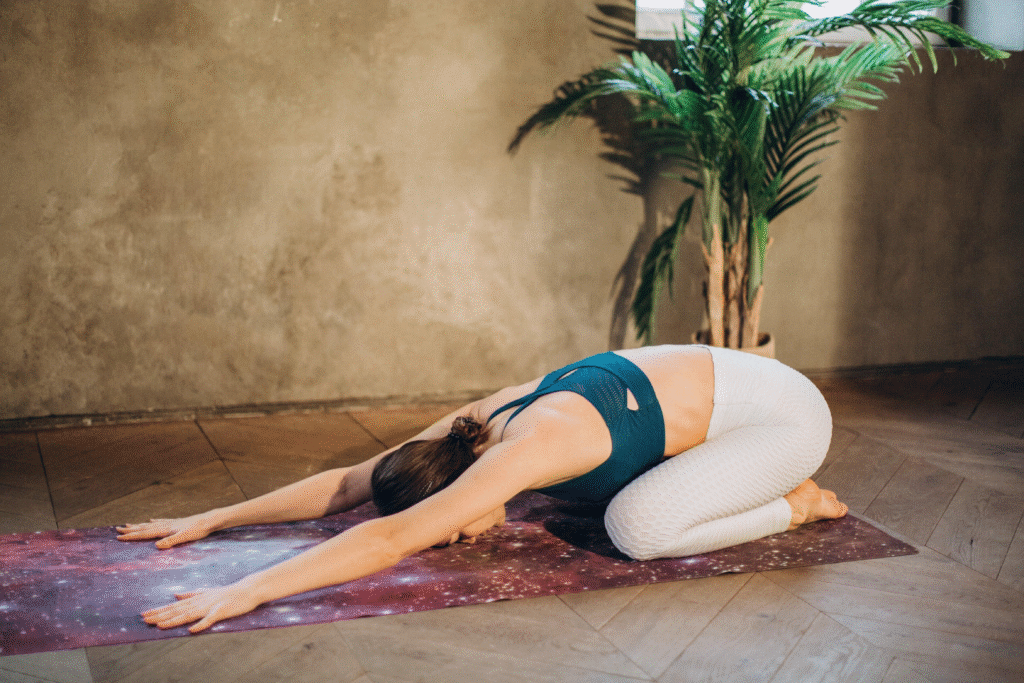
With regular practice, Best Hatha Yoga Asanas Explained can help:
- Reduce daily stress and tension
- Improve concentration and focus
- Develop patience and self-awareness
- Create emotional stability
- Encourage mindfulness
- Support relaxation and inner peace
At Diksha Yoga School, we guide students to understand that the goal of yoga is not simply achieving a beautiful posture but cultivating awareness through every breath and movement. These timeless principles are explored in greater depth through our Yoga Philosophy teachings and immersive Yoga Wellness Retreats, where students experience authentic yogic living beyond the yoga mat.
Hatha Yoga Asanas vs Other Yoga Styles
Yoga Asanas vs Other Yoga Styles
Many students ask us, “What is the difference between Best Hatha Yoga Asanas Explaineda and other yoga styles?” Understanding these differences helps you choose a practice that aligns with your goals, experience level, and personal yoga journey.
| Hatha Yoga | Vinyasa Yoga | Ashtanga Yoga |
| Focuses on alignment and awareness | Focuses on continuous movement | Follows a fixed sequence |
| Poses are held longer | Movements flow with breath | More physically demanding |
| Suitable for beginners and advanced students | Good for people who enjoy dynamic movement | Requires discipline and consistency |
| Builds a strong foundation and body awareness | Improves coordination and endurance | Builds strength, stamina, and focus |
Best Hatha Yoga Asanas Explained creates the foundation that allows students to safely explore other yoga traditions. At Diksha Yoga School, our 200 Hour Hatha & Vinyasa Flow Yoga Teacher Training combines the stability of traditional Best Hatha Yoga Asanas Explained with the fluidity of Vinyasa Flow, giving students a well-rounded understanding of both styles. For those who want to deepen their knowledge of sequencing, alignment, breath, and teaching methodology, our Yoga Alliance Registered Teacher Training provides comprehensive training for both personal practice and professional teaching
Categories of Hatha Yoga Asanas
Traditional Categories of Best Hatha Yoga Asanas Explained Asanas
Traditional Best Hatha Yoga Asanas Explained includes different categories of postures that work together to create strength, flexibility, stability, and balance throughout the body. Learning these pose groups systematically helps students build a safe and sustainable yoga practice. In our 200 Hour Hatha & Vinyasa Flow Yoga Teacher Training, each category is studied in depth alongside Yoga Anatomy to help students understand proper alignment, movement mechanics, and injury prevention.
Standing Best Hatha Yoga Asanas Explained Poses
Standing poses develop strength, stability, balance, and grounding while creating a strong foundation for more advanced yoga practices.
Examples:
- Tadasana (Mountain Pose)
- Vrikshasana (Tree Pose)
- Trikonasana (Triangle Pose)
- Virabhadrasana I (Warrior I)
- Virabhadrasana II (Warrior II)
Benefits:
- Improves balance
- Strengthens the legs
- Develops body awareness
- Builds postural stability
- Prepares the body for more advanced Best Hatha Yoga Asanas Explained Asanas
Sitting Best Hatha Yoga Asanas Explained Asanas
Sitting Best Hatha Yoga Asanas Explained Poses
Sitting postures create flexibility, improve posture, and prepare the body for deeper yogic practices such as Meditation and Pranayama. They provide a stable and comfortable foundation for breathwork, mindfulness, and self-awareness, making them an essential part of every traditional Best Hatha Yoga Asanas Explained practice.
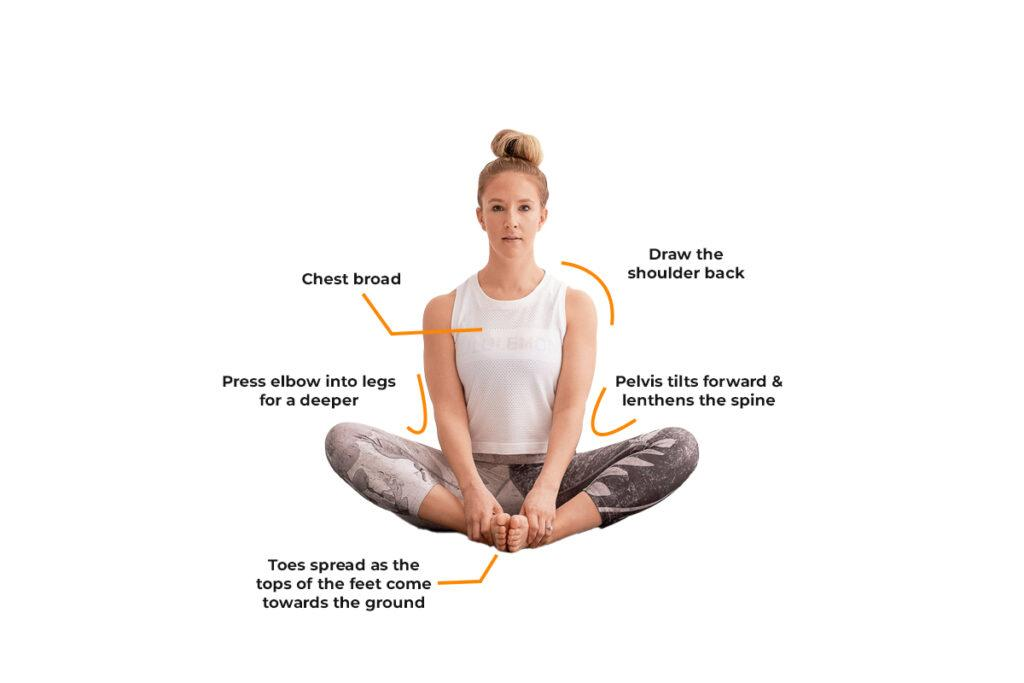
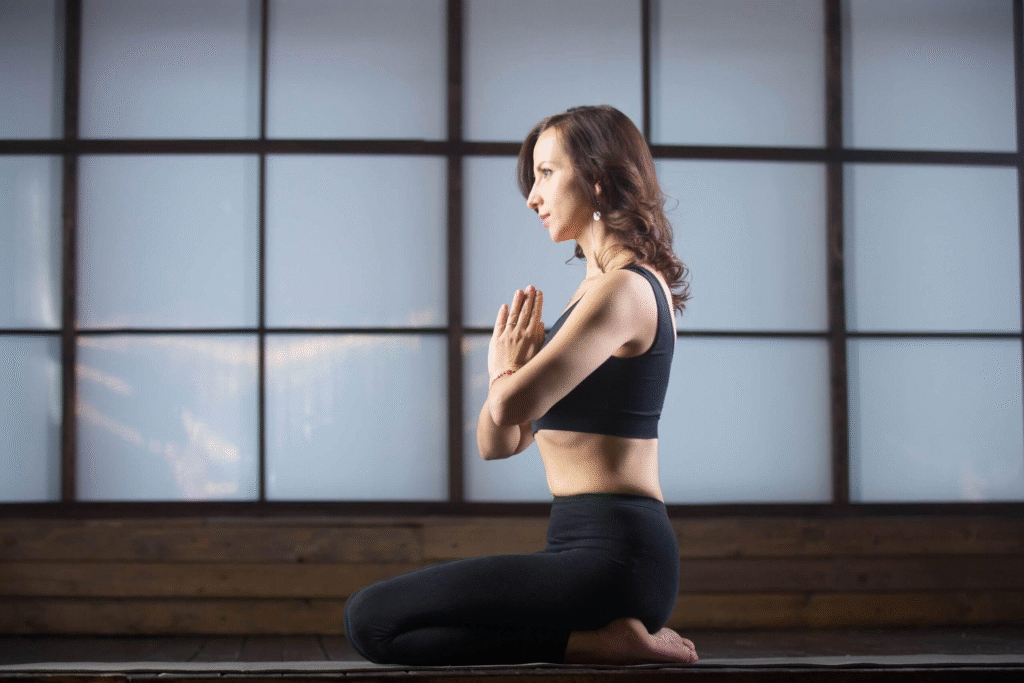
Examples:
- Sukhasana
- Padmasana
- Vajrasana
- Paschimottanasana
- Janu Sirsasana
Benefits:
- Improves hip flexibility
- Calms the nervous system
- Supports meditation practice
- Encourages mindful breathing
- Promotes mental clarity and inner peace
To experience the full benefits of these seated postures, they are often practiced alongside Pranayama, Meditation, and the teachings of Yoga Philosophy, helping students cultivate both physical.
Backwards Bending Best Hatha Yoga Asanas Explained Poses
Backbends open the front body, strengthen the spine, and improve posture by combining flexibility with controlled movement. Practicing these poses with proper alignment is essential for protecting the lower back and developing spinal mobility. Learning the principles of Yoga Anatomy helps students understand how the spine, shoulders, and hip flexors work together to perform backbends safely.
Examples:
· Bhujangasana
· Ustrasana
· Dhanurasana
· Setu Bandhasana
Benefits:
· Strengthens back muscles
· Improves spinal mobility
· Opens the chest and shoulders
· Enhances posture
· Encourages deeper breathing
2. Forward Bending Best Hatha Yoga Asanas Explained Asanas
Forward bends encourage relaxation, flexibility, and introspection. When practiced with slow breathing and mindful awareness, these postures help release physical tension while calming the nervous system. They are often combined with Pranayama and relaxation techniques to create a balanced Best Hatha Yoga Asanas Explained practice.
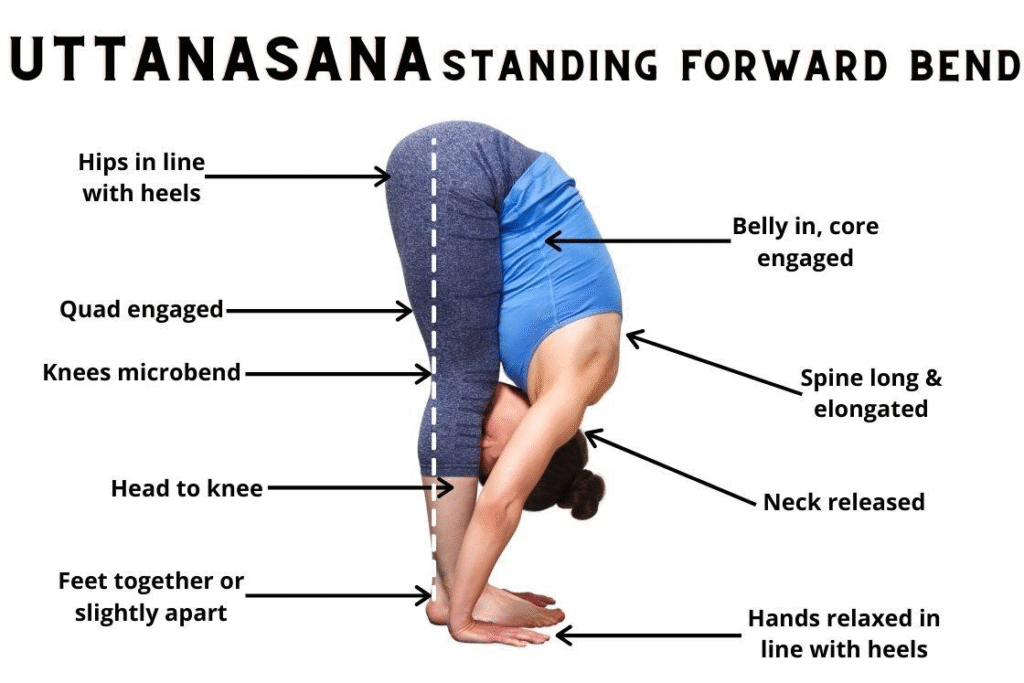
Examples:
· Uttanasana
· Paschimottanasana
· Balasana
Benefits:
· Stretches the posterior body
· Releases muscular tension
· Creates calming effects
· Improves flexibility
3. Balancing Best Hatha Yoga Asanas Explained Poses
Balancing poses develop focus, concentration, stability, and confidence. These postures teach practitioners to coordinate movement with breath while cultivating mental awareness and patience. During our Yoga Teacher Training, students learn how to build balance progressively through proper alignment, gaze (Drishti), and breath control.
Examples:
· Vrikshasana
· Garudasana
· Natarajasana
Benefits:
· Improves coordination
· Builds confidence
· Enhances concentration
· Develops body awareness
· Strengthens the core and leg
Recommended Links
| Section | Internal Link |
| Backward Bending | Yoga Anatomy Guide |
| Forward Bending | Pranayama Guide |
| Balancing | 200 Hour Yoga Teacher Training |
How to Practice Best Hatha Yoga Asanas Explained Asanas Correctly
We always encourage students to remember that yoga is not about forcing the body into a shape. Yoga is about creating awareness within the posture. Under the guidance of Yogini Manisha, students learn to practiceBest Hatha Yoga Asanas Explained safely by combining proper alignment, mindful breathing, and gradual progression rather than focusing only on flexibility or advanced poses.
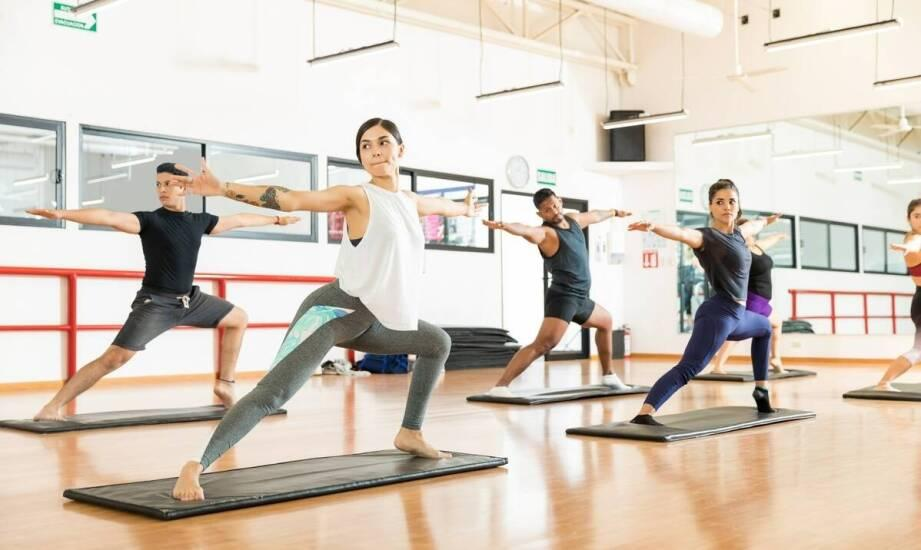
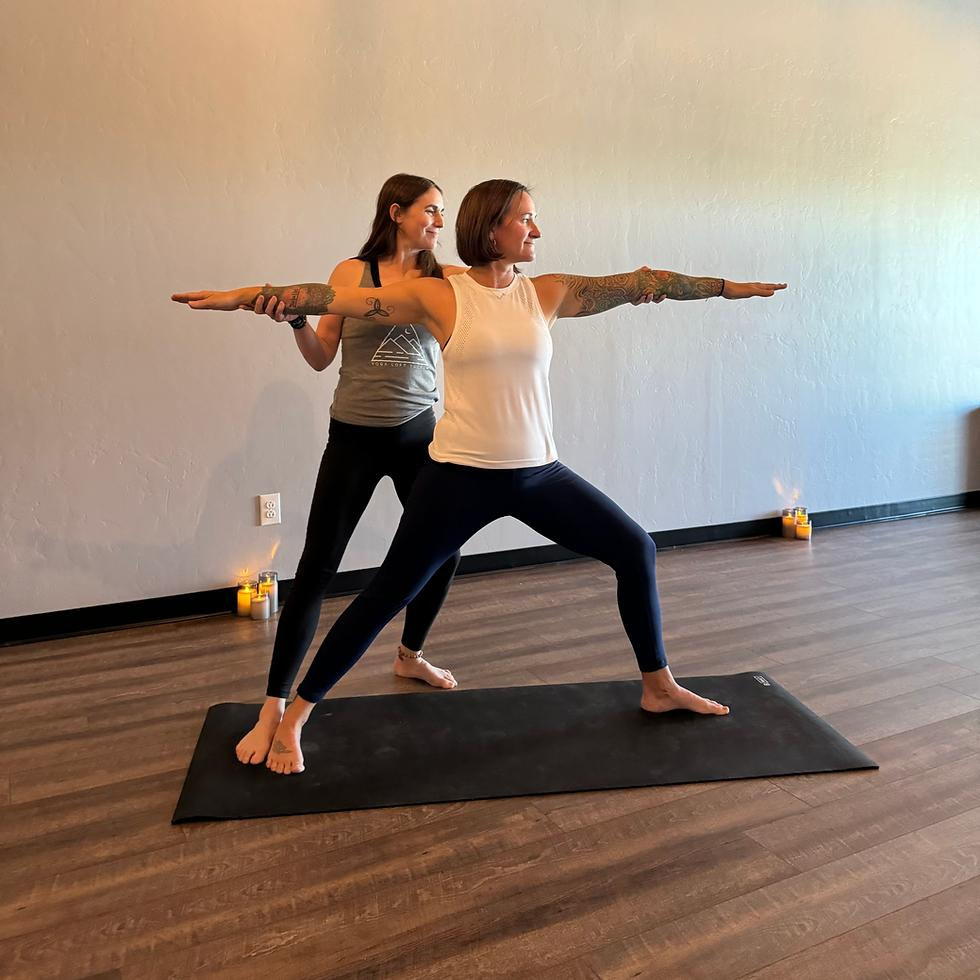
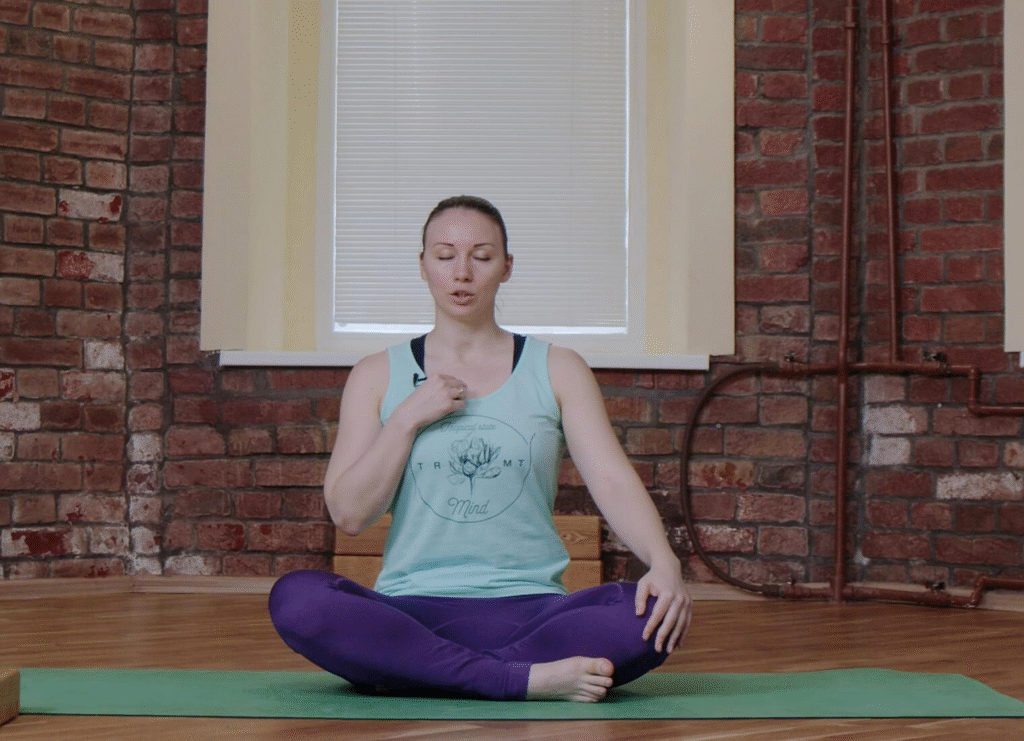
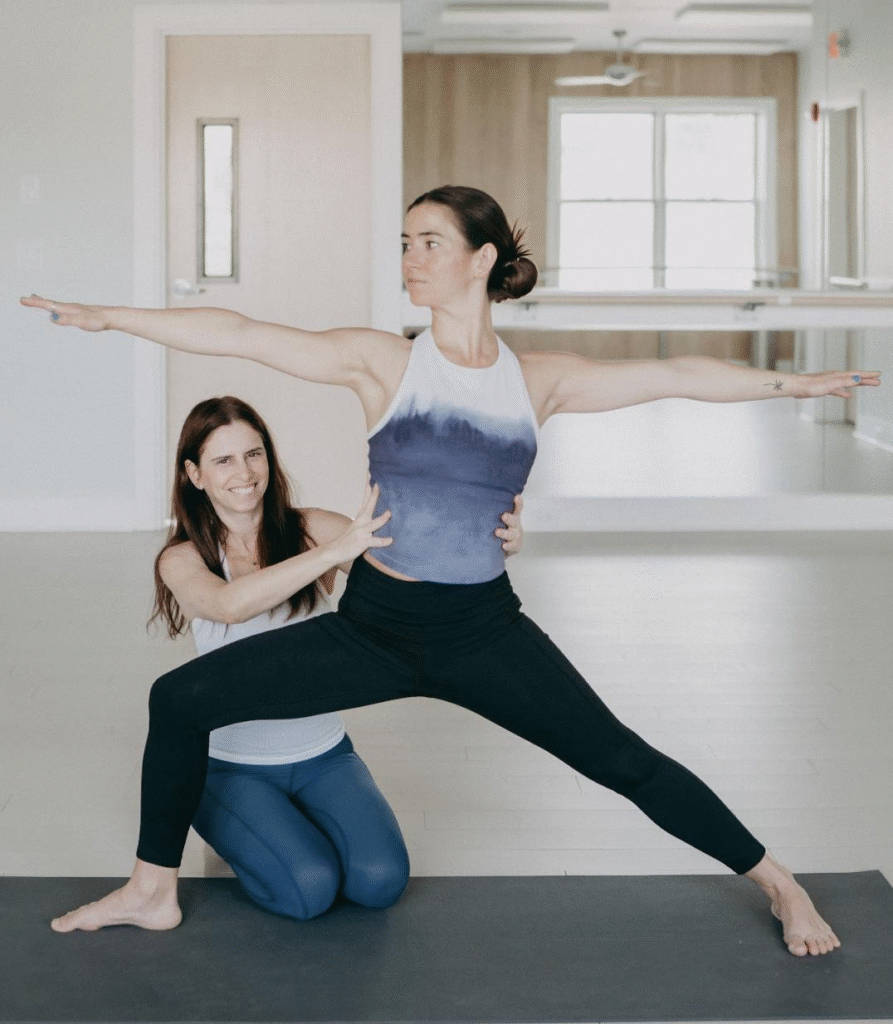
Before practicing Best Hatha Yoga Asanas Explained Asanas, keep these essential principles in mind:
1. Focus on Breath
The breath guides every movement. A calm and steady breath creates a calm and focused practice. Learning Pranayama alongside Best Hatha Yoga Asanas Explained helps practitioners improve breath awareness, concentration, and overall well-being.
2. Respect Your Body
Every body is unique, and flexibility develops gradually through consistent practice. During our Yoga Teacher Training Courses, students learn safe modifications and progressive techniques that allow them to practice according to their individual abilities.
3. Maintain Proper Alignment
Correct alignment protects the joints, improves posture, and helps you receive the full benefits of every asana. Understanding Yoga Anatomy makes it easier to move safely, prevent injuries, and build a sustainable yoga practice.
4. Practice With Awareness
Instead of rushing from one pose to another, experience each posture fully. Combining mindful movement with Meditation and the principles of Yoga Philosophy helps develop greater self-awareness both on and off the yoga mat.
Common Beginner Mistakes in Best Hatha Yoga Asanas Explained (And How to Avoid Them)
At Diksha Yoga School, we often remind our students that progress in Best Hatha Yoga Asanas Explained does not come from pushing harder—it comes from practicing with awareness, patience, and consistency. Under the guidance of Yogini Manisha, beginners learn that proper alignment, mindful breathing, and gradual progression are the keys to a safe and sustainable yoga practice. Every beginner makes mistakes, and that is a natural part of learning. By understanding these common habits early, you can build greater confidence, prevent injuries, and enjoy the long-term benefits of Best Hatha Yoga Asanas Explained.
| Common Mistake | Why It Happens | How to Avoid It |
| Holding the breath | Beginners focus only on the posture. | Keep your breathing slow, steady, and natural throughout every pose. Learning the fundamentals of Pranayama helps improve breath awareness and control. |
| Comparing yourself with others | Everyone has a different body, flexibility, and experience level. | Focus on your own progress instead of trying to copy someone else’s practice. Yoga is a personal journey, not a competition. |
| Forcing flexibility | Trying to reach the deepest version of a pose too quickly. | Move gradually and allow flexibility to develop over time. Never force your body into pain. |
| Locking the knees or elbows | Many students think straight joints create better alignment. | Keep a gentle micro-bend and engage the surrounding muscles for stability. |
| Skipping warm-up exercises | Excitement often leads beginners to jump into challenging poses. | Prepare the joints, muscles, and breath with gentle warm-up movements before practicing. |
| Ignoring pain | Some people mistake pain for progress. | Stretching may feel intense, but sharp or sudden pain is a sign to stop and adjust the pose. |
| Poor alignment | Lack of awareness or rushing through the practice. | Learn the correct alignment, understand the basics of Yoga Anatomy, use props when needed, and practice under an experienced teacher whenever possible. |
| Practicing advanced poses too early | Social media often creates unrealistic expectations. | Build a strong foundation with beginner poses before attempting inversions, arm balances, or deep backbends. A structured 200 Hour Yoga Teacher Training helps students progress safely and confidently. |
Our Advice for Beginners
At Diksha Yoga School, Yogini Manisha encourages every student to remember that yoga is not about achieving the most advanced posture. A mindful practice built on proper alignment, steady breathing, and consistent effort creates far greater long-term benefits than rushing into difficult poses. Through our Yoga Alliance Registered Yoga Teacher Training, students learn how to practice safely, understand alignment, develop body awareness, and build confidence under the guidance of experienced teachers. When you respect your body’s natural limits, you develop strength, flexibility, confidence, and awareness in a safe, sustainable, and lifelong yoga practice.
Part 2: Standing Best Hatha Yoga Asanas Explained Asanas (Foundation of Strength, Balance & Awareness)
Standing Best Hatha Yoga Asanas Explained Asanas: Building Strength, Stability, and Balance
We believe that standing Best Hatha Yoga Asanas Explained Asanas create the foundation for a strong, stable, and balanced yoga practice. These postures teach practitioners how to connect with the earth, improve posture, develop body awareness, and build a solid foundation for every movement. Under the guidance of Yogini Manisha, students learn that mastering standing poses is not about perfection but about cultivating proper alignment, mindful breathing, and steady awareness.
Standing poses are especially important for beginners because they build confidence and prepare the body for deeper yoga practices. In our 200 Hour Hatha & Vinyasa Flow Yoga Teacher Training at Diksha Yoga School, students learn the correct alignment of standing postures alongside Yoga Anatomy, helping them understand how muscles, joints, and breath work together to create safe and effective movement. A strong foundation in these fundamental poses allows students to progress confidently into more advanced Best Hatha Yoga Asanas Explained Asanas.
Standing Best Hatha Yoga Asanas Explained Asanas help improve:
- Body awareness
- Leg strength
- Core stability
- Balance and coordination
- Postural alignment
- Concentration and focus
Whether you are beginning your yoga journey or preparing to become a yoga teacher, developing a strong foundation in standing postures will improve every aspect of your practice. Let us explore some of the most important traditional Best Hatha Yoga Asanas Explained standing poses.
1. Tadasana (Mountain Pose)
Sanskrit Meaning
Tada = Mountain
Asana = Posture
Tadasana is one of the most basic yet powerful Best Hatha Yoga Asanas Explained Asanas. Although it appears simple, it teaches the essential principles of proper alignment, grounding, posture, and body awareness that form the foundation of every yoga practice. Under the guidance of Yogini Manisha, students learn that mastering Tadasana is not about standing still—it is about creating stability, mindful breathing, and awareness throughout the body. In our 200 Hour Hatha & Vinyasa Flow Yoga Teacher Training, Tadasana is one of the first postures students learn because it establishes the alignment principles required for practicing more advanced Best Hatha Yoga Asanas Explained Asanas safely.
How to Practice Tadasana
- Stand with your feet together or hip-width apart.
- Keep your toes pointing forward and distribute your weight evenly on both feet.
- Engage your thigh muscles gently without locking your knees.
- Lengthen your spine and lift the crown of your head upward.
- Relax your shoulders away from your ears.
- Keep your arms beside your body with palms facing forward.
- Take slow and deep breaths while maintaining awareness.
Breathing Technique
- Inhale deeply while lengthening the spine.
- Exhale while relaxing unnecessary tension.
- Maintain slow and natural breathing.
Benefits of Tadasana
Regular practice of Mountain Pose can help:
- Improve standing posture
- Strengthen legs and ankles
- Develop body awareness
- Improve balance
- Create better spinal alignment
- Prepare the body for other yoga poses
Alignment Points in Tadasana
A correct Tadasana should include:
✓ Feet grounded evenly
✓ Knees active but relaxed
✓ Pelvis neutral
✓ Spine naturally extended
✓ Chest open without forcing
✓ Shoulders relaxed
✓ Chin parallel to the floor
Common Mistakes in Tadasana
| Common Mistake | Correction |
| Putting weight only on heels | Balance weight across the entire foot |
| Locking knees | Keep legs active but soft |
| Pushing chest forward | Maintain natural alignment |
| Raising shoulders | Relax shoulders downward |
Beginner Modification
If you find it difficult to balance:
- Practice near a wall for support.
- Keep feet slightly apart.
- Focus first on posture awareness.
Teaching Tip for Yoga Teachers
Under the guidance of Yogini Manisha, we encourage students to imagine themselves as a mountain—stable at the base, strong through the center, and reaching upward with awareness. This simple visualization helps develop balance, confidence, mindful breathing, and proper alignment before progressing to more challenging Best Hatha Yoga Asanas Explained Asana.
These two links are sufficient. Avoid adding more links inside every pose, otherwise the article will become over-optimized. A good practice is to add 1–2 contextual links every 4–5 poses, rather than in every single pose. This keeps the reading experience natural while still strengthening SEO.
2. Vrikshasana (Tree Pose)
Sanskrit Meaning
Vriksha = Tree
Asana = Posture
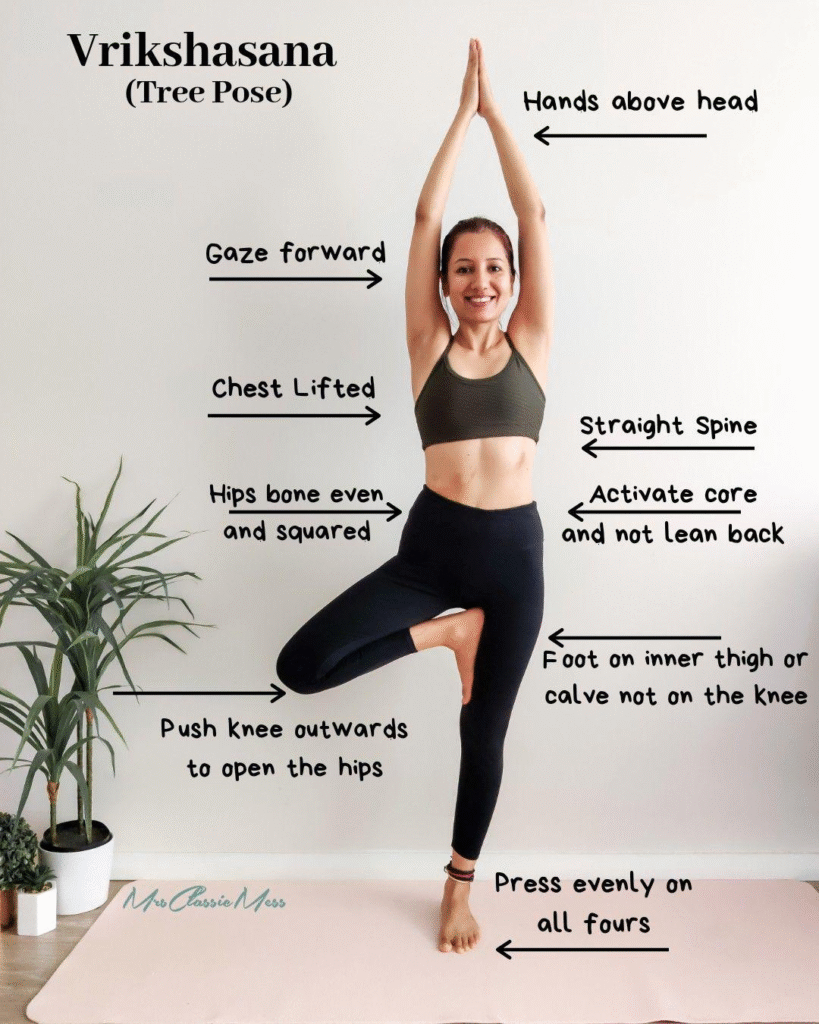
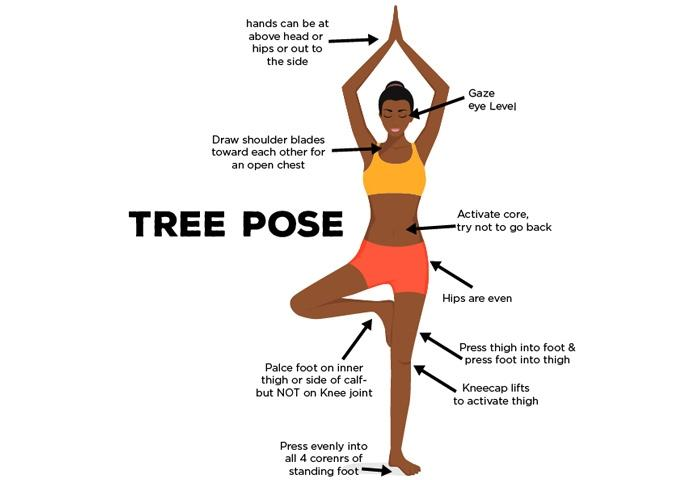
Vrikshasana is one of the most popular Best Hatha Yoga Asanas Explained balancing poses. It represents stability, patience, resilience, and growth—just like a tree that remains deeply rooted while reaching toward the sky. Under the guidance of Yogini Manisha, students learn that true balance comes not only from physical strength but also from steady breathing, focused attention, and body awareness. Rather than trying to remain perfectly still, Vrikshasana teaches practitioners to remain calm and centered even when the body naturally sways.
How to Practice Vrikshasana
- Begin standing in Tadasana.
- Shift your weight onto your left foot.
- Bend your right knee and place the right foot on the inner left thigh or calf.
- Avoid placing the foot directly on the knee joint.
- Bring your palms together at your chest.
- Focus your eyes on one steady point (Drishti).
- When balanced, raise your arms overhead if comfortable.
- Repeat on the opposite side.
Benefits of Vrikshasana
Tree Pose helps:
- Improve balance and coordination
- Strengthen legs and ankles
- Increase concentration
- Improve posture
- Develop confidence
- Create mind-body awareness
Muscles Engaged in Vrikshasana
This pose activates:
- Quadriceps
- Glute muscles
- Calf muscles
- Core muscles
- Foot stabilizers
Common Mistakes in Vrikshasana
| Mistake | Correction |
| Placing foot on knee joint | Place foot above or below the knee |
| Looking down | Keep your gaze forward on a fixed point |
| Collapsing standing hip | Keep both hips level and engaged |
| Holding the breath | Maintain slow, smooth, and natural breathing |
Beginner Modification
Beginners can:
- Keep the toes of the lifted foot touching the floor.
- Practice near a wall for support.
- Keep the hands at the heart center instead of raising them overhead.
Teaching Tip for Yoga Teachers
Yogini Manisha encourages students to imagine themselves as a deeply rooted tree. Even if the body gently sways, maintaining steady breath, a focused gaze (Drishti), and a calm mind helps develop balance, confidence, and mindfulness over time.
3. Trikonasana (Triangle Pose)
3. Trikonasana (Triangle Pose)
Sanskrit Meaning
Trikona = Triangle
Asana = Posture
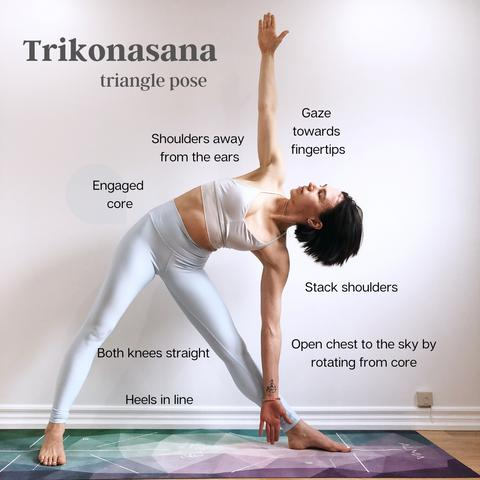
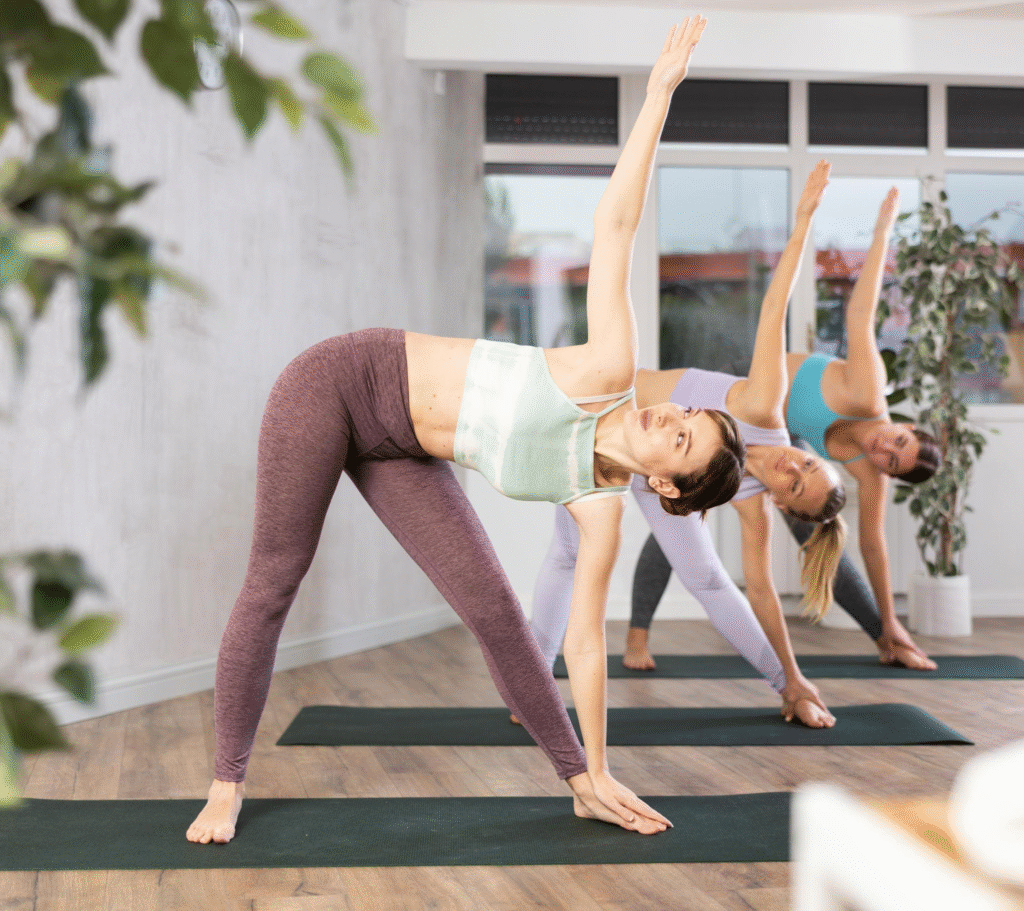
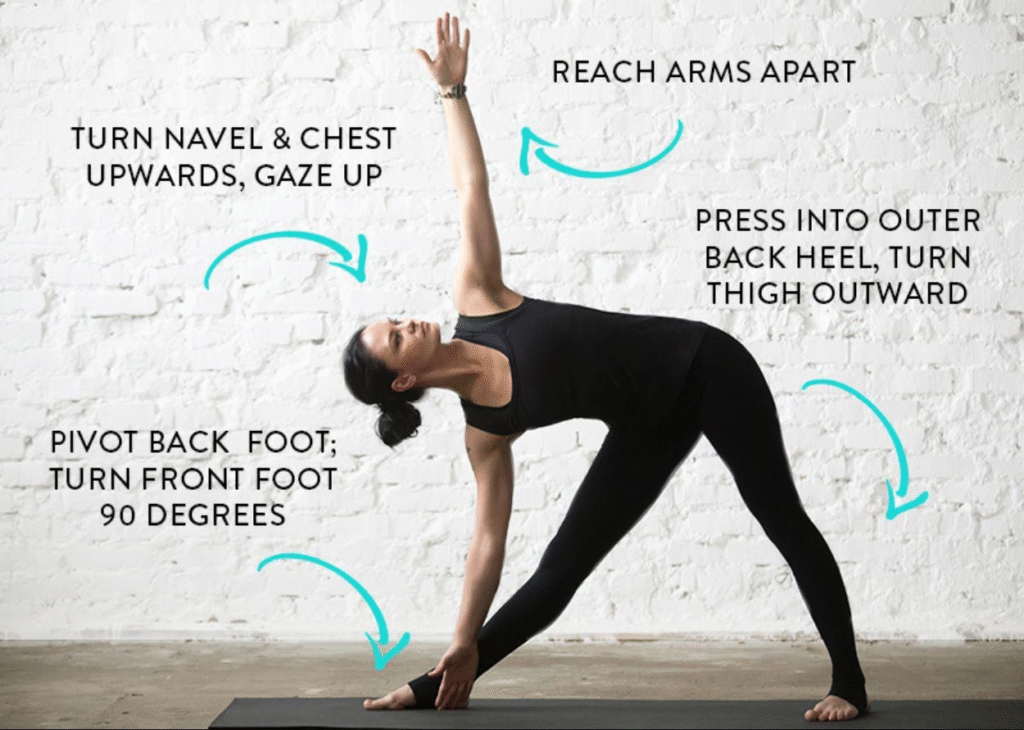
Trikonasana is a traditional Best Hatha Yoga Asanas Explained standing pose that develops strength, flexibility, and openness throughout the entire body. It is especially beneficial for improving hip mobility, lengthening the side body, and creating proper spinal alignment. Understanding the principles of Yoga Anatomy helps practitioners perform Trikonasana safely by improving body awareness, joint stability, and alignment rather than simply reaching deeper into the posture.
How to Practice Trikonasana
- Stand with your feet wide apart.
- Turn your right foot outward approximately 90 degrees.
- Extend your arms sideways at shoulder height.
- Inhale and lengthen your spine.
- Exhale and bend sideways toward the right leg.
- Place your right hand on your shin, ankle, or a yoga block.
- Extend your left arm upward.
- Turn your gaze toward the upper hand if comfortable.
- Repeat on the other side.
Benefits of Trikonasana
Triangle Pose helps:
- Stretch hamstrings and hips
- Improve spinal flexibility
- Strengthen legs
- Open shoulders and chest
- Improve digestion
- Develop balance
Alignment Focus
During Trikonasana:
✓ Keep both legs active
✓ Avoid collapsing into the lower side body
✓ Lengthen both sides of the waist
✓ Keep the chest open
✓ Maintain steady breathing
Common Mistakes in Trikonasana
| Mistake | Correction |
| Rounding the spine | Lengthen the spine before bending |
| Putting too much weight on the lower hand | Use the hand only for light support |
| Locking the knees | Keep the legs active with a gentle micro-bend if needed |
| Turning the chest toward the floor | Rotate the chest upward and keep it open |
==Beginner Modification
Use a yoga block under the lower hand to maintain proper alignment and reduce strain on the spine and hamstrings.
A deeper pose is not always a better pose. Correct awareness, proper alignment, and steady breathing create the true benefits of Best Hatha Yoga Asanas Explained. Understanding the fundamentals of Yoga Anatomy can help you practice Triangle Pose with greater confidence, safety, and long-term progress
5. Virabhadrasana I (Warrior I Pose)
Sanskrit Meaning:
Virabhadra = Warrior
Asana = Posture
Warrior I is a powerful standing Best Hatha Yoga Asanas Explained pose that develops strength, stability, and confidence.
How to Practice Virabhadrasana I
Benefits of Warrior I
- Strengthens legs and hips
- Opens hip flexors
- Improves stamina
- Builds confidence
- Expands chest and shoulders
Common Mistakes
| Mistake | Correction |
| Front knee moving inward | Keep knee aligned with toes |
| Lower back compression | Lengthen spine |
| Losing balance | Create a strong foundation through feet |
5. Virabhadrasana II (Warrior II Pose)
Warrior II is one of the most practiced Best Hatha Yoga Asanas Explained poses worldwide. It develops strength, endurance, and awareness.
How to Practice Warrior II
- Stand with legs wide apart.
- Turn your front foot outward.
- Bend your front knee.
- Extend both arms in opposite directions.
- Keep shoulders relaxed.
- Look toward your front fingertips.
- Maintain steady breathing.
Benefits of Warrior II
- Strengthens legs
- Improves hip flexibility
- Builds concentration
- Opens chest and shoulders
- Develops physical endurance
Teaching Awareness
At Diksha Yoga School, we remind students that Warrior poses are not about aggression or force. They represent inner strength, discipline, courage, and awareness.
Part 3: Standing & Transitional Best Hatha Yoga Asanas Explained Asanas for Strength, Flexibility and Stability
We believe that standing Best Hatha Yoga Asanas Explained Asanas teach us one of the most important lessons of yoga: creating stability before creating movement.
A strong yoga practice does not begin with advanced poses. It begins with learning how to stand, breathe, balance, and move with awareness.
At Diksha Yoga School, we guide our students to understand that every asana has a purpose. Standing poses build the foundation for deeper practices by strengthening the legs, improving hip mobility, developing core awareness, and preparing the body for more challenging yoga postures.
In this section, we continue exploring traditional Best Hatha Yoga Asanas Explained poses that are practiced by beginners, intermediate students, and yoga teachers around the world.
6. Virabhadrasana III (Warrior III Pose)
Sanskrit Meaning:
Virabhadra = Warrior
Asana = Posture
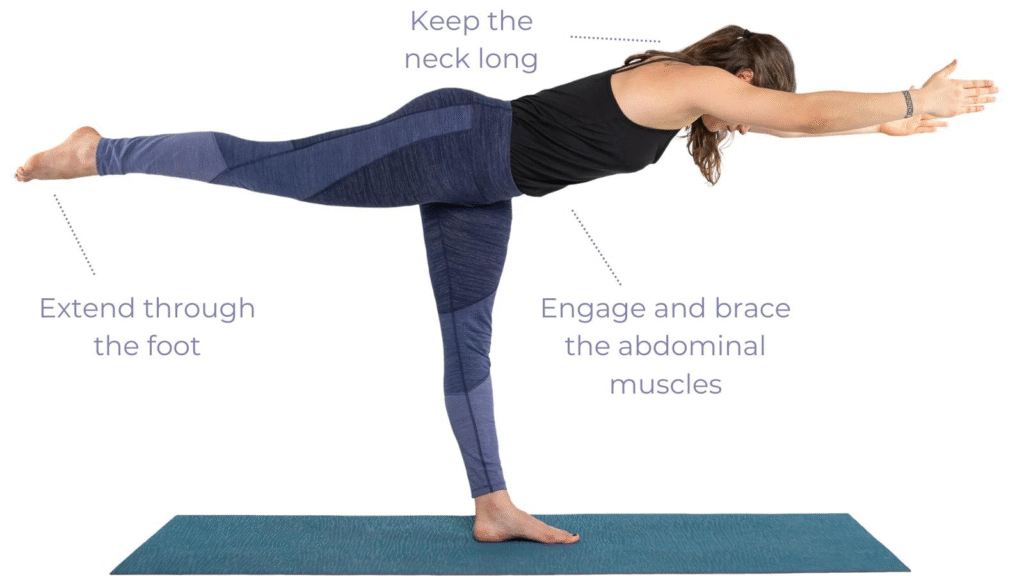
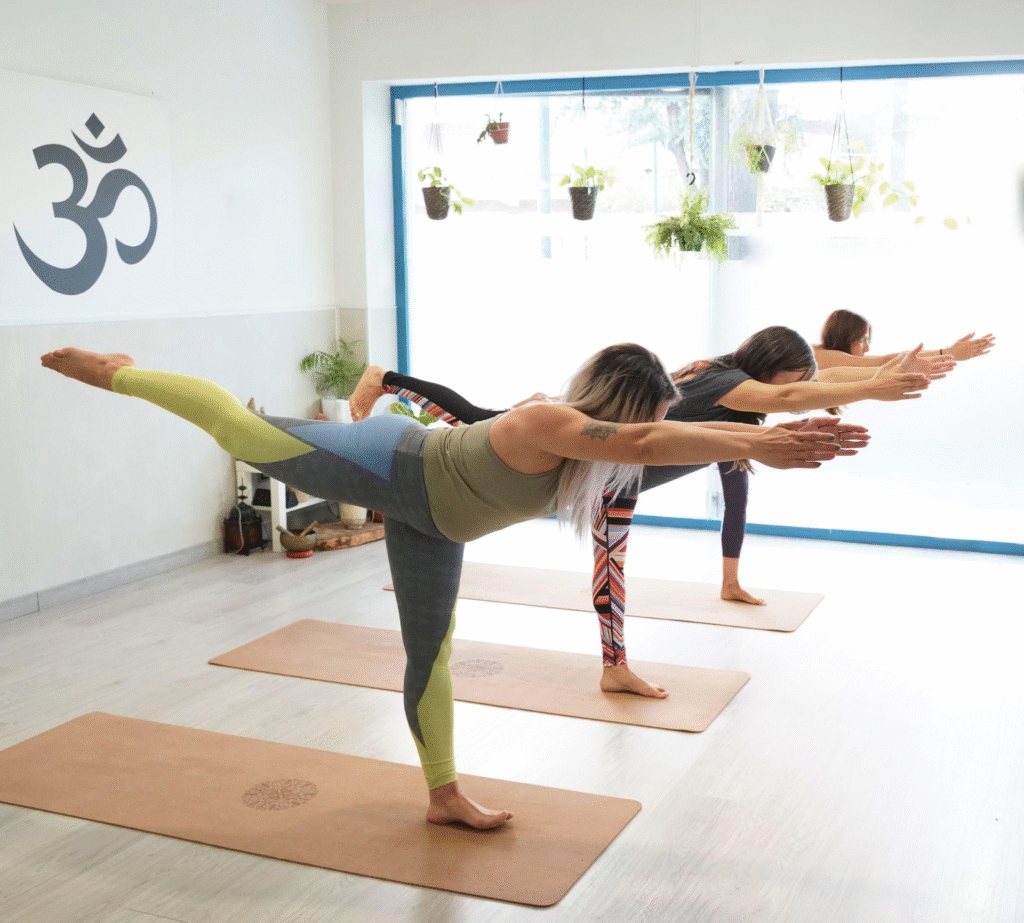
Virabhadrasana III is a powerful balancing Best Hatha Yoga Asanas Explained pose that combines strength, concentration, and body awareness.
Unlike Warrior I and Warrior II, this pose challenges us to find balance on one leg while creating a long and stable line through the body.
How to Practice Virabhadrasana III
- Begin in Tadasana (Mountain Pose).
- Step one foot slightly back.
- Shift your weight onto the standing leg.
- Slowly lift the back leg while extending the torso forward.
- Keep your hips level with the floor.
- Extend your arms forward or keep them beside the body.
- Create a straight line from fingertips to lifted heel.
- Hold the posture while breathing smoothly.
- Repeat on the opposite side.
Breathing Technique
- Inhale while lengthening the spine.
- Exhale while maintaining balance and stability.
Benefits of Virabhadrasana III
Warrior III helps:
- Improve balance and concentration
- Strengthen legs and core muscles
- Develop body coordination
- Improve posture awareness
- Build confidence
- Increase stability in standing poses
Muscles Activated
This pose engages:
- Core muscles
- Glute muscles
- Hamstrings
- Quadriceps
- Back muscles
- Shoulder stabilizers
Common Mistakes in Warrior III
| Common Mistake | Correction |
| Opening hips sideways | Keep hips facing downward |
| Rounding the spine | Lengthen through the crown of the head |
| Locking standing knee | Keep the leg strong but soft |
| Holding breath | Maintain calm breathing |
Beginner Modification
Beginners can:
- Practice with hands on a wall.
- Keep fingertips on blocks.
- Lift the back leg only slightly.
The goal is not to create a perfect shape but to develop awareness and stability.
7. Utkatasana (Chair Pose)
Sanskrit Meaning:
Utkata = Powerful, Fierce, Strong
Asana = Posture
Utkatasana is a strengthening Best Hatha Yoga Asanas Explained pose that builds heat and activates the lower body.
Although it looks simple, Chair Pose requires strength, concentration, and proper alignment.
How to Practice Utkatasana
- Stand in Tadasana.
- Keep feet together or hip-width apart.
- Inhale and raise your arms overhead.
- Exhale and bend your knees as if sitting on an imaginary chair.
- Move your hips backward while keeping your chest lifted.
- Keep your knees tracking in the direction of your toes.
- Hold the pose with steady breathing.
Benefits of Utkatasana
Chair Pose helps:
- Strengthen thighs and glutes
- Improve lower body endurance
- Activate core muscles
- Improve posture
- Build determination and focus
- Increase body awareness
Alignment Points
During Utkatasana:
✓ Weight stays in the heels and middle of the feet
✓ Knees should not collapse inward
✓ Spine remains long
✓ Shoulders stay relaxed
✓ Abdomen gently engaged
Common Mistakes
| Mistake | Correction |
| Knees moving beyond alignment | Keep knees tracking over toes |
| Lower back arching excessively | Engage core gently |
| Shoulders lifting toward ears | Relax shoulders |
| Putting all weight on toes | Shift weight back slightly |
8. Parsvakonasana (Extended Side Angle Pose)
Sanskrit Meaning:
Parsva = Side
Kona = Angle
Asana = Posture
Parsvakonasana is a traditional standing Best Hatha Yoga Asanas Explained posture that creates strength and deep stretching throughout the side body.
How to Practice Parsvakonasana
- Begin in a wide standing position.
- Turn your right foot outward.
- Bend the right knee over the ankle.
- Place your right forearm on your thigh.
- Extend the left arm overhead.
- Create length from the heel to fingertips.
- Keep the chest open.
- Repeat on the opposite side.
Benefits of Parsvakonasana
This pose supports:
- Hip flexibility
- Leg strength
- Shoulder opening
- Side body expansion
- Better posture
- Improved breathing capacity
Alignment Awareness
Focus on:
- Keeping the front knee stable
- Maintaining length in the spine
- Avoiding collapse in the lower waist
- Creating space between ribs and hips
Common Mistakes
| Mistake | Correction |
| Front knee falling inward | Align knee with second toe |
| Collapsing the chest | Rotate chest upward |
| Losing grounding in feet | Press both feet firmly |
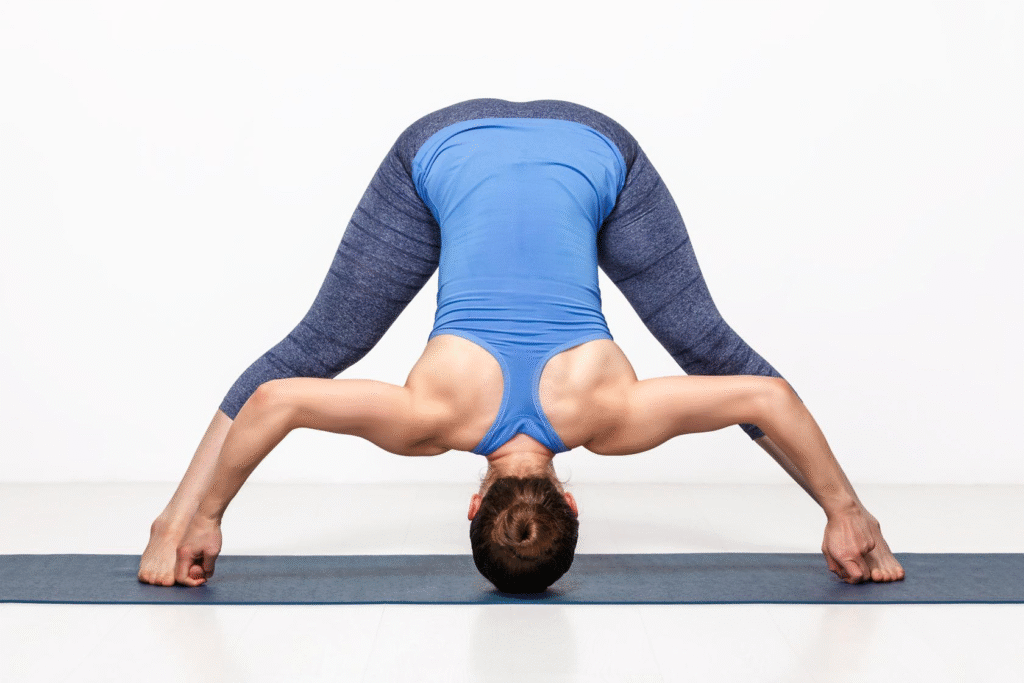
9. Prasarita Padottanasana (Wide-Legged Forward Bend)
Sanskrit Meaning:
Prasarita = Expanded/Wide
Pada = Foot
Uttana = Intense Stretch
This Best Hatha Yoga Asanas Explained forward bend combines strength, flexibility, and relaxation.
It is commonly practiced as a preparation for deeper forward bends and inversions.
How to Practice Prasarita Padottanasana
- Stand with legs wide apart.
- Keep feet parallel.
- Place hands on hips.
- Lengthen your spine while inhaling.
- Fold forward from the hips while exhaling.
- Place hands on the floor or blocks.
- Allow the head to move toward the ground comfortably.
- Maintain slow breathing.
Benefits of Prasarita Padottanasana
Benefits include:
- Stretching hamstrings
- Improving hip flexibility
- Relaxing the nervous system
- Strengthening legs
- Improving circulation
- Preparing the body for inversion practices
Common Mistakes
| Mistake | Correction |
| Rounding from the back | Fold from the hips |
| Forcing the head downward | Allow natural movement |
| Locking knees | Keep legs active |
10. Adho Mukha Svanasana (Downward Facing Dog)
Sanskrit Meaning:
Adho = Downward
Mukha = Face
Svana = Dog
Adho Mukha Svanasana is one of the most recognized Best Hatha Yoga Asanas Explained poses. It is used as a transition, resting posture, and strengthening pose.
Although commonly seen in modern yoga classes, it has deep traditional roots.
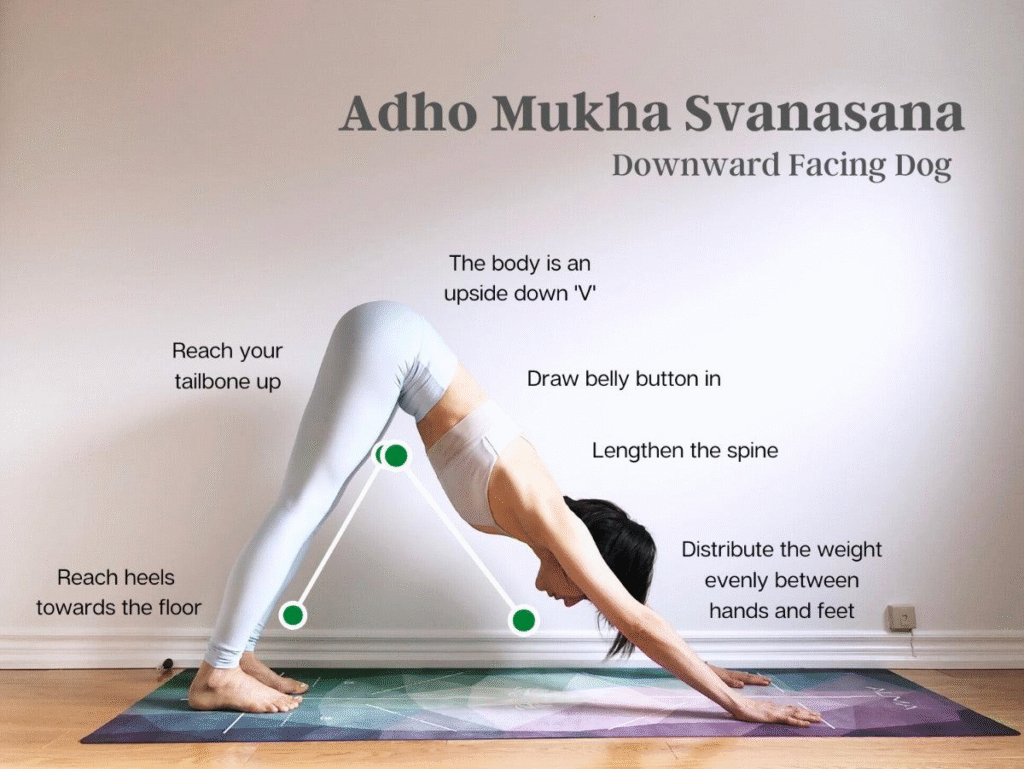
How to Practice Downward Facing Dog
- Begin on hands and knees.
- Place hands slightly forward of shoulders.
- Spread fingers and press through palms.
- Lift hips upward and backward.
- Lengthen the spine.
- Relax the neck.
- Keep knees bent if needed.
- Slowly work toward straight legs with practice.
Benefits of Adho Mukha Svanasana
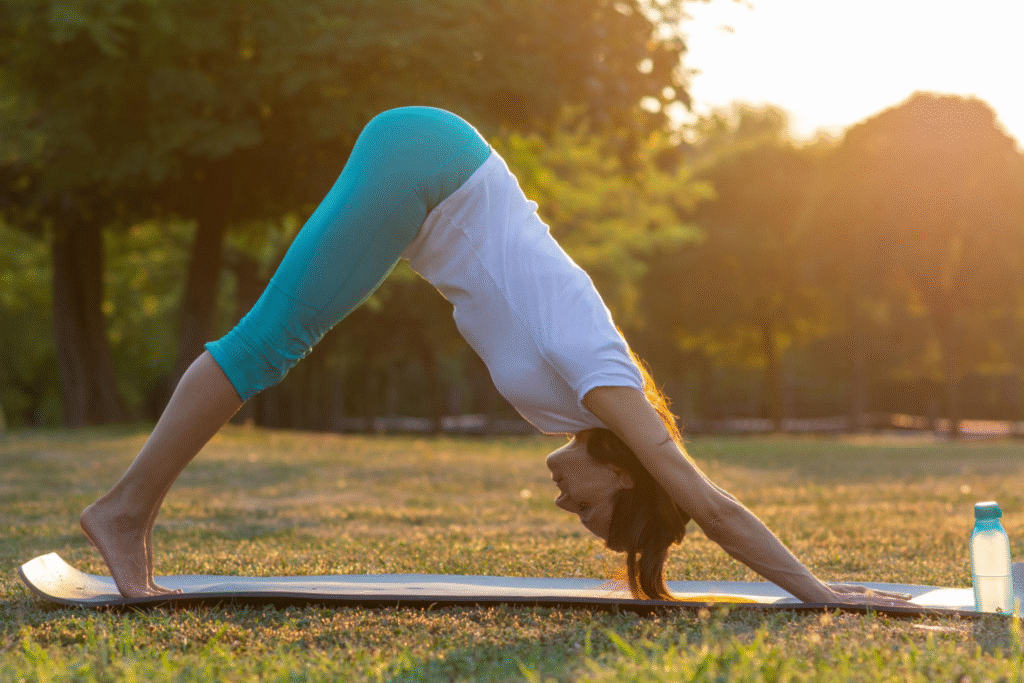
This pose helps:
- Strengthen arms and shoulders
- Stretch hamstrings and calves
- Improve spinal length
- Release tension from the back
- Build overall body strength
- Improve circulation
Alignment Tips
✓ Hands shoulder-width apart
✓ Fingers spread wide
✓ Spine remains long
✓ Shoulders move away from ears
✓ Weight distributed between hands and legs
Common Mistakes
| Mistake | Correction |
| Rounding the spine | Bend knees and lengthen back |
| Collapsing shoulders | Push the floor away |
| Putting all weight on hands | Send hips backward |
| Holding breath | Maintain smooth breathing |
How Standing Best Hatha Yoga Asanas Explained Asanas Prepare the Body
Standing poses create the foundation for:
- Deeper hip opening
- Backbends
- Forward bends
- Arm balances
- Meditation sitting postures
A strong standing practice improves awareness of alignment, which is essential for anyone learning yoga for personal practice or becoming a yoga teacher.
At Diksha Yoga School, we teach students that correct alignment is not about creating a perfect external shape; it is about creating safety, awareness, and connection within the posture.
Summary of Standing Best Hatha Yoga Asanas Explained Asanas Covered
| Asana | Main Focus |
| Tadasana | Alignment and grounding |
| Vrikshasana | Balance and concentration |
| Trikonasana | Flexibility and opening |
| Virabhadrasana I | Strength and stability |
| Virabhadrasana II | Endurance and confidence |
| Virabhadrasana III | Balance and core strength |
| Utkatasana | Lower body strength |
| Parsvakonasana | Side body opening |
| Prasarita Padottanasana | Flexibility and relaxation |
| Adho Mukha Svanasana | Full body strength |
Part 4: Sitting Hatha Yoga Asanas for Flexibility, Meditation & Inner Awareness
We believe that sitting Best Hatha Yoga Asanas Explained Asanas create a deeper connection between the body and mind. While standing poses help us develop strength, stability, and grounding, seated postures teach us patience, awareness, flexibility, and stillness.
In traditional Best Hatha Yoga Asanas Explained, sitting postures hold great importance because they prepare the body for pranayama (breathing practices), meditation, and deeper yogic experiences.
At Diksha Yoga School, we guide students to understand that flexibility is not the main goal of seated yoga poses. The real purpose is to create a comfortable and stable body where the breath can flow freely and the mind can become calm.
Seated Hatha Yoga Asanas help improve:
- Hip flexibility
- Spinal mobility
- Postural awareness
- Lower body relaxation
- Meditation practice
- Mind-body connection
Let us explore some important traditional sitting yoga poses.
11. Sukhasana (Easy Pose)
Sanskrit Meaning:
Sukha = Comfortable, Ease, Happiness
Asana = Posture
Sukhasana is one of the most commonly practiced meditation postures in yoga. Although it appears simple, it teaches the foundation of comfortable sitting, proper spinal alignment, and mindful breathing.
Many beginners start their meditation journey with Sukhasana.
How to Practice Sukhasana
- Sit comfortably on the floor or a yoga mat.
- Cross your legs naturally.
- Place your hands on your knees or in your lap.
- Lengthen your spine upward.
- Relax your shoulders.
- Keep your face and jaw relaxed.
- Close your eyes and focus on your breath.
Breathing Technique
- Breathe slowly through the nose.
- Allow the breath to become smooth and relaxed.
- Observe the natural rhythm of breathing.
Benefits of Sukhasana
Easy Pose helps:
- Calm the nervous system
- Improve meditation posture
- Create awareness of breathing
- Relax the hips and lower body
- Improve spinal alignment
- Reduce mental stress
Alignment Points
During Sukhasana:
✓ Sit evenly on both sitting bones
✓ Keep the spine naturally upright
✓ Avoid rounding the shoulders
✓ Relax the face and neck
✓ Keep the chest open comfortably
Common Mistakes in Sukhasana
| Mistake | Correction |
| Rounding the back | Sit on a cushion or folded blanket |
| Forcing knees downward | Allow hips to open gradually |
| Creating tension in shoulders | Relax upper body |
| Leaning backward | Maintain neutral spine |
Beginner Modification
If sitting on the floor feels uncomfortable:
- Use a meditation cushion.
- Sit against a wall for support.
- Place blankets under the hips.
A comfortable sitting position allows deeper meditation practice.
12. Vajrasana (Thunderbolt Pose)
Sanskrit Meaning:
Vajra = Thunderbolt or Diamond
Asana = Posture
Vajrasana is a traditional Best Hatha Yoga Asanas Explained sitting posture often practiced after meals and during Meditation or pranayama.
It is unique because it is one of the few yoga poses that can be practiced comfortably after eating.
How to Practice Vajrasana
- Kneel on the floor.
- Bring your knees together or slightly apart.
- Sit back on your heels.
- Keep your spine upright.
- Place your hands on your thighs.
- Relax your shoulders.
- Breathe slowly and naturally.
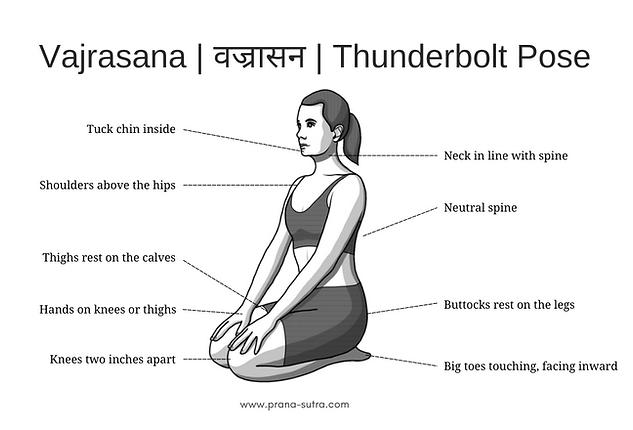
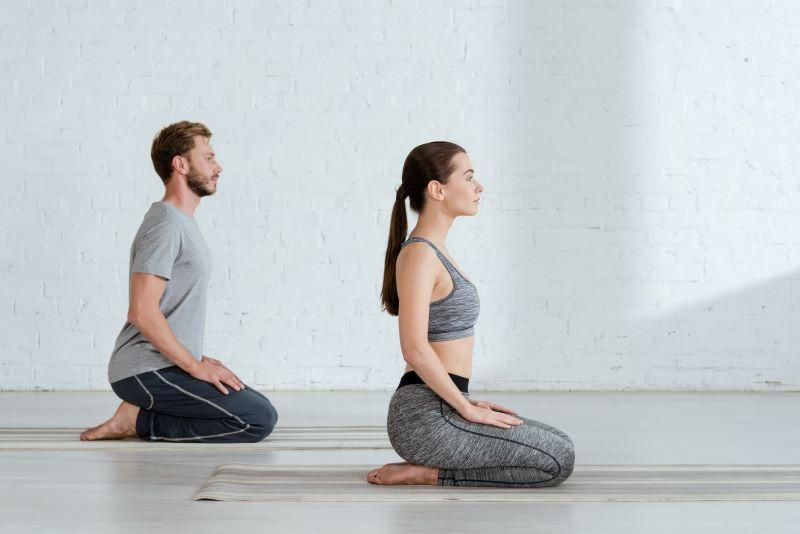
Thunderbolt Pose helps:
- Improve sitting posture
- Support digestion
- Prepare the body for meditation
- Create grounding awareness
- Strengthen ankles and knees gradually
- Encourage calm breathing
Common Mistakes
| Mistake | Correction |
| Sitting with discomfort | Use support under hips |
| Rounding the spine | Lift through the crown of the head |
| Putting too much pressure on knees | Modify according to your body |
Beginner Modification
Students with tight knees or ankles can:
- Place a cushion between heels and hips.
- Use a yoga block for support.
Always practice with awareness rather than forcing the joints.
13. Padmasana (Lotus Pose)
Sanskrit Meaning:
Padma = Lotus
Asana = Posture
Padmasana is one of the most recognized meditation postures in yoga. The lotus flower represents purity, growth, and spiritual awakening.
Traditionally, Padmasana is practiced for meditation and pranayama because it creates a stable and balanced sitting position.
How to Practice Padmasana
- Sit with legs extended forward.
- Bend the right knee and place the right foot on the opposite thigh.
- Bend the left knee and place the left foot on the opposite thigh.
- Keep both knees moving toward the floor naturally.
- Place hands on knees.
- Lengthen the spine.
- Maintain relaxed breathing.
Important Note:
Padmasana requires open hips and flexibility. It should not be forced.
Many students need months or years of preparation through other Best Hatha Yoga Asanas Explained poses before practicing full Lotus Pose safely.
Benefits of Padmasana
Lotus Pose helps:
- Create stability for meditation
- Improve posture awareness
- Calm the mind
- Encourage concentration
- Develop hip flexibility
Common Mistakes
| Mistake | Correction |
| Forcing the feet into position | Prepare hips gradually |
| Twisting knees | Rotate from hips, not knees |
| Rounding the spine | Sit tall |
Beginner Alternative
Practice:
- Sukhasana
- Ardha Padmasana (Half Lotus)
- Baddha Konasana
before attempting full Padmasana.
14. Baddha Konasana (Butterfly Pose)
Sanskrit Meaning:
Baddha = Bound
Kona = Angle
Asana = Posture
Baddha Konasana is a popular Best Hatha Yoga Asanas Explained hip-opening pose that improves flexibility in the inner thighs and hips.
How to Practice Baddha Konasana
- Sit with legs extended.
- Bring the soles of your feet together.
- Hold your feet with your hands.
- Allow knees to move gently toward the floor.
- Keep your spine long.
- Stay relaxed while breathing deeply.
Benefits of Baddha Konasana
Butterfly Pose helps:
- Open hips
- Stretch inner thighs
- Improve lower body flexibility
- Release tension
- Support pelvic mobility
- Prepare the body for meditation
Alignment Awareness
Remember:
✓ Keep spine lengthened
✓ Avoid forcing knees down
✓ Relax shoulders
✓ Move from the hips
Common Mistakes
| Mistake | Correction |
| Pressing knees forcefully | Allow natural opening |
| Rounding the back | Lift the chest |
| Pulling feet too close aggressively | Maintain comfort |
15. Paschimottanasana (Seated Forward Bend)
Sanskrit Meaning:
Paschima = West or Back Body
Uttana = Intense Stretch
Asana = Posture
Paschimottanasana is one of the most important traditional Best Hatha Yoga Asanas Explained forward bends.
It creates a deep stretch along the entire back body, including the spine, hamstrings, and calves.
How to Practice Paschimottanasana
- Sit with legs extended forward.
- Keep feet together and active.
- Inhale and lengthen the spine.
- Exhale and fold forward from the hips.
- Hold your feet, ankles, or legs comfortably.
- Relax the neck and shoulders.
- Maintain steady breathing.
Benefits of Paschimottanasana
This pose helps:
- Improve hamstring flexibility
- Stretch the spine
- Calm the nervous system
- Improve body awareness
- Encourage relaxation
- Support digestion
Common Mistakes
| Mistake | Correction |
| Pulling forcefully | Move gradually |
| Rounding deeply from lower back | Lengthen first |
| Locking knees | Keep legs active |
16. Janu Sirsasana (Head-to-Knee Pose)
Sanskrit Meaning:
Janu = Knee
Sirsa = Head
Asana = Posture
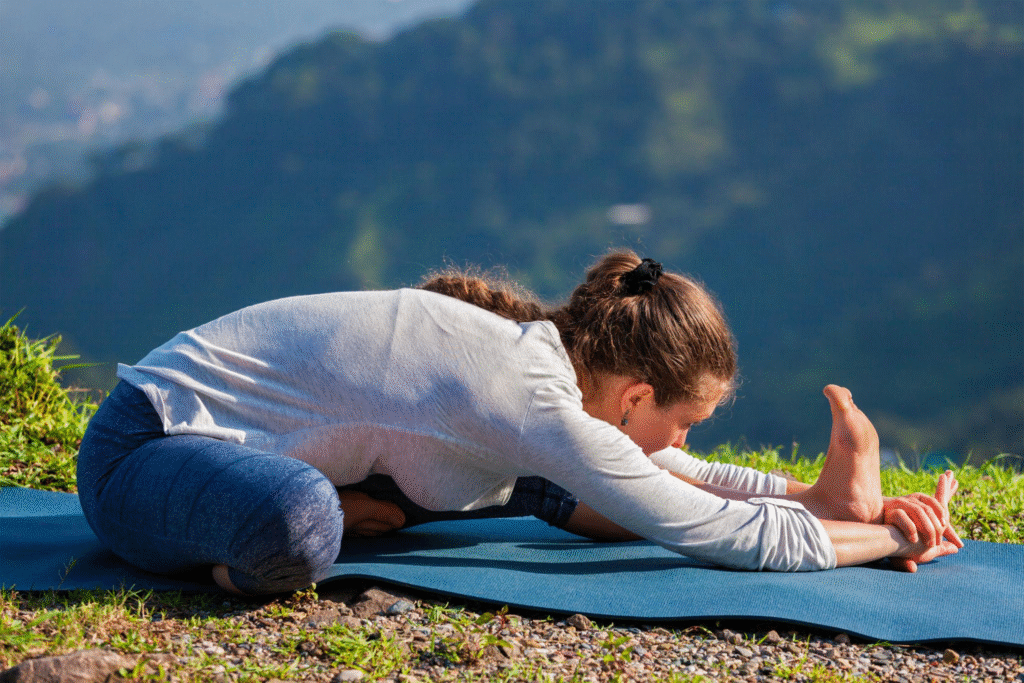
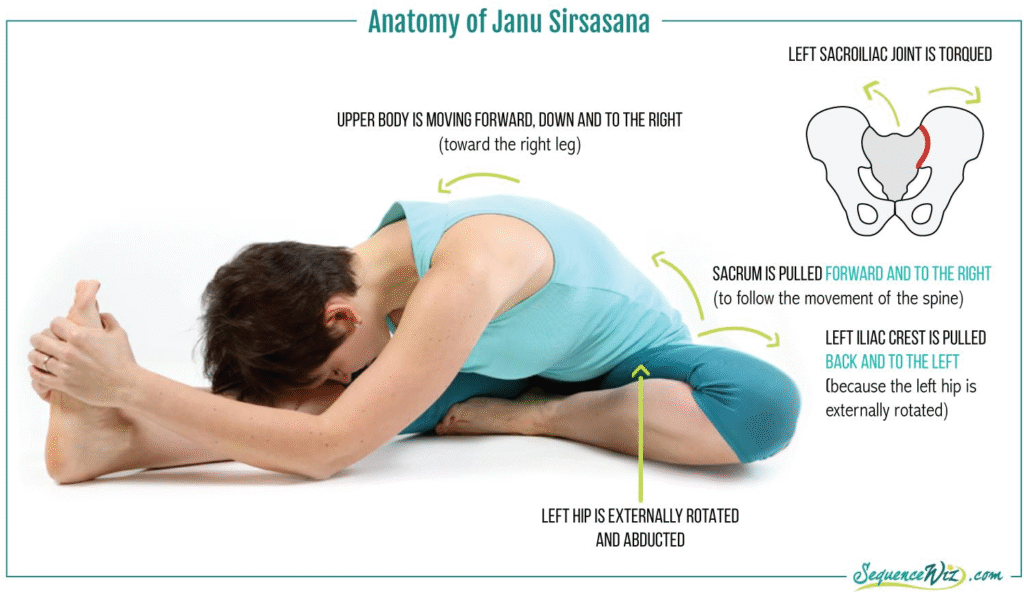
Janu Sirsasana is a seated forward bend that combines stretching, breathing awareness, and relaxation.
How to Practice Janu Sirsasana
- Sit with legs extended.
- Bend one knee and place the foot near the inner thigh.
- Turn your torso toward the extended leg.
- Inhale and lengthen your spine.
- Exhale and fold forward.
- Repeat on the other side.
Benefits of Janu Sirsasana
- Improves hamstring flexibility
- Opens hips
- Stretches the back body
- Creates relaxation
- Improves concentration
17. Ardha Matsyendrasana (Half Lord of the Fishes Pose)
Sanskrit Meaning:
Ardha = Half
Matsyendra = Lord of the Fishes
Asana = Posture
Ardha Matsyendrasana is a traditional seated twisting pose that improves spinal mobility and awareness.
How to Practice Ardha Matsyendrasana
- Sit with legs extended.
- Bend one knee and place the foot outside the opposite thigh.
- Rotate your torso toward the bent knee.
- Place one hand behind you for support.
- Use the opposite arm to deepen the twist gently.
- Repeat on both sides.
Benefits of Ardha Matsyendrasana
This twist helps:
- Improve spinal flexibility
- Release back tension
- Improve posture
- Increase body awareness
- Support digestive awareness
Common Mistakes
| Mistake | Correction |
| Twisting from the neck only | Rotate from the spine |
| Collapsing the chest | Lift before twisting |
| Forcing the twist | Respect your range |
Summary: SittingBest Hatha Yoga Asanas Explained Asanas Covered
| Asana | Main Benefits |
| Sukhasana | Meditation and relaxation |
| Vajrasana | Grounding and posture |
| Padmasana | Meditation stability |
| Baddha Konasana | Hip opening |
| Paschimottanasana | Flexibility and calmness |
| Janu Sirsasana | Hamstring and hip mobility |
| Ardha Matsyendrasana | Spinal flexibility |
At Diksha Yoga School, we teach that seated Best Hatha Yoga Asanas Explained Asanas are not only physical postures. They are a bridge between body awareness and inner awareness. When the body becomes steady, the breath becomes smooth, and the mind naturally becomes more peaceful.
Part 5: Backbend Best Hatha Yoga Asanas Explained Asanas – Strengthening the Spine, Opening the Heart & Building Confidence
We believe that backbend Best Hatha Yoga Asanas Explained Asanas teach us the importance of strength, courage, and conscious movement. Backbends are not only about creating flexibility in the spine; they are about developing awareness of the entire body while creating space through the chest, shoulders, hips, and breath.
Many students approach backbends with excitement, but proper preparation and alignment are essential. A safe backbend comes from balanced strength, mobility, and mindful breathing — not from forcing the body into a deeper shape.
At Diksha Yoga School, we teach our students that every backbend should be practiced with stability first, flexibility second. When the foundation is strong, the spine can move naturally and safely.
Backbend Best Hatha Yoga Asanas Explained Poses help develop:
- Spinal mobility
- Back muscle strength
- Chest and shoulder opening
- Hip flexibility
- Better posture
- Confidence and emotional openness
Let us explore some important traditional backbend yoga poses.
18. Bhujangasana (Cobra Pose)
Sanskrit Meaning:
Bhujanga = Cobra or Serpent
Asana = Posture
Bhujangasana is one of the most popular traditional Best Hatha Yoga Asanas Explained backbends. It gently strengthens the spine while opening the chest and shoulders.
Cobra Pose is often practiced as part of traditional yoga sequences because it prepares the body for deeper backbends.
How to Practice Bhujangasana
- Lie on your stomach with legs extended behind you.
- Place your palms beside your chest.
- Keep elbows close to your body.
- Press the tops of your feet into the floor.
- Inhale and slowly lift your chest upward.
- Keep the lower ribs connected to the floor for a gentle version.
- Lift only as high as comfortable.
- Keep shoulders away from ears.
- Breathe slowly while holding the posture.
Breathing Technique
- Inhale while lifting the chest.
- Exhale while relaxing deeper into the pose.
- Maintain smooth breathing throughout.
Benefits of Bhujangasana
Cobra Pose helps:
- Strengthen spinal muscles
- Open the chest and shoulders
- Improve posture
- Stretch the front body
- Increase spinal awareness
- Support better breathing patterns
Muscles Activated
Bhujangasana engages:
- Spinal extensors
- Glute muscles
- Shoulder stabilizers
- Chest muscles
- Core muscles
Alignment Points
During Cobra Pose:
✓ Keep elbows slightly bent
✓ Avoid compressing the lower back
✓ Lengthen the spine before lifting higher
✓ Relax shoulders away from ears
✓ Keep the movement controlled
Common Mistakes in Bhujangasana
| Mistake | Correction |
| Lifting too high using arms only | Use back muscles gradually |
| Compressing lower back | Lengthen spine first |
| Shoulders near ears | Relax shoulders downward |
| Holding breath | Maintain natural breathing |
Beginner Modification
Practice Baby Cobra Pose:
- Lift only the upper chest.
- Keep elbows bent.
- Focus on spinal length rather than height.
19. Salabhasana (Locust Pose)
Sanskrit Meaning:
Salabha = Locust or Grasshopper
Asana = Posture
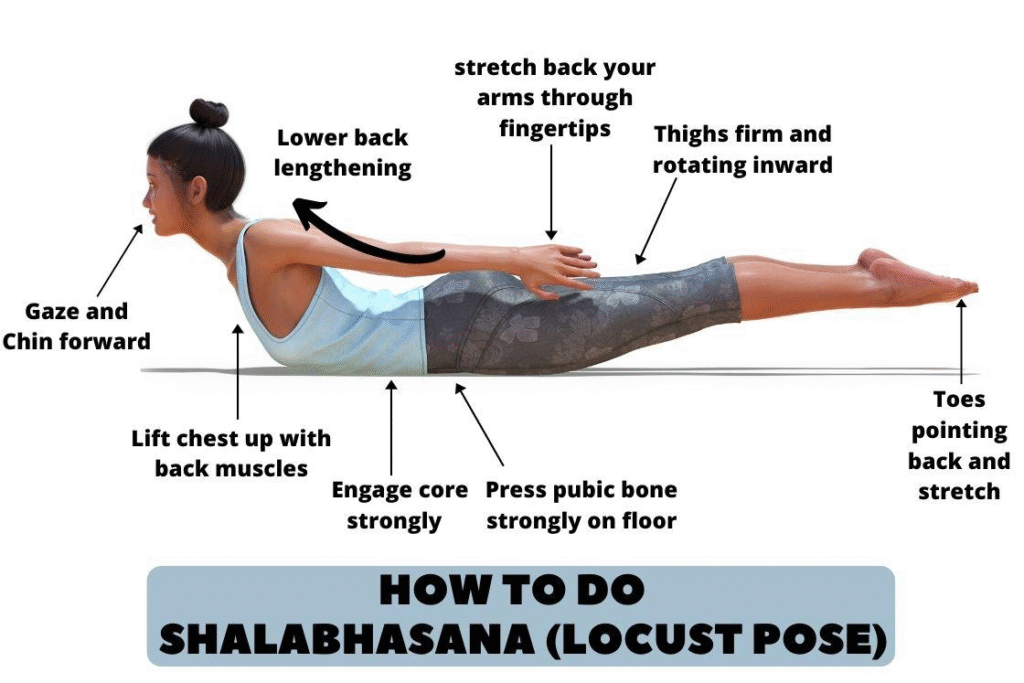
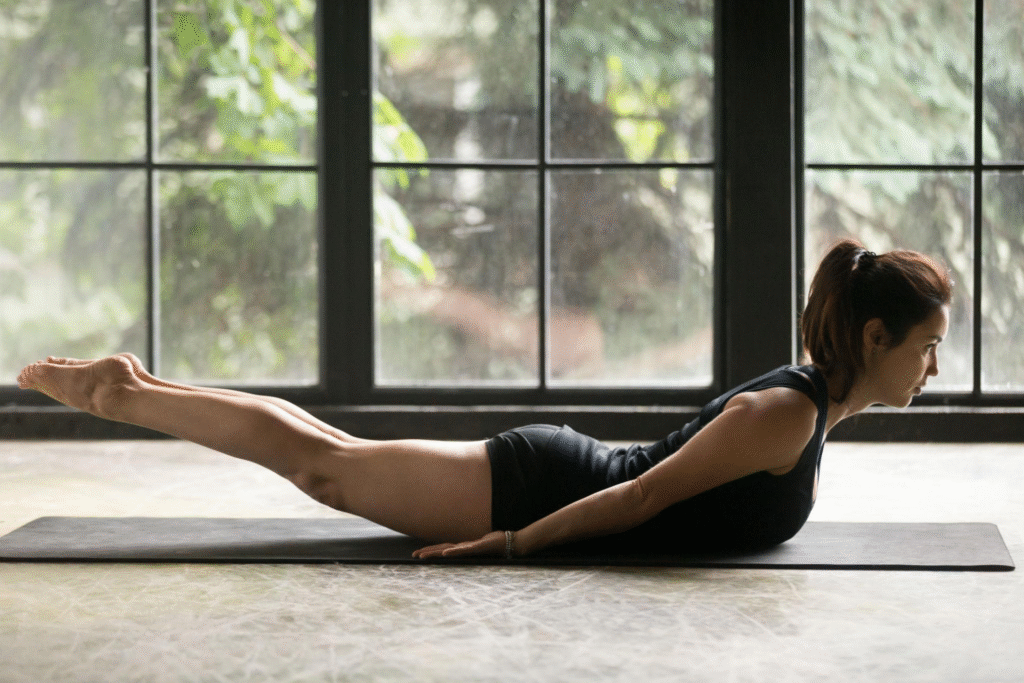
Salabhasana is a strengthening Best Hatha Yoga Asanas Explained pose that develops power in the back body.
Unlike some backbends that rely on flexibility, Locust Pose teaches us how to build strength and stability
How to Practice Salabhasana
- Lie on your stomach.
- Keep arms beside the body or extended forward.
- Place forehead or chin gently on the mat.
- Inhale and lift the chest, arms, and legs slightly.
- Engage the back muscles.
- Keep the neck relaxed.
- Hold while breathing steadily.
Benefits of Salabhasana
Locust Pose helps:
- Strengthen the back muscles
- Improve posture
- Activate the core
- Strengthen glutes and legs
- Develop body awareness
- Prepare for deeper backbends
Common Mistakes
| Mistake | Correction |
| Using momentum | Lift slowly with control |
| Overarching the lower back | Engage core gently |
| Straining the neck | Keep gaze downward |
20. Dhanurasana (Bow Pose)
Sanskrit Meaning:
Dhanur = Bow
Asana = Posture
Dhanurasana creates a strong opening through the front body while strengthening the back muscles.
The shape of the body resembles a bow, with the arms creating the string and the body creating the curve.
How to Practice Dhanurasana
- Lie on your stomach.
- Bend your knees and bring heels toward the hips.
- Reach back and hold your ankles.
- Inhale deeply.
- Lift your chest and thighs away from the floor.
- Use the strength of your back muscles.
- Keep breathing while maintaining the pose.
Benefits of Dhanurasana
Bow Pose helps:
- Strengthen the spine
- Open chest and shoulders
- Stretch hip flexors
- Improve body flexibility
- Develop strength and confidence
Alignment Awareness
Remember:
✓ Do not pull aggressively with arms
✓ Lift through the chest
✓ Keep knees comfortably aligned
✓ Maintain steady breathing
Common Mistakes
| Mistake | Correction |
| Pulling ankles forcefully | Allow gradual opening |
| Knees spreading too wide | Keep them aligned |
| Holding breath | Breathe continuously |
Beginner Modification
Use a strap around the ankles if reaching the feet is difficult.
21. Ustrasana (Camel Pose)
Sanskrit Meaning:
Ustra = Camel
Asana = Posture
Ustrasana is a powerful Best Hatha Yoga Asanas Explained heart-opening posture. It creates a deep stretch through the front body while developing spinal flexibility.
How to Practice Ustrasana
- Come into a kneeling position.
- Keep knees hip-width apart.
- Place hands on the lower back.
- Lift the chest upward.
- Slowly lean backward.
- Reach hands toward heels if comfortable.
- Keep thighs vertical.
- Breathe calmly.
Benefits of Ustrasana
Camel Pose helps:
- Open the chest
- Improve spinal mobility
- Stretch hip flexors
- Strengthen back muscles
- Improve posture
- Release tension from shoulders
Alignment Points
✓ Avoid collapsing into lower back
✓ Lift chest before bending backward
✓ Keep hips above knees
✓ Maintain relaxed breathing
Common Mistakes
| Mistake | Correction |
| Throwing head backward | Keep neck comfortable |
| Compressing lumbar spine | Lengthen before bending |
| Pushing hips backward | Keep hips forward |
22. Setu Bandhasana (Bridge Pose)
Sanskrit Meaning:
Setu = Bridge
Bandha = Formation or Lock
Asana = Posture
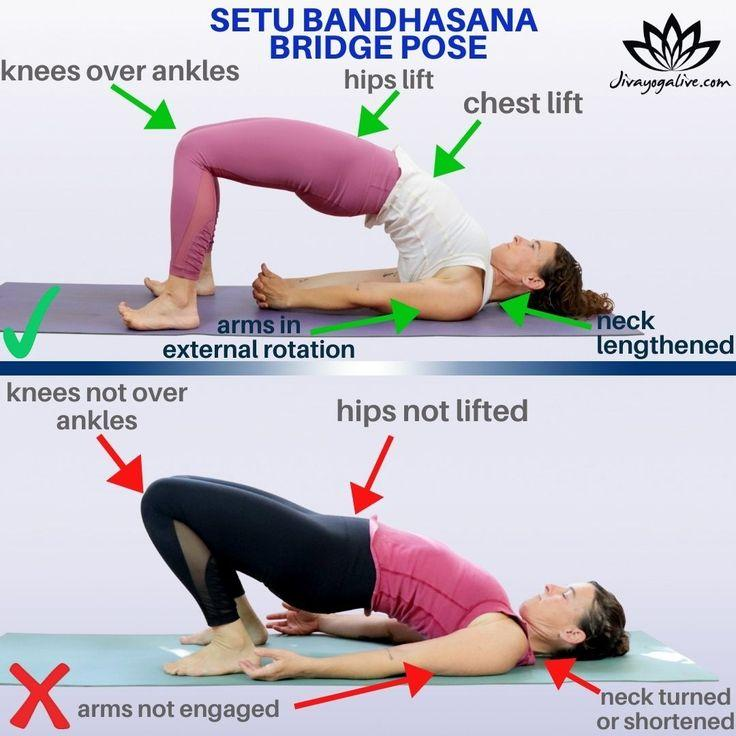
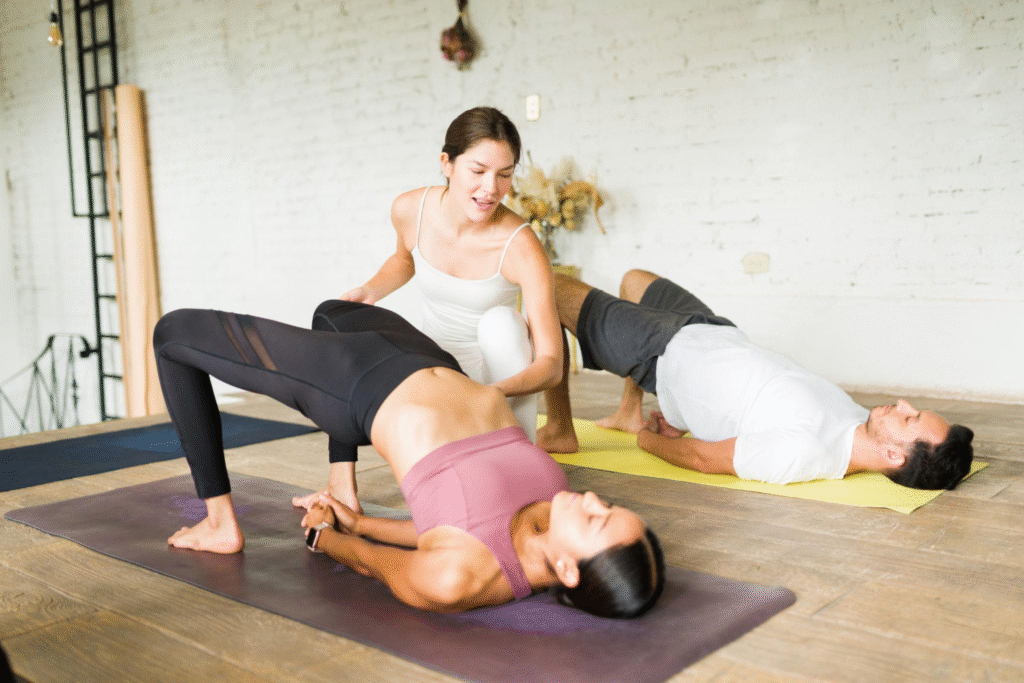
Setu Bandhasana is a gentle backbend suitable for many levels of practitioners.
It strengthens the back body while opening the chest and shoulders.
How to Practice Setu Bandhasana
- Lie on your back.
- Bend your knees and place feet on the floor.
- Keep feet hip-width apart.
- Place arms beside your body.
- Press feet into the floor.
- Lift hips upward.
- Keep thighs parallel.
- Hold with steady breathing.
Benefits of Setu Bandhasana
Bridge Pose helps:
- Strengthen glutes and back muscles
- Open chest and shoulders
- Improve spinal flexibility
- Support better posture
- Calm the nervous system
23. Matsyasana (Fish Pose)
Sanskrit Meaning:
Matsya = Fish
Asana = Posture
Matsyasana is a traditional Best Hatha Yoga Asanas Explained backbend that opens the chest and throat area.
How to Practice Matsyasana
- Lie on your back.
- Place hands under hips.
- Press elbows into the floor.
- Lift chest upward.
- Allow the crown of the head to gently touch the floor.
- Keep breathing comfortably.
Benefits of Matsyasana
Fish Pose helps:
- Open chest and shoulders
- Improve spinal flexibility
- Stretch the throat area
- Improve breathing awareness
- Create relaxation
Backbend Safety Principles in Best Hatha Yoga Asanas Explained
At Diksha Yoga School, we teach students to remember:
1. Warm Up Before Backbends
Prepare:
- Shoulders
- Spine
- Hips
- Core muscles
before deeper movements.
2. Never Force Flexibility
A deeper posture does not always mean a better practice.
3. Use Breath as a Guide
If breathing becomes difficult, reduce intensity.
4. Build Strength Along With Flexibility
Strong muscles protect the joints and spine.
Summary: Backbend Best Hatha Yoga Asanas Explained Asanas Covered
| Asana | Main Focus |
| Bhujangasana | Spine strength and chest opening |
| Salabhasana | Back body strength |
| Dhanurasana | Full front-body opening |
| Ustrasana | Heart opening and flexibility |
| Setu Bandhasana | Gentle spinal strengthening |
| Matsyasana | Chest expansion and awareness |
Backbend Best Hatha Yoga Asanas Explained Asanas remind us that yoga is a balance between effort and surrender. With patience, correct alignment, and mindful breathing, these postures can transform both physical strength and inner confidence.
Part 6: Twisting Hatha Yoga Asanas – Improving Spinal Mobility, Digestion & Body Awareness
We believe that twisting Best Hatha Yoga Asanas Explained Asanas teach us the importance of creating space, awareness, and balance within the body. Twists are not only about rotating the spine; they are about learning how to move with control, maintain stability, and breathe deeply while exploring our natural range of motion.
In traditional Best Hatha Yoga Asanas Explained, twisting poses are practiced to improve spinal flexibility, release muscular tension, and create a feeling of lightness throughout the body.
At Diksha Yoga School, we teach our students that a safe twist always begins with lengthening the spine first and rotating second. When we create space between the vertebrae, the body can move more freely and comfortably.
Twisting Best Hatha Yoga Asanas Explained poses help develop:
- Healthy spinal mobility
- Better posture awareness
- Hip and shoulder flexibility
- Core strength
- Body coordination
- Mindful breathing
Before practicing deeper twists, remember:
- Keep the spine long
- Avoid forcing rotation
- Use breath to create relaxation
- Respect your body’s natural movement
Let us explore some important traditional twisting yoga poses.
24. Vakrasana (Simple Spinal Twist)
Sanskrit Meaning:
Vakra = Twisted or Bent
Asana = Posture
Vakrasana is a gentle seated Best Hatha Yoga Asanas Explained twisting pose that is suitable for beginners. It introduces students to the principles of spinal rotation while maintaining stability.
How to Practice Vakrasana
- Sit with legs extended forward.
- Bend your right knee and place the right foot outside the left thigh.
- Keep the left leg extended or bend it comfortably.
- Place your right hand behind your body.
- Bring your left arm around the right knee.
- Inhale and lengthen the spine.
- Exhale and gently twist toward the right side.
- Repeat on the opposite side.
Breathing Technique
- Inhale: Lengthen the spine.
- Exhale: Slowly deepen the twist.
Never force the twist. Breath should remain smooth and comfortable.
Benefits of Vakrasana
This simple spinal twist helps:
- Improve spinal flexibility
- Release back tension
- Improve posture awareness
- Stretch shoulder muscles
- Develop twisting awareness
- Prepare the body for deeper twists
Common Mistakes in Vakrasana
| Mistake | Correction |
| Twisting only the neck | Rotate from the spine |
| Rounding the back | Sit tall before twisting |
| Pulling aggressively | Move slowly with breath |
| Lifting one hip | Keep sitting bones grounded |
Beginner Modification
Place a cushion under the hips if sitting upright is difficult.
25. Ardha Matsyendrasana (Half Lord of the Fishes Pose)
Sanskrit Meaning:
Ardha = Half
Matsyendra = Lord of the Fishes
Asana = Posture
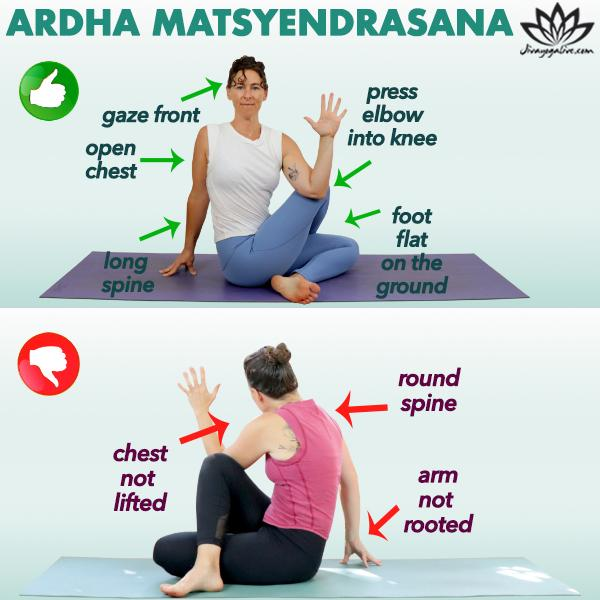
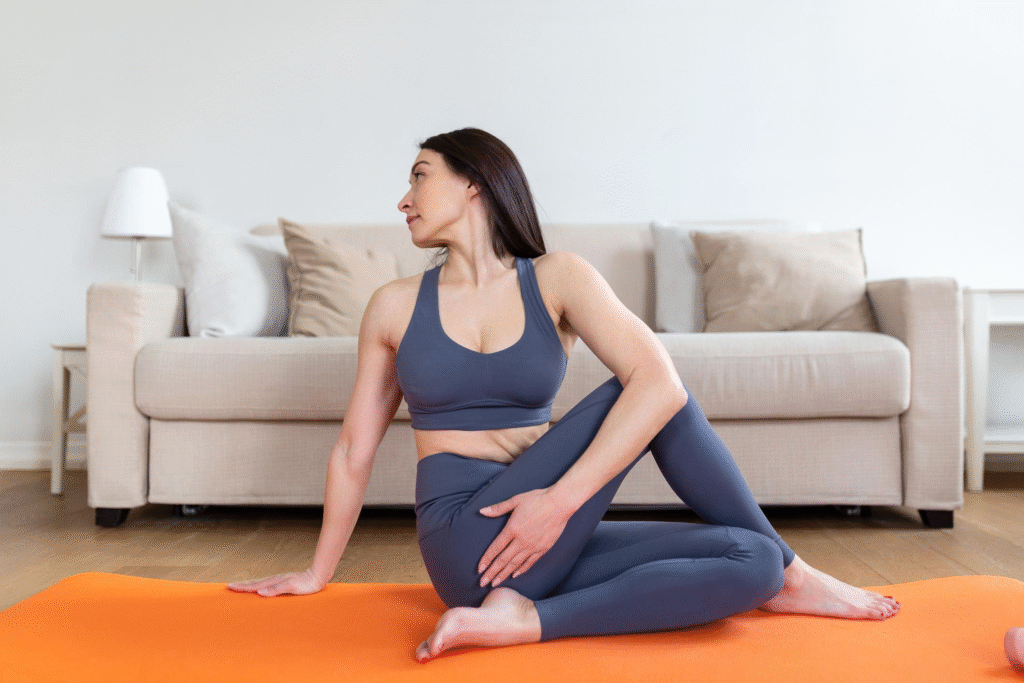
Ardha Matsyendrasana is one of the most well-known traditional Best Hatha Yoga Asanas Explained twisting poses.
This posture develops spinal awareness and teaches students how to create a balanced rotation through the entire body.
How to Practice Ardha Matsyendrasana
- Sit with both legs extended.
- Bend your right knee and place the right foot outside the left thigh.
- Bend your left leg if comfortable.
- Place your right hand behind you.
- Bring your left arm around the right knee.
- Inhale and lift the chest.
- Exhale and rotate toward the right.
- Repeat on the other side.
Benefits of Ardha Matsyendrasana
This pose helps:
- Improve spinal mobility
- Stretch back muscles
- Open shoulders
- Improve body awareness
- Support digestive awareness
- Release stiffness
Alignment Focus
During the twist:
✓ Keep spine lengthened
✓ Rotate gradually
✓ Keep shoulders relaxed
✓ Avoid collapsing the chest
✓ Maintain steady breathing
Common Mistakes
| Mistake | Correction |
| Forcing the twist | Stay within comfortable range |
| Collapsing forward | Lift through the spine |
| Moving only shoulders | Rotate through the torso |
26. Bharadvajasana (Bharadvaja’s Twist)
Sanskrit Meaning:
Named after Sage Bharadvaja, one of the ancient sages of yoga tradition.
Bharadvajasana is a gentle seated twist often practiced for improving spinal awareness and creating relaxation.
How to Practice Bharadvajasana
- Sit with legs folded to one side.
- Keep the spine upright.
- Place your left hand on the right knee.
- Place your right hand behind your body.
- Inhale and lengthen upward.
- Exhale and twist gently.
- Repeat on the opposite side.
Benefits of Bharadvajasana
Benefits include:
- Improves spinal flexibility
- Opens shoulders
- Reduces stiffness
- Encourages relaxation
- Improves sitting posture
Common Mistakes
| Mistake | Correction |
| Twisting with a rounded spine | Lift first |
| Pressing knees unevenly | Keep hips grounded |
| Holding breath | Maintain smooth breathing |
27. Parivrtta Trikonasana (Revolved Triangle Pose)
Sanskrit Meaning:
Parivrtta = Revolved or Twisted
Trikona = Triangle
Asana = Posture
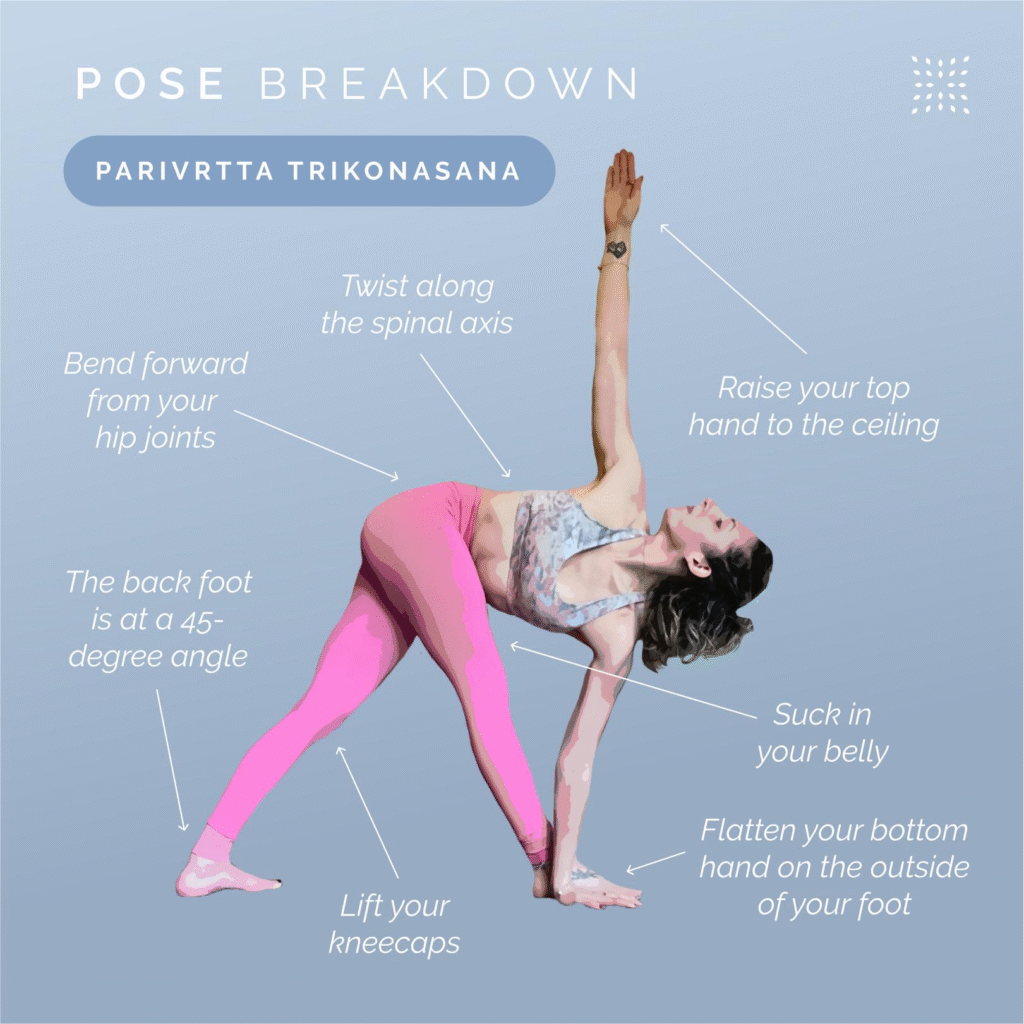
Parivrtta Trikonasana is an advanced standing twisting Best Hatha Yoga Asanas Explained pose that combines balance, flexibility, and spinal rotation.
How to Practice Parivrtta Trikonasana
- Stand with legs apart.
- Turn your front foot forward.
- Square your hips toward the front.
- Extend your arms.
- Lengthen the spine.
- Rotate your torso toward the front leg.
- Place the opposite hand on the floor, block, or shin.
- Extend the upper arm upward.
Benefits of Revolved Triangle Pose
This pose helps:
- Improve spinal rotation
- Strengthen legs
- Increase balance
- Stretch hamstrings
- Improve body awareness
- Develop concentration
Alignment Tips
Remember:
✓ Lengthen before twisting
✓ Keep hips stable
✓ Avoid collapsing into the lower side
✓ Use blocks if needed
Common Mistakes
| Mistake | Correction |
| Rounding the spine | Create length first |
| Forcing the hand to the floor | Use support |
| Opening hips too much | Keep alignment stable |
28. Parivrtta Parsvakonasana (Revolved Side Angle Pose)
Sanskrit Meaning:
Parivrtta = Revolved
Parsva = Side
Kona = Angle
This powerful twisting pose combines strength, balance, and flexibility.
How to Practice Parivrtta Parsvakonasana
- Begin in a standing position.
- Step one foot back into a lunge.
- Bend the front knee.
- Bring hands to prayer position.
- Rotate your torso toward the front knee.
- Place the opposite elbow outside the knee if comfortable.
- Maintain length through the spine.
- Repeat on the other side.
Benefits of Revolved Side Angle Pose
Helps improve:
- Hip flexibility
- Leg strength
- Spinal mobility
- Balance
- Concentration
- Body awareness
Common Mistakes
| Mistake | Correction |
| Losing balance | Create a wider stance |
| Collapsing chest | Lift and rotate |
| Twisting only the neck | Rotate entire torso |
The Role of Twists in Best Hatha Yoga Asanas Explained Practice
Twisting poses are often included between strengthening and relaxing postures because they create balance throughout the practice.
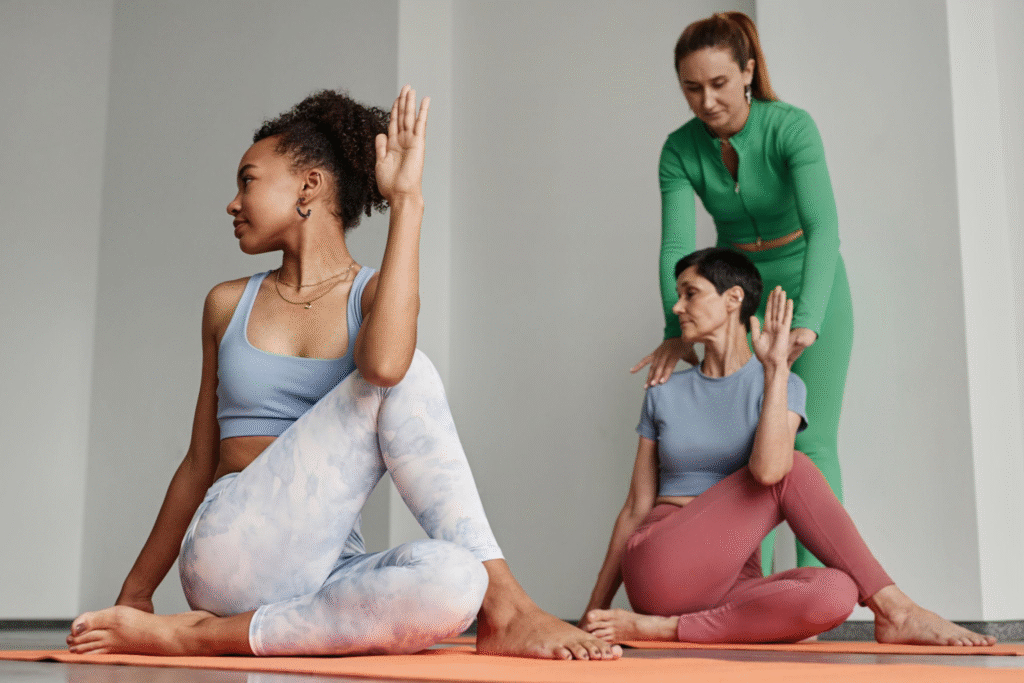
A balanced Best Hatha Yoga Asanas Explained sequence may include:
- Warm-up movements
- Standing poses
- Twists
- Backbends
- Forward bends
- Meditation and relaxation
At Diksha Yoga School, we teach students that twists are a practice of awareness. The goal is not to rotate as deeply as possible, but to move with intelligence, patience, and respect for the body.
Summary: Twisting Best Hatha Yoga Asanas Explained Asanas Covered
| Asana | Main Focus |
| Vakrasana | Beginner spinal rotation |
| Ardha Matsyendrasana | Deep seated twist |
| Bharadvajasana | Gentle spinal mobility |
| Parivrtta Trikonasana | Standing twist and balance |
| Parivrtta Parsvakonasana | Strength and rotation |
Part 7: Hip Opening Hatha Yoga Asanas – Improving Mobility, Flexibility & Body Freedom
We believe that hip-opening Best Hatha Yoga Asanas Explained Asanas are essential for creating a balanced and comfortable body. The hips are the center of many daily movements, and when they become stiff due to sitting, stress, or limited movement, it can affect posture, lower back health, and overall mobility.
In traditional Best Hatha Yoga Asanas Explained, hip-opening poses are practiced not only to increase flexibility but also to create stability and awareness around the pelvis.
At Diksha Yoga School, we guide students to understand that flexibility should always be developed with strength and control. A flexible body without stability may create imbalance, while a strong and mobile body supports a safe and sustainable yoga practice.
Hip-opening Hatha Yoga poses help improve:
- Hip mobility
- Lower body flexibility
- Pelvic awareness
- Postural alignment
- Range of motion
- Comfort in meditation postures
Before practicing deeper hip openers:
- Warm up the hips gradually
- Never force the joints
- Focus on breath and relaxation
- Move from the hip joint rather than twisting the knees
Let us explore important traditional hip-opening yoga poses.
29. Malasana (Garland Pose / Yogic Squat)
Sanskrit Meaning:
Mala = Garland or Necklace
Asana = Posture
Malasana is a traditional Best Hatha Yoga Asanas Explained squatting pose that develops hip mobility, ankle flexibility, and lower body strength.
In many cultures, squatting is a natural human movement. Yoga uses this position to reconnect with natural mobility and grounding
How to Practice Malasana
- Stand with feet slightly wider than hip-width apart.
- Turn toes slightly outward.
- Bend your knees and lower your hips toward the floor.
- Bring palms together at the heart center.
- Use elbows gently against inner knees.
- Lengthen your spine upward.
- Breathe slowly while holding the pose.
Benefits of Malasana
Garland Pose helps:
- Open hips and groin muscles
- Improve ankle mobility
- Strengthen legs
- Support pelvic flexibility
- Improve posture awareness
- Prepare the body for deeper yoga poses
Alignment Points
During Malasana:
✓ Keep heels grounded if possible
✓ Keep spine long
✓ Avoid collapsing chest forward
✓ Allow knees to follow toe direction
✓ Relax shoulders
Common Mistakes in Malasana
| Mistake | Correction |
| Heels lifting | Place support under heels |
| Knees collapsing inward | Align knees with toes |
| Rounding the spine | Lift chest upward |
| Forcing depth | Work gradually |
Beginner Modification
Practice with:
- A block under the hips
- Support under heels
- Wider stance
30. Gomukhasana (Cow Face Pose)
Sanskrit Meaning:
Go = Cow
Mukha = Face
Asana = Posture
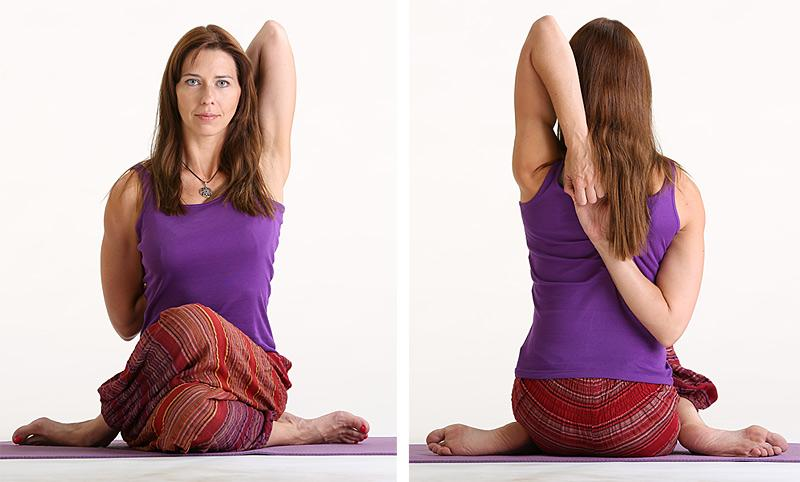
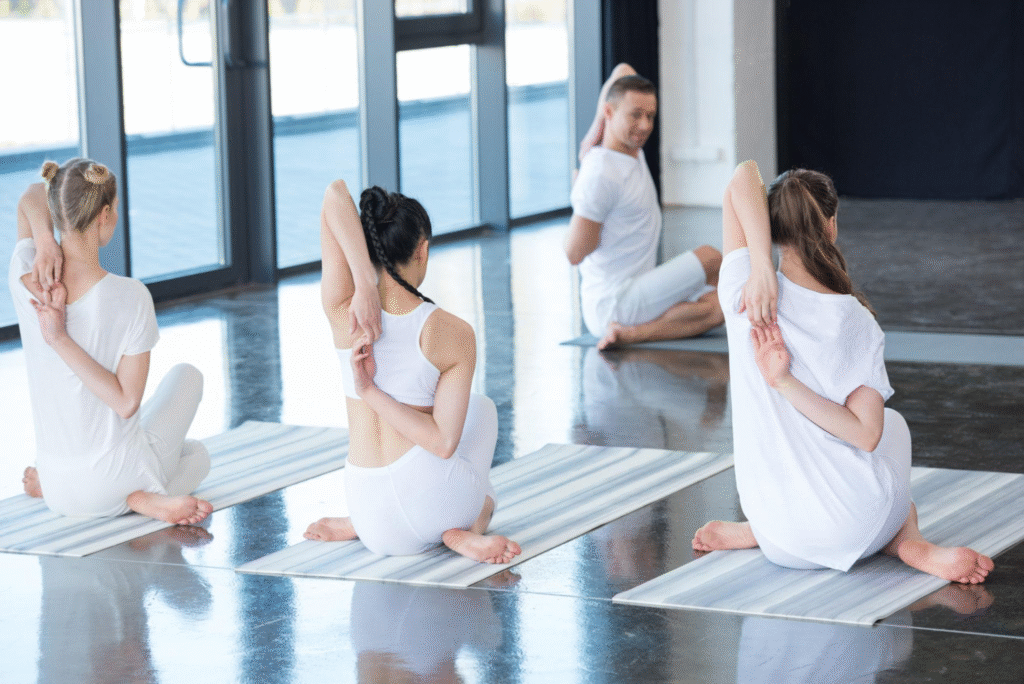
Gomukhasana is a traditional seated Best Hatha Yoga Asanas Explained pose that opens the hips, shoulders, and outer thighs.
It is unique because it combines both hip flexibility and shoulder mobility.
How to Practice Gomukhasana
- Sit with legs extended.
- Cross one leg over the other so knees stack.
- Bring one arm overhead and bend the elbow.
- Bring the opposite arm behind the back.
- Try to connect the hands if comfortable.
- Keep the spine upright.
- Repeat on both sides.
Benefits of Gomukhasana
Cow Face Pose helps:
- Open outer hips
- Stretch shoulders
- Improve posture
- Release upper body tension
- Increase flexibility
- Prepare for meditation
Common Mistakes
| Mistake | Correction |
| Forcing hands together | Use a strap |
| Leaning sideways | Keep spine centered |
| Pressing knees aggressively | Allow natural openin |
Beginner Modification
Use a yoga strap between hands if shoulders are tight.
31. Mandukasana (Frog Pose)
Sanskrit Meaning:
Manduka = Frog
Asana = Posture
Mandukasana is a deep hip-opening Best Hatha Yoga Asanas Explained posture that requires patience and awareness.
It creates a strong opening through the hips and inner thighs.
How to Practice Mandukasana
- Begin on hands and knees.
- Slowly move knees wider apart.
- Keep ankles aligned with knees.
- Place forearms on the floor.
- Move hips backward gently.
- Breathe deeply without forcing.
Benefits of Mandukasana
Frog Pose helps:
- Open inner thighs
- Improve hip flexibility
- Release lower body tension
- Increase mobility
- Prepare for advanced hip poses
Important Safety Note
Frog Pose should be practiced carefully because it creates a strong stretch around the hip and groin area.
Never force the knees downward.
32. Hanumanasana (Monkey Pose / Splits Pose)
Sanskrit Meaning:
Named after Lord Hanuman, representing devotion, strength, and courage.
Hanumanasana is one of the deepest traditional Best Hatha Yoga Asanas Explained hip-opening poses.
How to Practice Hanumanasana
- Begin in a low lunge position.
- Slowly extend the front leg forward.
- Slide the back leg backward gradually.
- Keep hips facing forward.
- Use blocks for support if needed.
- Maintain steady breathing.
Benefits of Hanumanasana
Monkey Pose helps:
- Improve hamstring flexibility
- Open hip flexors
- Increase lower body mobility
- Develop patience and discipline
- Improve body awareness
Common Mistakes
| Mistake | Correction |
| Forcing into full splits | Progress slowly |
| Hips turning sideways | Keep hips squared |
| Ignoring warm-up | Prepare hamstrings first |
Beginner Modification
Practice:
- Half splits
- Low lunge
- Supported Hanumanasana with blocks
33. Anjaneyasana (Low Lunge Pose)
Sanskrit Meaning:
Named after Anjani, the mother of Hanuman.
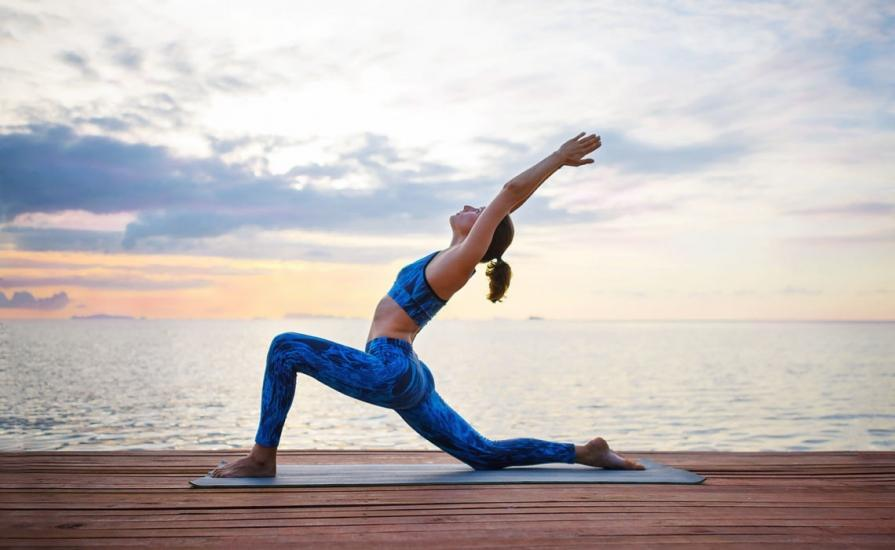
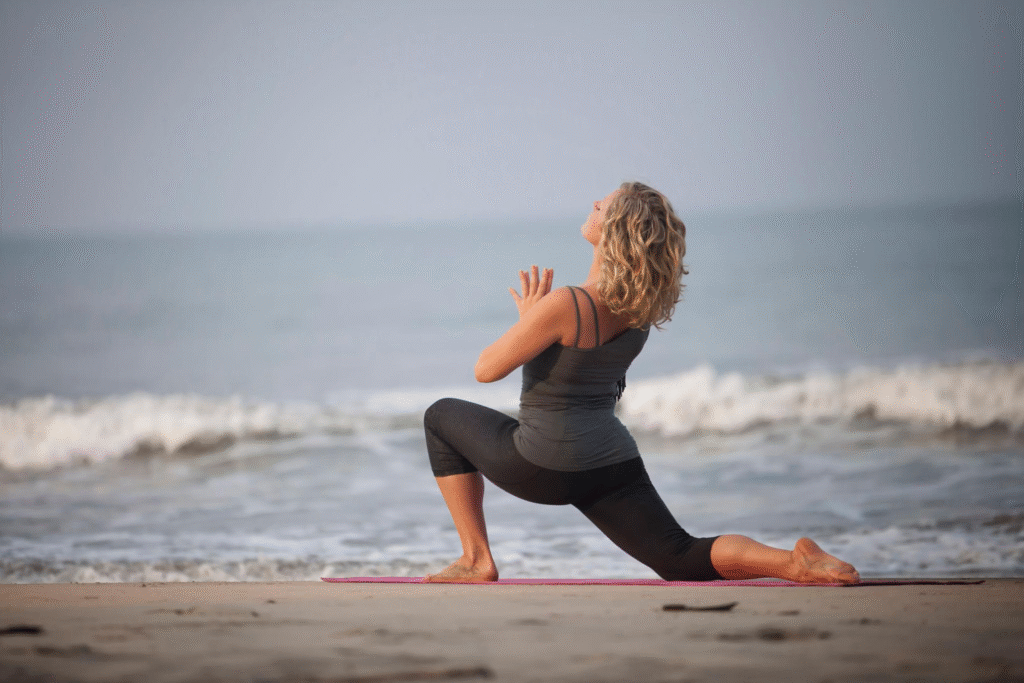
Anjaneyasana is a gentle and effective hip-opening Best Hatha Yoga Asanas Explained pose suitable for many levels.
How to Practice Anjaneyasana
- Begin in a lunge position.
- Lower the back knee to the floor.
- Keep the front knee above the ankle.
- Lift the chest.
- Raise arms overhead if comfortable.
- Lengthen through the spine.
- Repeat both sides.
Benefits of Anjaneyasana
Low Lunge helps:
- Stretch hip flexors
- Improve lower body mobility
- Open chest and shoulders
- Strengthen legs
- Improve posture
Alignment Focus
Remember:
✓ Front knee stays above ankle
✓ Hips move forward gently
✓ Avoid compressing lower back
✓ Engage core softly
34. Eka Pada Rajakapotasana (Pigeon Pose)
Sanskrit Meaning:
Eka Pada = One Leg
Raja = King
Kapota = Pigeon
Asana = Posture
Pigeon Pose is one of the most popular hip-opening yoga poses.
It targets deep hip muscles and encourages relaxation.
How to Practice Pigeon Pose
- Begin from Downward Facing Dog.
- Bring one knee forward toward the wrist.
- Extend the opposite leg behind you.
- Keep hips as square as possible.
- Lower onto forearms or extend forward.
- Breathe deeply.
- Repeat on both sides.
Benefits of Pigeon Pose
This pose helps:
- Release hip tension
- Improve external hip rotation
- Stretch glute muscles
- Increase flexibility
- Encourage relaxation
Common Mistakes
| Mistake | Correction |
| Forcing hips square | Respect natural alignment |
| Collapsing into front knee | Support with blanket |
| Creating knee pressure | Adjust leg position |
Why Hip Opening Is Important in Best Hatha Yoga Asanas Explained
Healthy hips support:
- Better walking patterns
- Improved posture
- Comfortable meditation sitting
- Reduced lower back tension
- Greater movement freedom
At Diksha Yoga School, we teach that hip flexibility is not about achieving extreme poses. True yoga practice is about creating a balanced relationship between mobility, strength, and awareness.
A student with open hips is not necessarily more advanced. A student who understands their body and practices mindfully is progressing in yoga.
Summary: Hip Opening Best Hatha Yoga Asanas Explained Asanas Covered
| Asana | Main Focus |
| Malasana | Squat mobility and grounding |
| Gomukhasana | Hip and shoulder opening |
| Mandukasana | Deep hip flexibility |
| Hanumanasana | Advanced flexibility |
| Anjaneyasana | Hip flexor opening |
| Pigeon Pose | Deep hip release |
Part 8: Balancing Hatha Yoga Asanas – Developing Focus, Strength & Mind-Body Connection
We believe that balancing Best Hatha Yoga Asanas Explained Asanas teach one of the deepest lessons of yoga: stability comes from awareness.
Balance is not only a physical ability. It requires concentration, patience, breath control, and the ability to remain calm in changing situations.
Many students think that balance poses are only for advanced practitioners, but every balancing posture begins with simple awareness of the feet, breath, and body alignment.
At Diksha Yoga School, we teach our students that falling out of a balance pose is not a failure. It is part of the learning process. Every attempt develops concentration, confidence, and a deeper understanding of the body.
Balancing Best Hatha Yoga Asanas Explained poses help improve:
- Concentration and mental focus
- Core strength
- Body coordination
- Stability and control
- Confidence
- Mind-body connection
Before practicing balancing poses:
- Create a strong foundation
- Keep breathing naturally
- Focus your gaze (Drishti)
- Avoid rushing
- Practice patience
Let us explore some important traditional balancing yoga poses.
35. Garudasana (Eagle Pose)
Sanskrit Meaning:
Garuda = Eagle
Asana = Posture
Garudasana is a traditional Best Hatha Yoga Asanas Explained balancing pose that develops concentration, flexibility, and strength.
The eagle represents focus and awareness, which are the qualities developed through this practice.
How to Practice Garudasana
- Begin in Tadasana (Mountain Pose).
- Bend your knees slightly.
- Lift your right foot and cross the right thigh over the left.
- Wrap the right foot around the left calf if possible.
- Cross your arms in front of you.
- Bend elbows and bring palms together.
- Keep your gaze steady.
- Repeat on the opposite side.
Breathing Technique
- Breathe slowly and evenly.
- Use each exhalation to relax unnecessary tension.
Benefits of Garudasana
Eagle Pose helps:
- Improve balance
- Strengthen legs
- Improve concentration
- Open shoulders
- Stretch upper back muscles
- Develop coordination
Muscles Activated
Garudasana engages:
- Quadriceps
- Glute muscles
- Calf muscles
- Core muscles
- Shoulder muscles
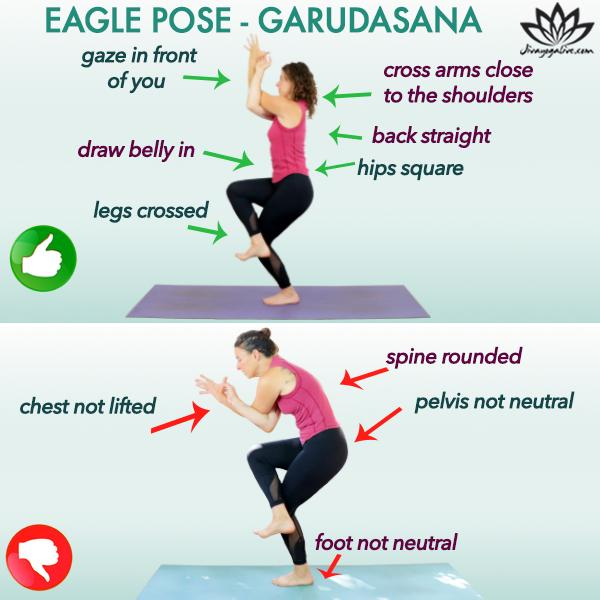
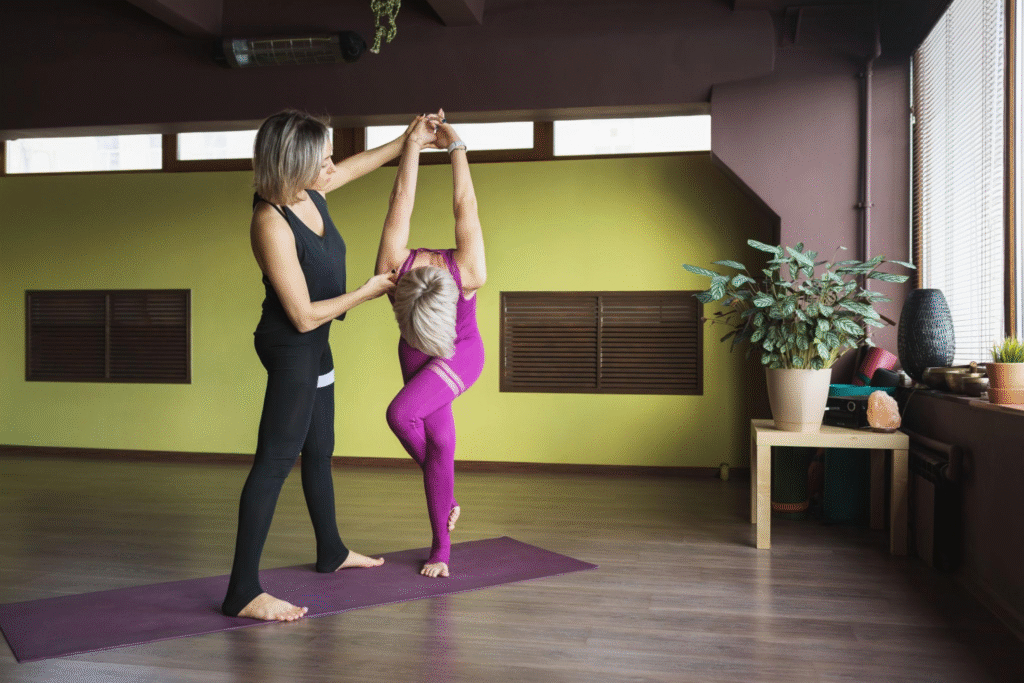
Common Mistakes in Garudasana
| Mistake | Correction |
| Looking down | Keep gaze forward |
| Collapsing chest | Lift through the spine |
| Holding breath | Maintain smooth breathing |
| Losing foundation | Press standing foot firmly |
Beginner Modification
Beginners can:
- Keep toes of the lifted foot on the floor.
- Practice only the arm position first.
- Use a wall for support.
36. Natarajasana (Dancer Pose)
Sanskrit Meaning:
Nata = Dancer
Raja = King
Asana = Posture
Natarajasana is a beautiful standing Best Hatha Yoga Asanas Explained balance pose representing creativity, strength, and harmony.
It combines balance, backbend, and hip opening.
How to Practice Natarajasana
- Stand in Tadasana.
- Shift weight onto your left foot.
- Bend your right knee and hold the right ankle.
- Extend your left arm forward.
- Slowly kick the right foot backward into your hand.
- Lift the chest and maintain balance.
- Repeat on the other side.
Benefits of Natarajasana
Dancer Pose helps:
- Improve balance
- Strengthen legs
- Open shoulders and hips
- Improve posture
- Increase concentration
- Develop body awareness
Alignment Tips
During Natarajasana:
✓ Keep standing leg strong
✓ Lift chest forward and upward
✓ Avoid collapsing into lower back
✓ Maintain steady breathing
Common Mistakes
| Mistake | Correction |
| Pulling foot aggressively | Move gradually |
| Leaning forward too much | Maintain control |
| Forgetting breath | Stay connected to breathing |
37. Bakasana (Crow Pose)
Sanskrit Meaning:
Baka = Crow
Asana = Posture
Bakasana is an arm-balancing Best Hatha Yoga Asanas Explained pose that develops strength, courage, and concentration.
Although it looks challenging, it begins with understanding weight distribution and confidence.
How to Practice Bakasana
- Begin in a squat position.
- Place hands firmly on the floor.
- Spread fingers wide.
- Place knees near upper arms.
- Shift weight forward slowly.
- Lift feet away from the floor.
- Engage the core.
- Maintain steady breathing.
Benefits of Bakasana
Crow Pose helps:
- Strengthen arms and wrists
- Build core strength
- Improve concentration
- Develop confidence
- Improve body control
Alignment Awareness
Remember:
✓ Press hands firmly into the floor
✓ Keep shoulders away from ears
✓ Engage abdominal muscles
✓ Look slightly forward, not down
Common Mistakes
| Mistake | Correction |
| Fear of falling | Practice with support |
| Looking down | Look forward |
| Putting weight only on wrists | Engage whole body |
Beginner Modification
Practice with:
- A cushion in front
- Feet lifted one at a time
- Blocks under feet
38. Kakasana (Crow Variation)
Sanskrit Meaning:
Kaka = Crow
Asana = Posture
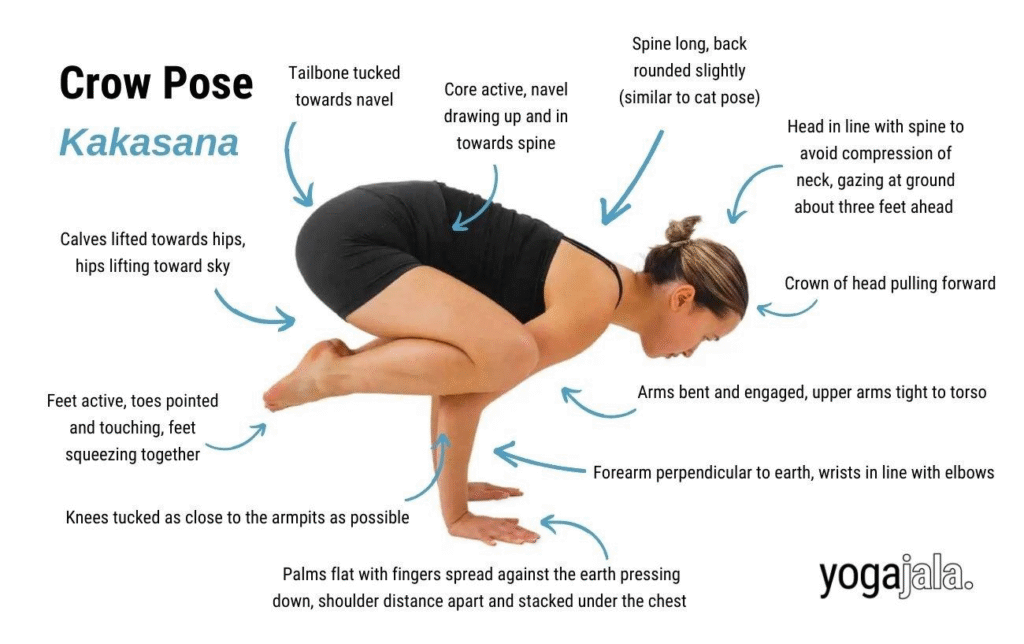
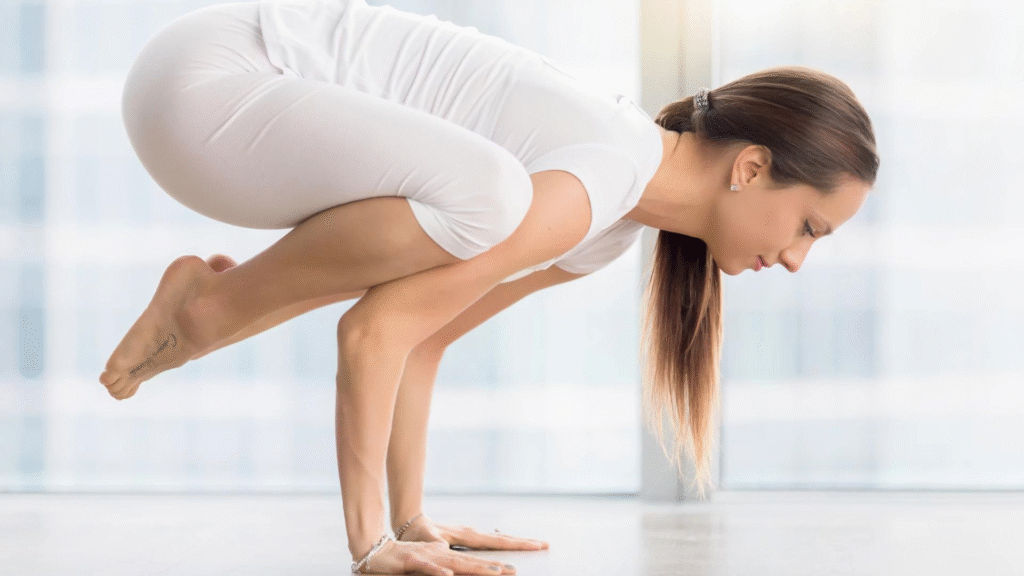
Kakasana is similar to Bakasana but usually involves more bent arms and a lower body position.
It is often taught as a preparation for stronger arm balances.
How to Practice Kakasana
- Come into a squat.
- Place hands on the floor.
- Bend elbows slightly.
- Place knees on upper arms.
- Shift weight forward.
- Lift feet gradually.
- Maintain awareness.
Benefits of Kakasana
Helps:
- Build arm strength
- Improve coordination
- Develop confidence
- Prepare for advanced balancing poses
39. Vasisthasana (Side Plank Pose)
Sanskrit Meaning:
Named after Sage Vasistha, one of the ancient sages of yoga tradition.
Vasisthasana is a powerful Best Hatha Yoga Asanas Explained balancing posture that combines strength and stability.
How to Practice Vasisthasana
- Begin in Plank Pose.
- Shift weight onto one hand.
- Rotate your body sideways.
- Stack your feet or place one foot in front.
- Lift the opposite arm upward.
- Keep the body in one straight line.
- Repeat on both sides.
Benefits of Vasisthasana
Side Plank helps:
- Strengthen arms and shoulders
- Improve core stability
- Develop balance
- Strengthen wrists
- Improve body control
Common Mistakes
| Mistake | Correction |
| Dropping hips | Engage core |
| Collapsing shoulder | Press away from floor |
| Holding breath | Maintain breathing |
40. Hasta Padangusthasana (Hand-to-Big-Toe Pose)
Sanskrit Meaning:
Hasta = Hand
Pada = Foot
Angustha = Big Toe
Hasta Padangusthasana is a challenging standing balance that develops flexibility, strength, and concentration.
How to Practice Hasta Padangusthasana
- Stand in Tadasana.
- Lift one knee toward the chest.
- Hold the big toe with fingers if comfortable.
- Slowly extend the leg forward.
- Keep the standing leg strong.
- Maintain balance.
- Repeat on the other side.
Benefits of Hasta Padangusthasana
Helps:
- Improve balance
- Strengthen legs
- Increase hamstring flexibility
- Develop concentration
- Improve coordination
Beginner Modification
Use:
- A yoga strap around the foot
- Bent knee variation
- Wall support
The Importance of Balance in Best Hatha Yoga Asanas Explained Practice
Balancing poses teach us that yoga is not about being perfectly still. Balance is a continuous process of adjusting, observing, and staying present.
When we practice balance:
- The body becomes stronger
- The mind becomes focused
- The breath becomes calmer
- Awareness increases
At Diksha Yoga School, we encourage students to approach balancing poses with curiosity rather than pressure. Progress happens through consistent practice, patience, and mindful awareness.
Summary: Balancing Best Hatha Yoga Asanas Explained Asanas Covered
| Asana | Main Focus |
| Garudasana | Focus and coordination |
| Natarajasana | Balance and flexibility |
| Bakasana | Arm strength and confidence |
| Kakasana | Arm balance preparation |
| Vasisthasana | Core stability |
| Hasta Padangusthasana | Flexibility and concentration |
Part 9: Inversion Best Hatha Yoga Asanas Explained Asanas – Building Strength, Confidence & Inner Awareness
We believe that inversion Best Hatha Yoga Asanas Explained Asanas are some of the most transformative practices in yoga because they challenge our usual relationship with gravity and encourage a deeper understanding of strength, balance, and awareness.
Inversions are not only about lifting the body upside down. They require preparation, patience, correct alignment, and respect for individual limitations.
At Diksha Yoga School, we teach our students that the purpose of inversion practice is not to perform an impressive posture but to develop stability, concentration, confidence, and self-awareness.
A safe inversion practice begins with:
- Strong foundation
- Healthy shoulder stability
- Core awareness
- Proper breathing
- Step-by-step progression
Inversions should always be approached mindfully, especially by beginners.
In this section, we explore traditional Best Hatha Yoga Asanas Explained inversion poses that are practiced by advanced students and yoga teachers.
Understanding Inversions in Best Hatha Yoga Asanas Explained
Inversions are yoga poses where the heart is positioned above the head.
Examples include:
- Shoulder Stand
- Headstand
- Plow Pose
- Forearm Stand
- Handstand
Potential benefits of inversion practices include:
- Improving body awareness
- Building upper body strength
- Developing concentration
- Increasing confidence
- Improving balance skills
- Encouraging mental focus
However, inversions are not suitable for everyone at every stage of practice.
Students should always learn proper technique from an experienced yoga teacher.
41. Sarvangasana (Shoulder Stand)
Sanskrit Meaning:
Sarva = All
Anga = Parts of the Body
Asana = Posture
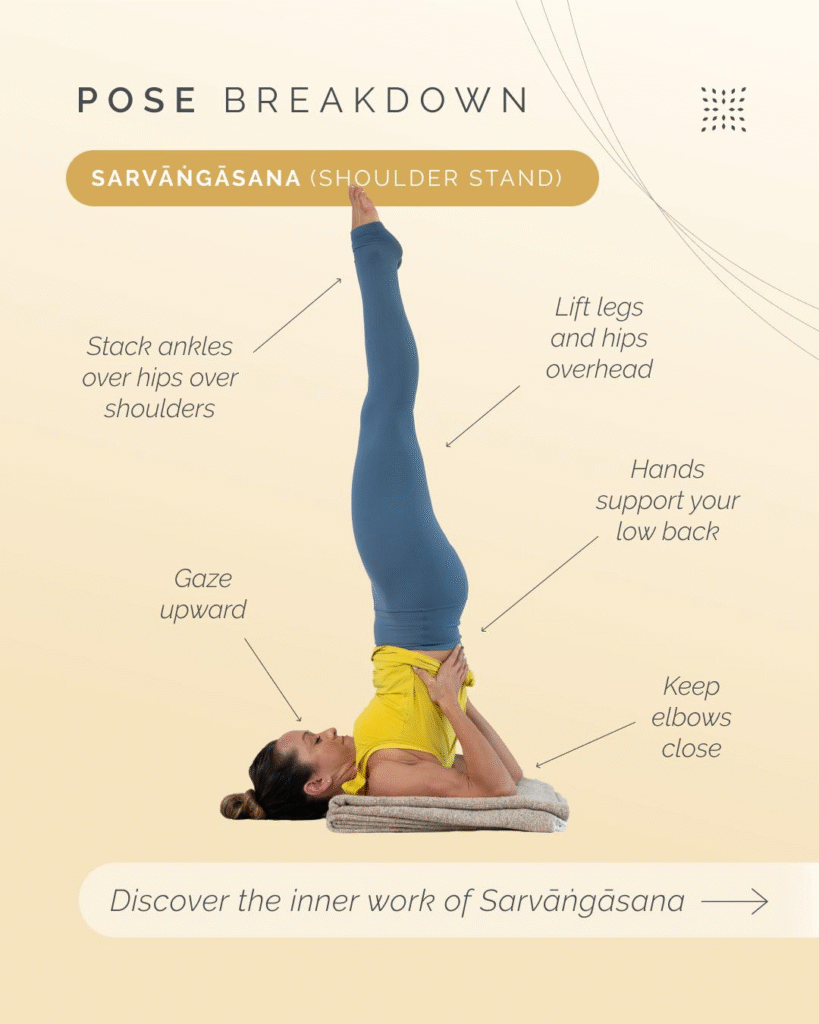
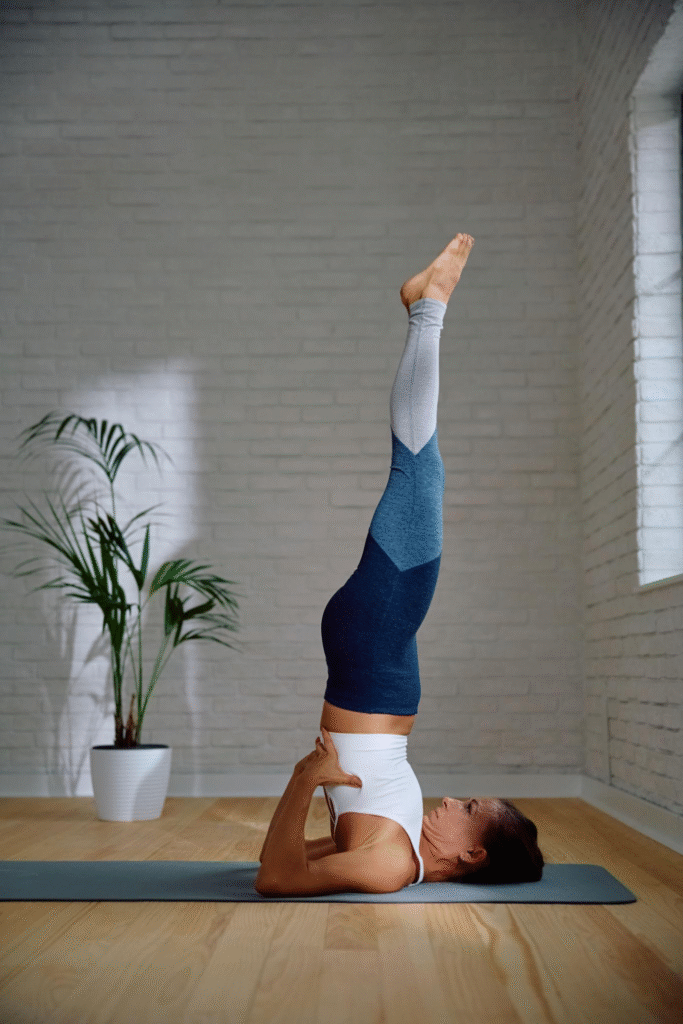
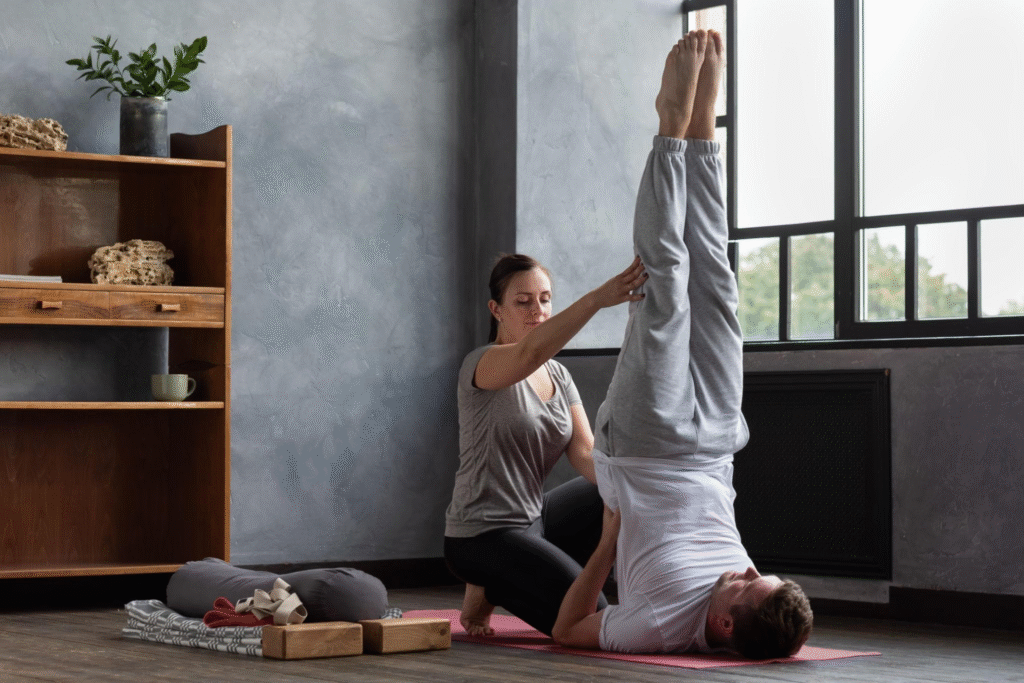
Sarvangasana is traditionally known as the “queen of yoga poses” because it involves the whole body and requires complete awareness.
It is a classical Best Hatha Yoga Asanas Explained inversion that develops strength, balance, and concentration.
How to Practice Sarvangasana
- Lie on your back.
- Bring your legs upward toward the ceiling.
- Lift your hips and support your lower back with your hands.
- Slowly extend your legs upward.
- Keep your body supported through shoulders and arms.
- Maintain a comfortable neck position.
- Breathe slowly.
- Come down with control.
Breathing Technique
- Maintain slow and steady breathing.
- Avoid holding the breath.
- Exit the pose calmly.
Benefits of Sarvangasana
Shoulder Stand helps:
- Develop body control
- Strengthen shoulders and core
- Improve balance awareness
- Encourage concentration
- Create a sense of calmness
- Improve posture awareness
Alignment Points
During Shoulder Stand:
✓ Weight should remain on shoulders, not the neck
✓ Keep elbows close together
✓ Maintain controlled movement
✓ Avoid turning the head while practicing
Common Mistakes in Sarvangasana
| Mistake | Correction |
| Putting pressure on neck | Shift weight into shoulders |
| Moving too quickly | Enter and exit slowly |
| Spreading elbows widely | Keep elbows stable |
| Losing body line | Engage core |
Beginner Preparation
Before attempting Sarvangasana, practice:
- Bridge Pose
- Supported Shoulder Stand
- Core strengthening exercises
42. Halasana (Plow Pose)
Sanskrit Meaning:
Hala = Plow
Asana = Posture
Halasana is traditionally practiced after Sarvangasana and creates a deep stretch through the back body.
The shape resembles a traditional farming plow.
How to Practice Halasana
- Begin lying on your back.
- Lift your legs upward.
- Move hips above shoulders.
- Slowly bring feet behind the head.
- Keep toes relaxed.
- Support the body comfortably.
- Maintain smooth breathing.
Benefits of Halasana
Plow Pose helps:
- Stretch the spine
- Improve flexibility of the back body
- Relax the nervous system
- Improve body awareness
- Prepare for deeper inversion practices
Common Mistakes
| Mistake | Correction |
| Forcing feet to touch floor | Use a comfortable range |
| Rounding excessively | Maintain control |
| Creating neck pressure | Practice carefully |
Beginner Modification
Use:
- Support under shoulders
- Feet on a chair
- Partial plow variation
43. Sirsasana (Headstand)
Sanskrit Meaning:
Sirsa = Head
Asana = Posture
Sirsasana is one of the most famous advanced Best Hatha Yoga Asanas Explained Asanas.
Traditionally called the “king of yoga poses,” it represents strength, discipline, and mental focus.
How to Practice Sirsasana
- Begin on knees.
- Place forearms on the floor.
- Interlock fingers.
- Place crown of head between hands.
- Lift hips upward.
- Walk feet closer.
- Slowly lift legs with control.
- Maintain balance through forearms and core.
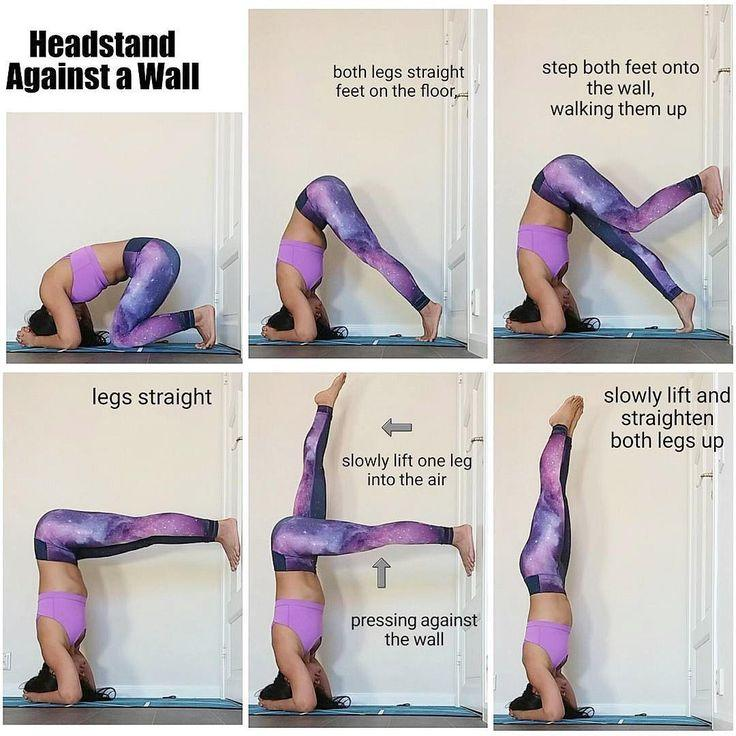
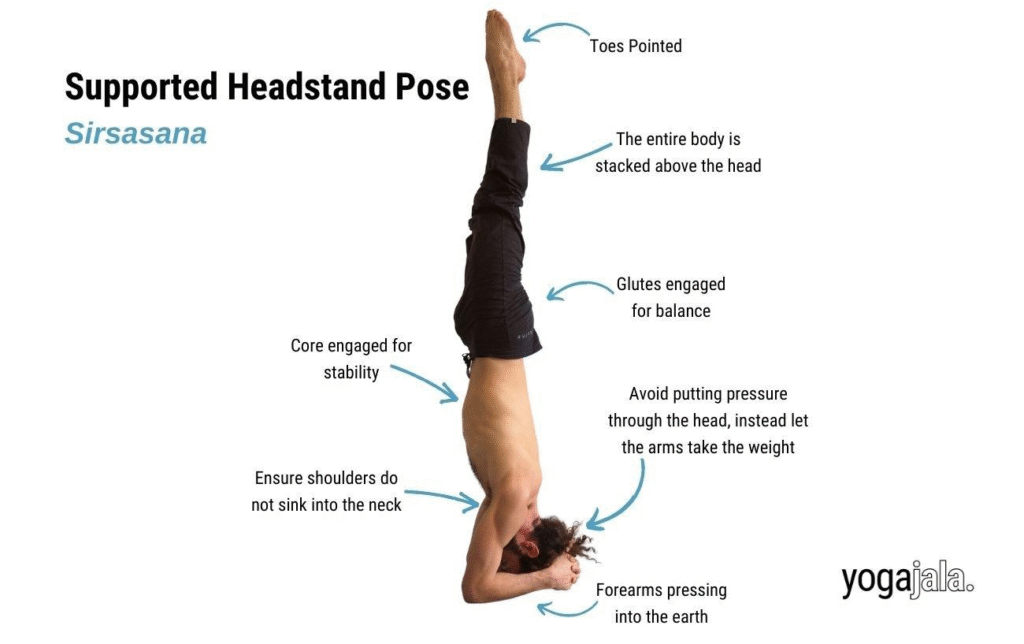
Important Safety Guidance
Headstand should not be practiced without proper preparation and guidance.
Important points:
- Avoid putting excessive weight on the head.
- Build shoulder and core strength first.
- Learn from an experienced teacher.
- Never rush the process.
Benefits of Sirsasana
Headstand helps:
- Develop concentration
- Improve body awareness
- Strengthen shoulders and core
- Build confidence
- Improve balance skills
Common Mistakes
| Mistake | Correction |
| Jumping into the pose | Enter slowly |
| Collapsing shoulders | Press forearms down |
| Losing core control | Engage abdomen |
| Practicing without preparation | Build foundation first |
44. Pincha Mayurasana (Forearm Stand)
Sanskrit Meaning:
Pincha = Feather
Mayura = Peacock
Asana = Posture
Pincha Mayurasana is an advanced inversion requiring shoulder strength, balance, and concentration.
How to Practice Pincha Mayurasana
- Begin in a forearm position.
- Place forearms parallel on the floor.
- Lift hips upward.
- Engage core.
- Kick or lift legs upward with control.
- Balance through forearms and shoulders.
Benefits of Pincha Mayurasana
Forearm Stand helps:
- Strengthen shoulders
- Develop balance
- Improve focus
- Build confidence
- Increase body control
Preparation Poses
Practice:
- Dolphin Pose
- Plank variations
- Shoulder strengthening exercises
- Core work
45. Adho Mukha Vrksasana (Handstand)
Sanskrit Meaning:
Adho = Downward
Mukha = Facing
Vrksa = Tree
Asana = Posture
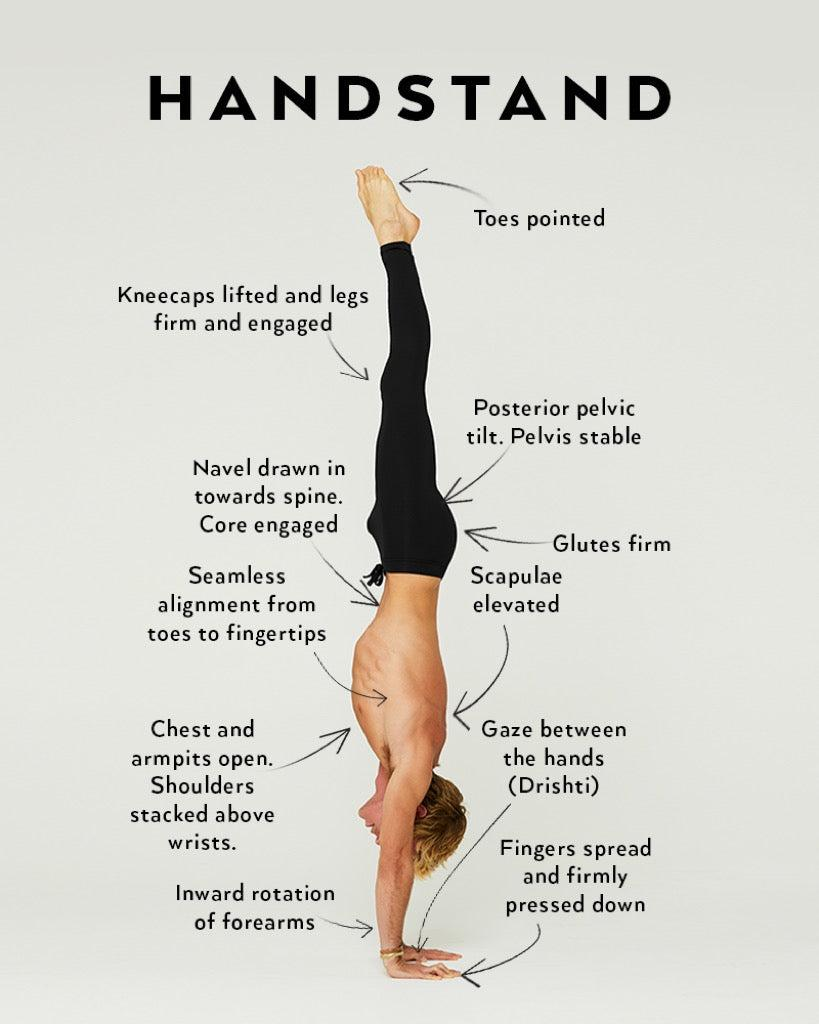
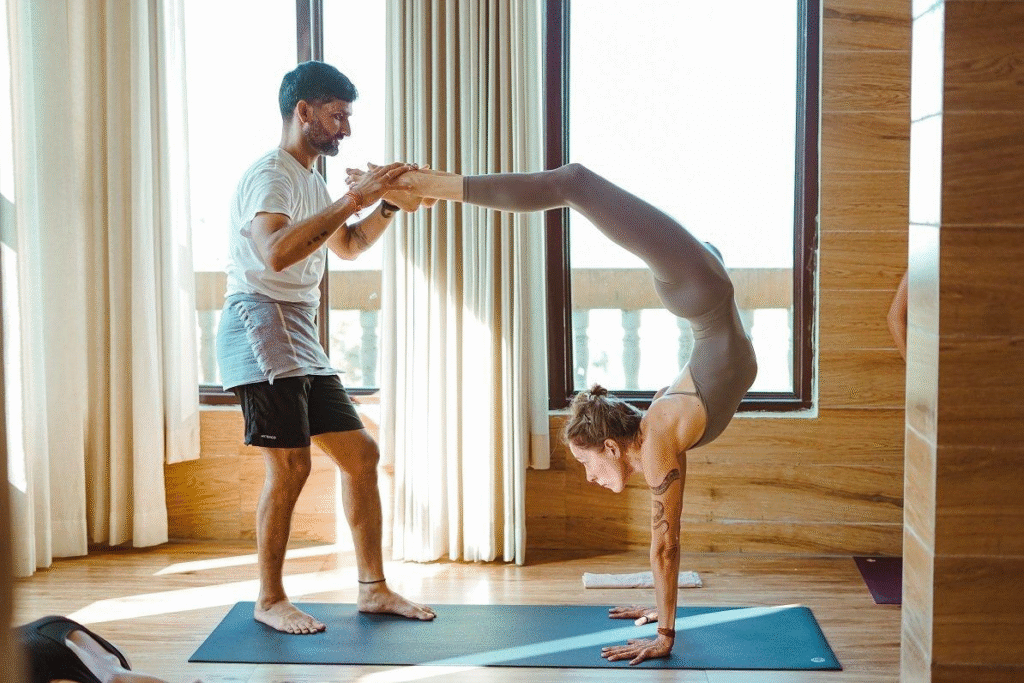
Handstand is an advanced balancing inversion that requires strength, flexibility, and mental confidence.
How to Practice Handstand
- Begin with hands on the floor.
- Create a strong shoulder foundation.
- Lift hips upward.
- Practice controlled leg lifting.
- Balance with awareness.
- Use wall support during learning.
Benefits of Handstand
Handstand helps:
Safety Guidelines for Best Hatha Yoga Asanas Explained Inversions
At Diksha Yoga School, we teach students that advanced poses require preparation, not force.
Before practicing inversions:
Build Strength
Focus on:
- Shoulders
- Arms
- Wrists
- Core muscles
Improve Mobility
Prepare:
- Hamstrings
- Shoulders
- Spine
Practice Under Guidance
Especially for:
- Headstand
- Shoulder Stand
- Forearm Stand
- Handstand
Who Should Avoid or Modify Inversions?
Students should seek guidance or modify inversions if they have:
- Neck injuries
- Shoulder injuries
- Certain medical conditions
- Pregnancy-related concerns
- High discomfort during practice
Yoga should always support health and awareness.
Summary: Inversion Best Hatha Yoga Asanas Explained Asanas Covered
| Asana | Main Focus |
| Sarvangasana | Full-body awareness |
| Halasana | Spine flexibility |
| Sirsasana | Strength and concentration |
| Pincha Mayurasana | Shoulder strength and balance |
| Adho Mukha Vrksasana | Advanced balance |
Inversions teach us an important lesson: the practice of yoga is not about reaching a final posture. It is about developing patience, discipline, awareness, and trust in our own journey.
At Diksha Yoga School, we encourage students to respect every stage of practice — from the first breath in a simple posture to the confidence of advanced Best Hatha Yoga Asanas Explained Asanas.
Part 10: Restorative & Relaxation Hatha Yoga Asanas – Healing, Recovery & Deep Relaxation
We believe that relaxation is not the absence of practice; it is an essential part of the practice.
In Best Hatha Yoga Asanas Explained, effort and relaxation always exist together. After strengthening, balancing, twisting, and challenging the body through different asanas, restorative yoga poses allow the nervous system to calm down and help the body absorb the benefits of the practice.
Many students focus only on flexibility or strength, but true yoga practice also includes learning how to relax, release tension, and become aware of the present moment.
At Diksha Yoga School, we teach our students that Savasana and restorative Best Hatha Yoga Asanas Explained poses are not simply resting positions; they are practices of awareness, surrender, and inner balance.
Restorative Best Hatha Yoga Asanas Explained Asanas help:
- Relax the nervous system
- Release physical tension
- Improve recovery
- Support meditation practice
- Calm the mind
- Create deeper body awareness
Let us explore some important relaxation and restorative yoga poses.
46. Balasana (Child’s Pose)
Sanskrit Meaning:
Bala = Child
Asana = Posture
Balasana is one of the most commonly practiced resting poses in Best Hatha Yoga Asanas Explained.
It creates a feeling of safety, relaxation, and grounding while gently stretching the back body.
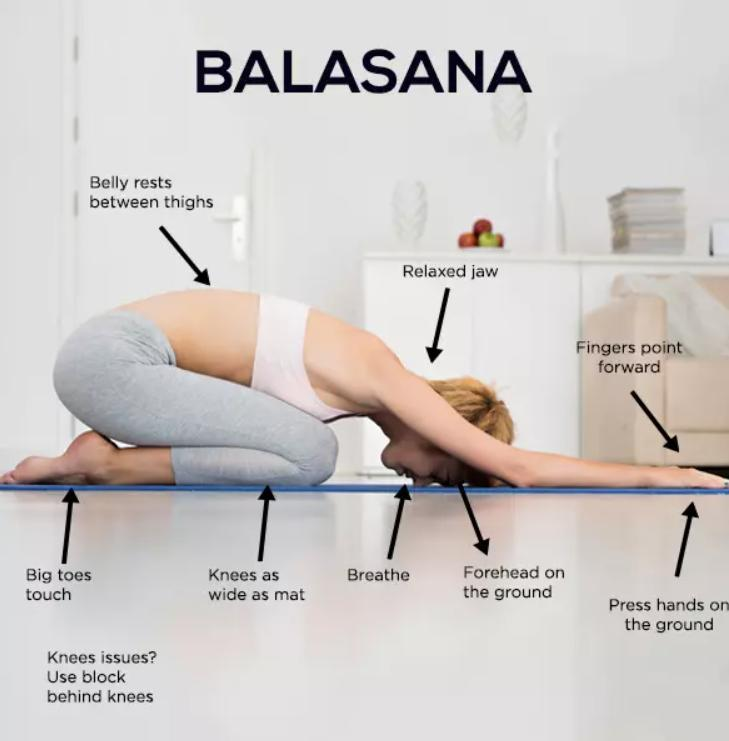
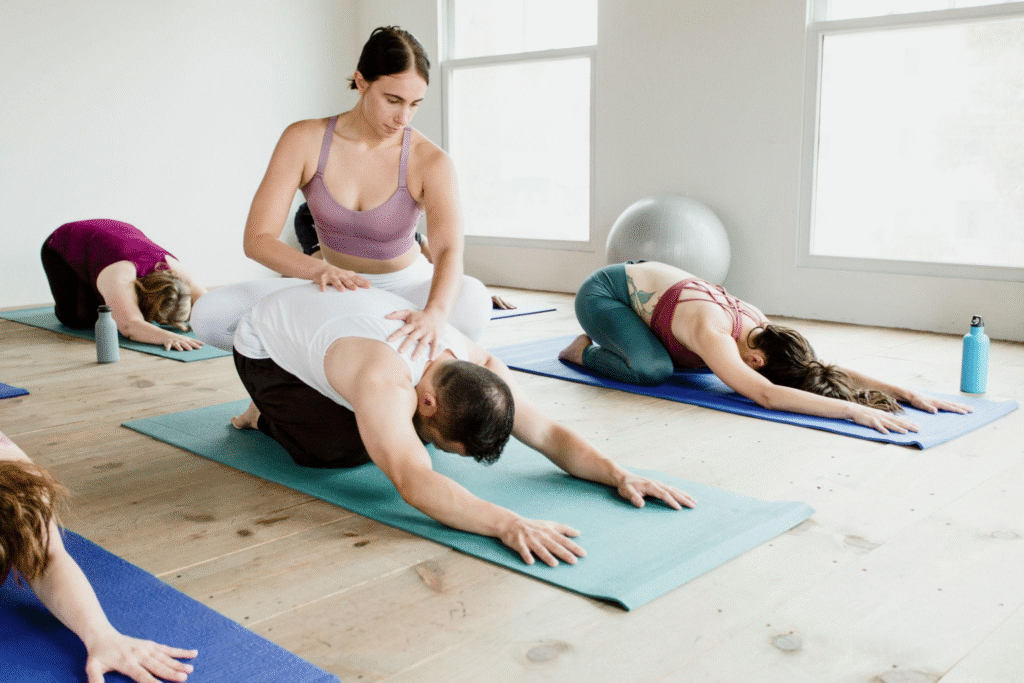
How to Practice Balasana
- Begin in a kneeling position.
- Bring your big toes together and knees comfortable apart.
- Sit back toward your heels.
- Fold your torso forward.
- Extend your arms forward or place them beside your body.
- Rest your forehead on the mat.
- Breathe slowly and deeply.
Breathing Technique
- Inhale gently into the back ribs.
- Exhale and allow the body to relax.
Benefits of Balasana
Child’s Pose helps:
- Release tension in the back
- Relax shoulders and neck
- Calm the nervous system
- Improve hip mobility
- Reduce physical stress
- Create a resting moment during practice
Alignment Points
During Balasana:
✓ Relax the shoulders
✓ Keep the spine comfortable
✓ Avoid forcing hips toward heels
✓ Allow natural breathing
Common Mistakes
| Mistake | Correction |
| Creating tension in shoulders | Relax arms |
| Forcing hips downward | Allow gradual movement |
| Holding breath | Breathe naturally |
Beginner Modification
Place:
- A cushion under the forehead
- A blanket under knees
- A bolster under the chest
for extra comfort.
47. Makarasana (Crocodile Pose)
Sanskrit Meaning:
Makara = Crocodile
Asana = Posture
Makarasana is a deeply relaxing prone position traditionally used for releasing tension from the back and improving awareness of breathing.
How to Practice Makarasana
- Lie on your stomach.
- Separate your legs comfortably.
- Bend your elbows and place hands under your forehead.
- Relax the shoulders.
- Allow the entire body to soften.
- Breathe naturally.
Benefits of Makarasana
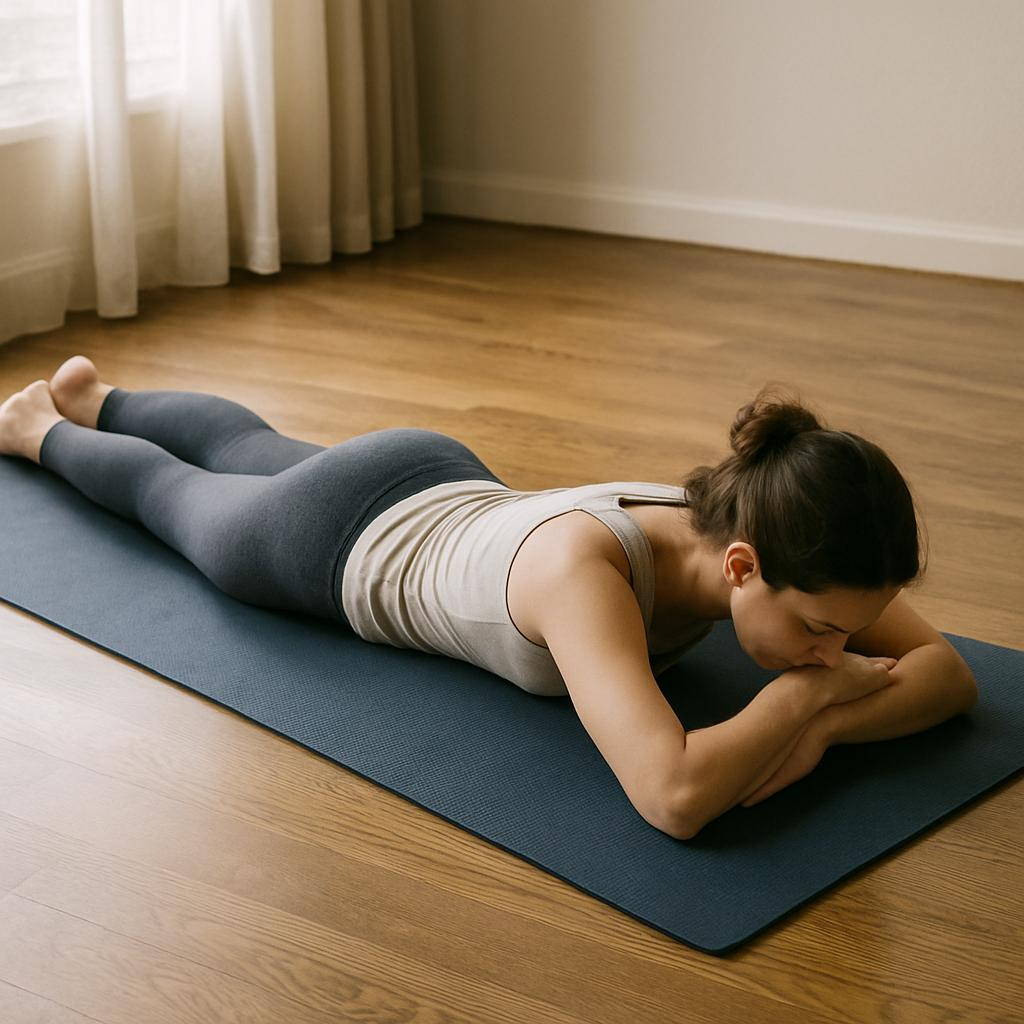
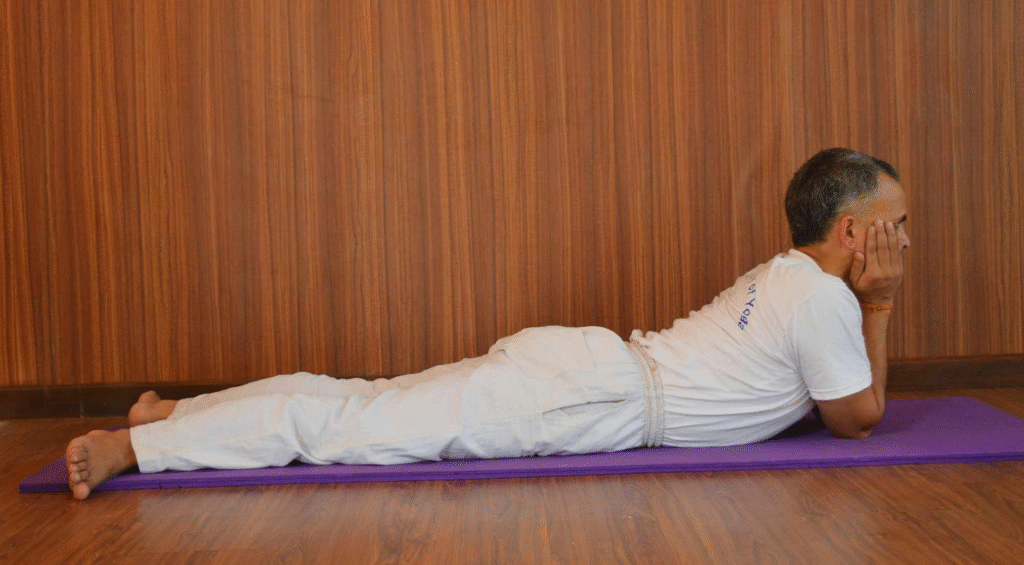
Crocodile Pose helps:
Common Mistakes
| Mistake | Correction |
| Holding body tension | Allow muscles to relax |
| Turning neck uncomfortably | Find a neutral position |
| Shallow breathing | Practice slow breaths |
48. Supta Baddha Konasana (Reclining Butterfly Pose)
Sanskrit Meaning:
Supta = Reclined
Baddha = Bound
Kona = Angle
Asana = Posture
Supta Baddha Konasana is a gentle restorative Best Hatha Yoga Asanas Explained pose that combines hip opening with deep relaxation.
How to Practice Supta Baddha Konasana
- Sit with soles of feet together.
- Slowly lie back.
- Allow knees to open naturally.
- Place hands comfortably beside the body.
- Relax the shoulders and face.
- Breathe deeply.
Benefits of Supta Baddha Konasana
This pose helps:
- Relax the hips
- Release inner thigh tension
- Calm the nervous system
- Improve relaxation
- Support mindful breathing
Beginner Modification
Use:
- Blocks under knees
- Bolster under spine
- Blanket support
to make the pose comfortable.
49. Viparita Karani (Legs Up The Wall Pose)
Sanskrit Meaning:
Viparita = Inverted or Reversed
Karani = Action
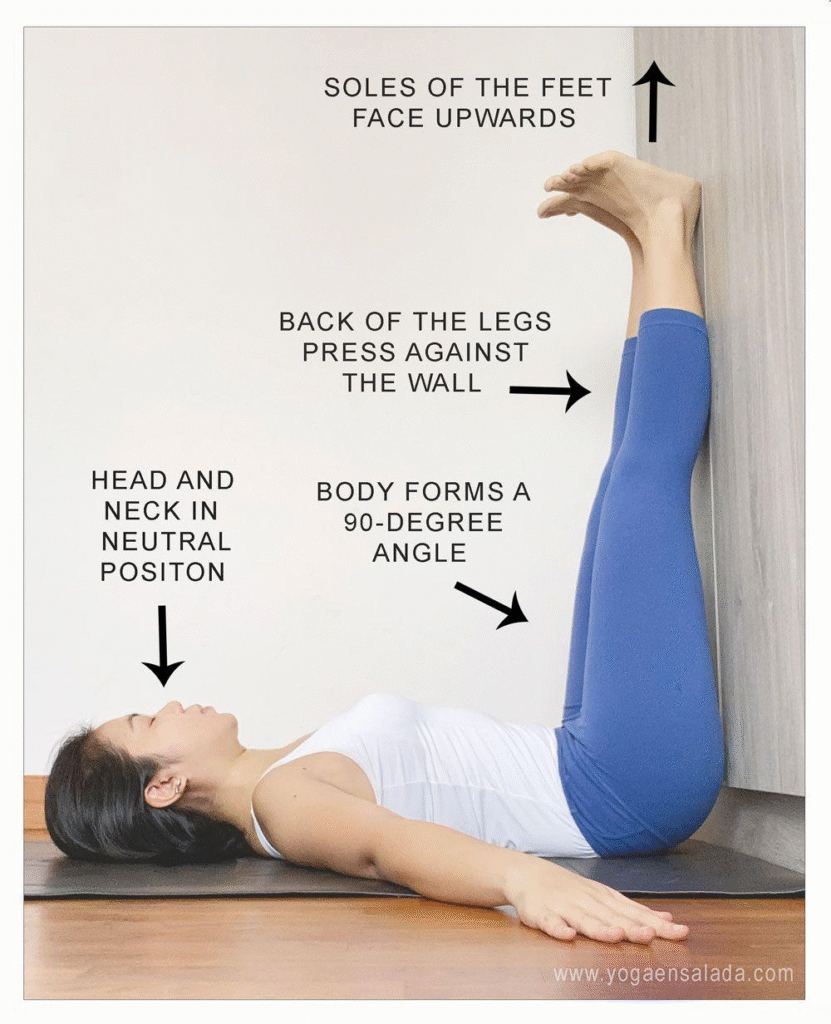
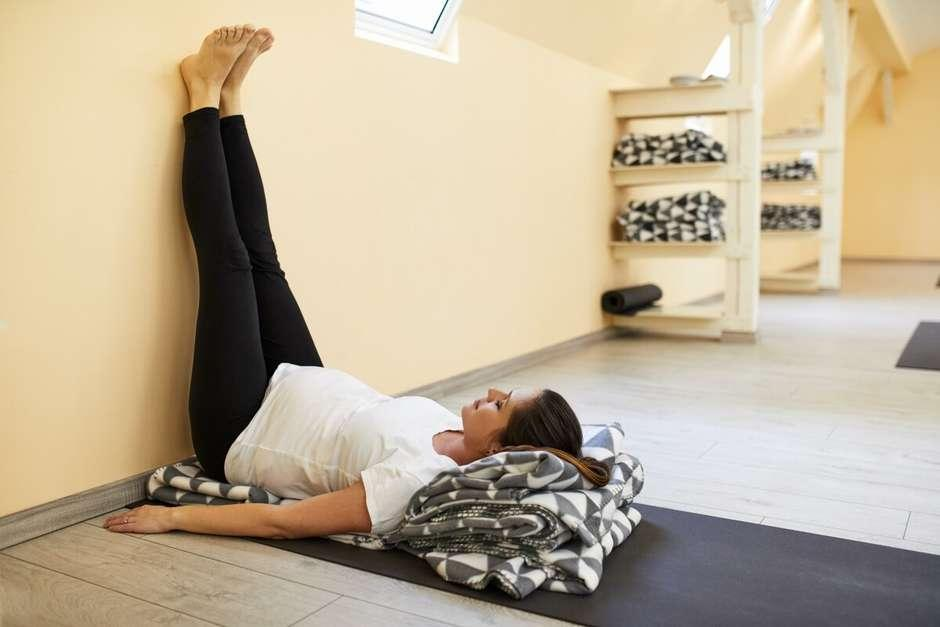
Viparita Karani is a gentle inversion and restorative Best Hatha Yoga Asanas Explained posture suitable for many practitioners.
It encourages relaxation and allows the body to rest while the legs are elevated.
How to Practice Viparita Karani
- Sit sideways near a wall.
- Lie back while bringing legs upward.
- Allow legs to rest against the wall.
- Keep arms relaxed beside the body.
- Close your eyes.
- Breathe slowly.
Benefits of Viparita Karani
Legs Up The Wall Pose helps:
- Relax tired legs
- Calm the nervous system
- Reduce physical tension
- Improve relaxation
- Support meditation practice
Common Mistakes
| Mistake | Correction |
| Forcing hips close to wall | Maintain comfort |
| Creating tension in legs | Relax naturally |
| Holding breath | Slow breathing |
50. Savasana (Corpse Pose)
Sanskrit Meaning:
Sava = Corpse
Asana = Posture
Savasana is considered one of the most important Best Hatha Yoga Asanas Explained Asanas because it allows complete physical and mental relaxation.
Although it appears simple, many students find complete relaxation one of the most challenging practices.
How to Practice Savasana
- Lie flat on your back.
- Separate feet comfortably.
- Allow arms to rest beside the body.
- Close your eyes.
- Relax every part of the body.
- Observe your natural breathing.
- Remain still.
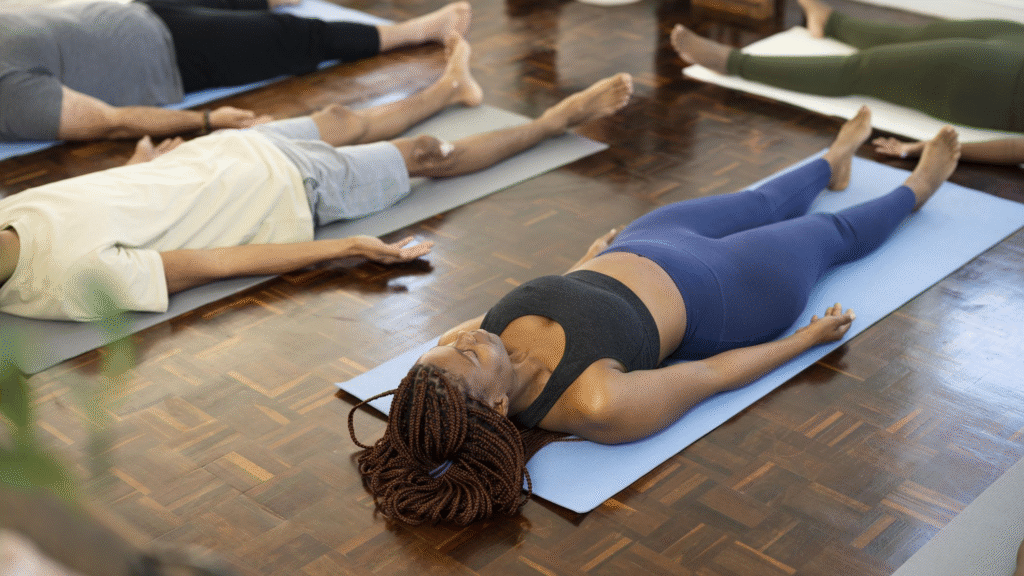
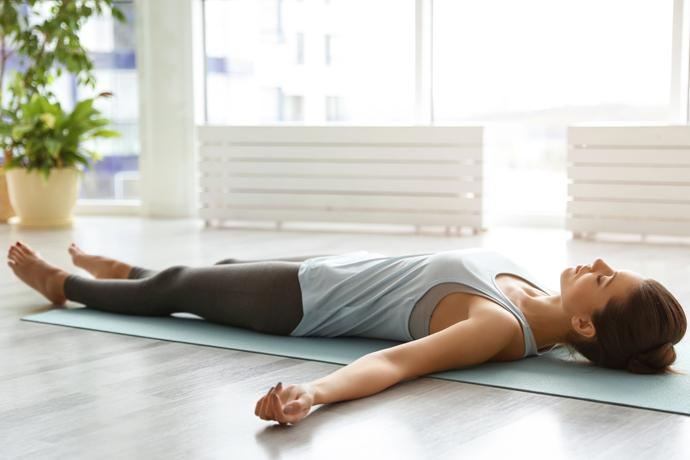
Benefits of Savasana
Corpse Pose helps:
- Reduce stress
- Calm the mind
- Relax muscles
- Improve body awareness
- Support meditation
- Integrate the effects of yoga practice
Common Mistakes
| Mistake | Correction |
| Falling asleep immediately | Maintain awareness |
| Holding body tension | Relax consciously |
| Feeling uncomfortable | Adjust support |
Creating a Balanced Hatha Yoga Sequence
A complete Best Hatha Yoga Asanas Explained practice usually includes different categories of asanas.
A balanced sequence may include:
| Practice Stage | Examples |
| Centering | Sukhasana, Breath Awareness |
| Warm-up | Gentle movements |
| Standing Poses | Tadasana, Warrior Poses |
| Balancing | Vrikshasana |
| Twists | Ardha Matsyendrasana |
| Backbends | Bhujangasana |
| Forward Bends | Paschimottanasana |
| Relaxation | Savasana |
Beginner Hatha Yoga Practice vs Advanced Practice
| Feature Beginner Best Hatha Yoga Asanas Explained Advanced Best Hatha Yoga Asanas Explained Experience Level Suitable for complete beginners Best for experienced practitioners Primary Goal Learn basic postures, breathing, and relaxation Build strength, flexibility, endurance, and deeper awareness Pace Slow and gentle Slow but more physically and mentally demanding Asanas Basic standing, seated, and balancing poses Advanced balances, inversions, arm balances, and deep backbends Breath Control Basic diaphragmatic breathing and simple pranayama Advanced pranayama techniques with breath retention (where appropriate) Flexibility Requirement Minimal Moderate to high Strength Requirement Low High core, arm, and leg strength required Balance Challenge Simple balancing poses Complex balancing and inversion practices Meditation Practice Short guided meditation Longer meditation with enhanced concentration Alignment Focus Learning correct posture and body awareness Refining alignment and energetic awareness Session Duration 30–60 minutes 60–120 minutes Risk of Injury Low when practiced correctly Higher if attempted without proper guidance Props Used Blocks, straps, bolsters, blankets Fewer props, depending on the practitioner’s ability Best For New yoga students, seniors, and those returning to exercise Yoga teachers, dedicated practitioners, and advanced students Expected Benefits Improved flexibility, stress relief, posture, and body awareness Enhanced strength, stamina, advanced flexibility, concentration, and self-discipline. |
How Long Should We Practice Best Hatha Yoga Asanas Explained Asanas?
The quality of practice is more important than the duration.
A beginner may start with:
- 20–30 minutes daily
Intermediate students may practice:
- 45–60 minutes
Advanced practitioners may include:
- Longer asana practice
- Pranayama
- Meditation
- Philosophy study
Consistency creates transformation.
The True Purpose of Best Hatha Yoga Asanas Explained Asanas
At Diksha Yoga School, we believe Best Best Hatha Yoga Asanas Explained Asanas Explained is not about achieving the most difficult posture.
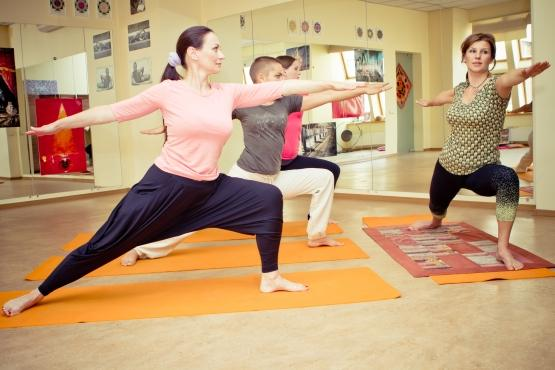
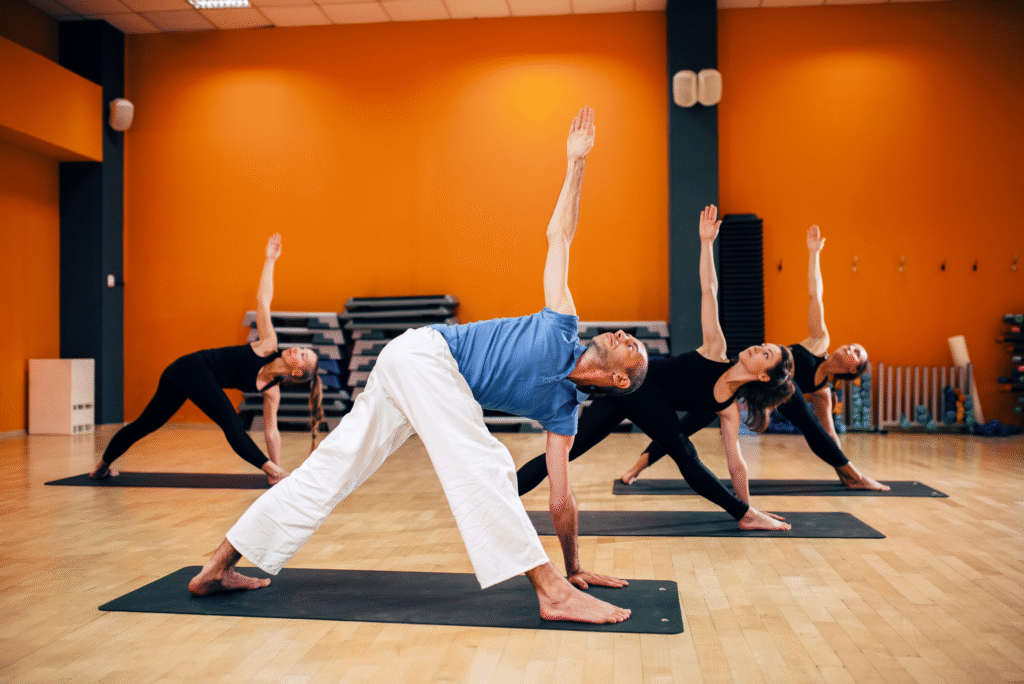
The deeper purpose is:
- Creating harmony between body and mind
- Developing awareness
- Building inner strength
- Learning patience
- Connecting with the breath
- Creating balance in life
Every asana becomes a meditation when practiced with awareness.
Summary: Restorative Best Hatha Yoga Asanas Explained Asanas Covered
| Asana | Main Focus |
| Balasana | Relaxation and grounding |
| Makarasana | Back release and calmness |
| Supta Baddha Konasana | Hip relaxation |
| Viparita Karani | Restorative inversion |
| Savasana | Complete relaxation |
Part 11: Complete List of 60+ Best Hatha Yoga Asanas Explained Asanas With Categories, Benefits & Practice Guide
We believe that understanding a complete range of Best Hatha Yoga Asanas Explained Asanas helps students create a balanced and meaningful yoga practice. Each posture has a different purpose — some build strength, some improve flexibility, some create stability, and others prepare the body and mind for meditation.
At Diksha Yoga School, we teach our students that yoga is not about collecting difficult poses. A true Hatha Yoga practice is about understanding the relationship between movement, breath, alignment, awareness, and inner balance.
A complete Best Hatha Yoga Asanas Explained practice should include different categories of asanas to create harmony throughout the body. Learning proper alignment, body mechanics, and safe movement principles helps practitioners develop a sustainable practice.
Students who want to understand how muscles, joints, and body movements work during asana practice can explore our [Yoga Anatomy] guide, which explains the connection between anatomy, alignment, and safe yoga practice.
1. Standing Hatha Yoga Asanas
Standing poses create the foundation of yoga practice. They improve strength, balance, posture, and body awareness.
| No. | Asana Name | Sanskrit Name | Main Benefits |
| 1 | Mountain Pose | Tadasana | Improves posture and grounding |
| 2 | Tree Pose | Vrikshasana | Improves balance and concentration |
| 3 | Triangle Pose | Trikonasana | Opens hips and strengthens legs |
| 4 | Warrior I | Virabhadrasana I | Builds strength and stability |
| 5 | Warrior II | Virabhadrasana II | Improves endurance and focus |
| 6 | Warrior III | Virabhadrasana III | Develops balance and core strength |
| 7 | Chair Pose | Utkatasana | Strengthens lower body |
| 8 | Extended Side Angle | Parsvakonasana | Improves flexibility and strength |
| 9 | Wide-Legged Forward Bend | Prasarita Padottanasana | Improves hamstring flexibility |
| 10 | Downward Facing Dog | Adho Mukha Svanasana | Strengthens and stretches the whole body |
2. Sitting Hatha Yoga Asanas
Seated postures develop flexibility, calmness, and prepare the body for meditation.
| No. | Asana Name | Sanskrit Name | Main Benefits |
| 11 | Easy Pose | Sukhasana | Meditation and relaxation |
| 12 | Thunderbolt Pose | Vajrasana | Improves posture and grounding |
| 13 | Lotus Pose | Padmasana | Meditation stability |
| 14 | Butterfly Pose | Baddha Konasana | Opens hips and inner thighs |
| 15 | Seated Forward Bend | Paschimottanasana | Improves flexibility |
| 16 | Head-to-Knee Pose | Janu Sirsasana | Stretches legs and spine |
| 17 | Half Lord of Fishes Pose | Ardha Matsyendrasana | Improves spinal mobility |
3. Backbend Hatha Yoga Asanas
Backbends strengthen the spine and open the front body.
| No. | Asana Name | Sanskrit Name | Main Benefits |
| 18 | Cobra Pose | Bhujangasana | Strengthens spine |
| 19 | Locust Pose | Salabhasana | Builds back strength |
| 20 | Bow Pose | Dhanurasana | Improves flexibility |
| 21 | Camel Pose | Ustrasana | Opens chest and hips |
| 22 | Bridge Pose | Setu Bandhasana | Strengthens back body |
| 23 | Fish Pose | Matsyasana | Opens chest and shoulders |
4. Twisting Hatha Yoga Asanas
Twists improve spinal awareness and create mobility.
| No. | Asana Name | Sanskrit Name | Main Benefits |
| 24 | Simple Twist | Vakrasana | Beginner spinal mobility |
| 25 | Half Lord of Fishes | Ardha Matsyendrasana | Deep spinal rotation |
| 26 | Bharadvaja’s Twist | Bharadvajasana | Gentle spinal opening |
| 27 | Revolved Triangle | Parivrtta Trikonasana | Balance and flexibility |
| 28 | Revolved Side Angle | Parivrtta Parsvakonasana | Strength and rotation |
5. Hip Opening Hatha Yoga Asanas
Hip openers create mobility and support comfortable sitting meditation.
| No. | Asana Name | Sanskrit Name | Main Benefits |
| 29 | Garland Pose | Malasana | Hip and ankle mobility |
| 30 | Cow Face Pose | Gomukhasana | Hip and shoulder opening |
| 31 | Frog Pose | Mandukasana | Deep hip opening |
| 32 | Monkey Pose | Hanumanasana | Advanced flexibility |
| 33 | Low Lunge | Anjaneyasana | Hip flexor opening |
| 34 | Pigeon Pose | Eka Pada Rajakapotasana | Deep hip release |
6. Balancing Hatha Yoga Asanas
Balance poses improve concentration, coordination, and confidence.
| No. | Asana Name | Sanskrit Name | Main Benefits |
| 35 | Eagle Pose | Garudasana | Focus and stability |
| 36 | Dancer Pose | Natarajasana | Balance and flexibility |
| 37 | Crow Pose | Bakasana | Arm strength |
| 38 | Crow Variation | Kakasana | Balance preparation |
| 39 | Side Plank | Vasisthasana | Core strength |
| 40 | Hand-to-Big-Toe Pose | Hasta Padangusthasana | Balance and flexibility |
7. Inversion Hatha Yoga Asanas
Inversions challenge strength, awareness, and concentration.
| No. | Asana Name | Sanskrit Name | Main Benefits |
| 41 | Shoulder Stand | Sarvangasana | Body awareness |
| 42 | Plow Pose | Halasana | Spine flexibility |
| 43 | Headstand | Sirsasana | Concentration and strength |
| 44 | Forearm Stand | Pincha Mayurasana | Shoulder stability |
| 45 | Handstand | Adho Mukha Vrksasana | Advanced balance |
8. Restorative Hatha Yoga Asanas
Restorative poses allow the body and nervous system to relax.
| No. | Asana Name | Sanskrit Name | Main Benefits |
| 46 | Child’s Pose | Balasana | Relaxation |
| 47 | Crocodile Pose | Makarasana | Back release |
| 48 | Reclining Butterfly | Supta Baddha Konasana | Deep relaxation |
| 49 | Legs Up The Wall | Viparita Karani | Recovery and calmness |
| 50 | Corpse Pose | Savasana | Complete relaxation |
Additional Traditional Hatha Yoga Asanas (51–60+)
To create a more complete practice, traditional Hatha Yoga includes many additional poses.
51. Pawanmuktasana (Wind Relieving Pose)
Benefits:
- Releases abdominal tension
- Improves body awareness
- Supports gentle digestion practice
52. Naukasana (Boat Pose)
Benefits:
- Strengthens core muscles
- Improves balance
- Builds concentration
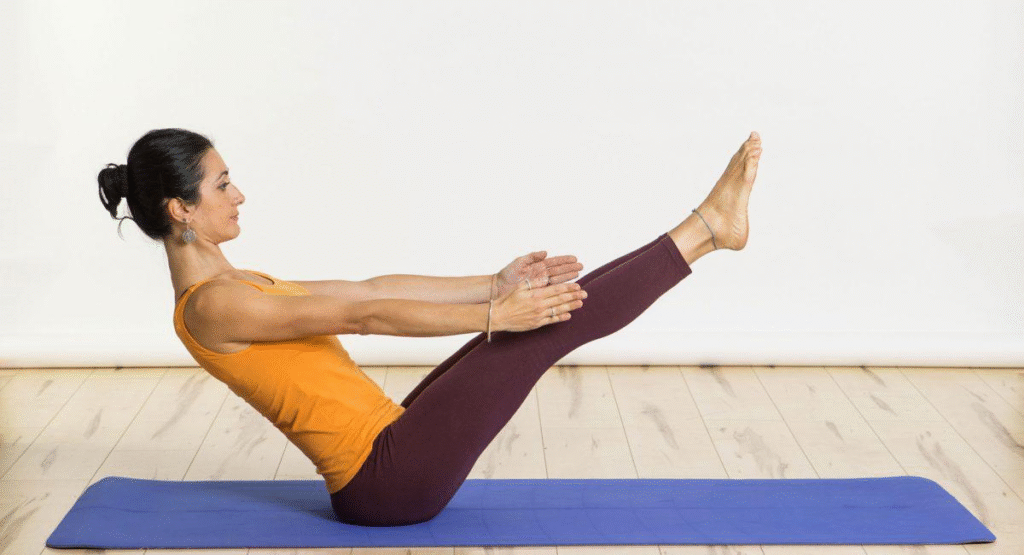
53. Dandasana (Staff Pose)
Benefits:
- Improves sitting posture
- Strengthens back muscles
- Creates spinal awareness
54. Purvottanasana (Upward Plank Pose)
Benefits:
- Strengthens arms
- Opens chest
- Improves shoulder mobility
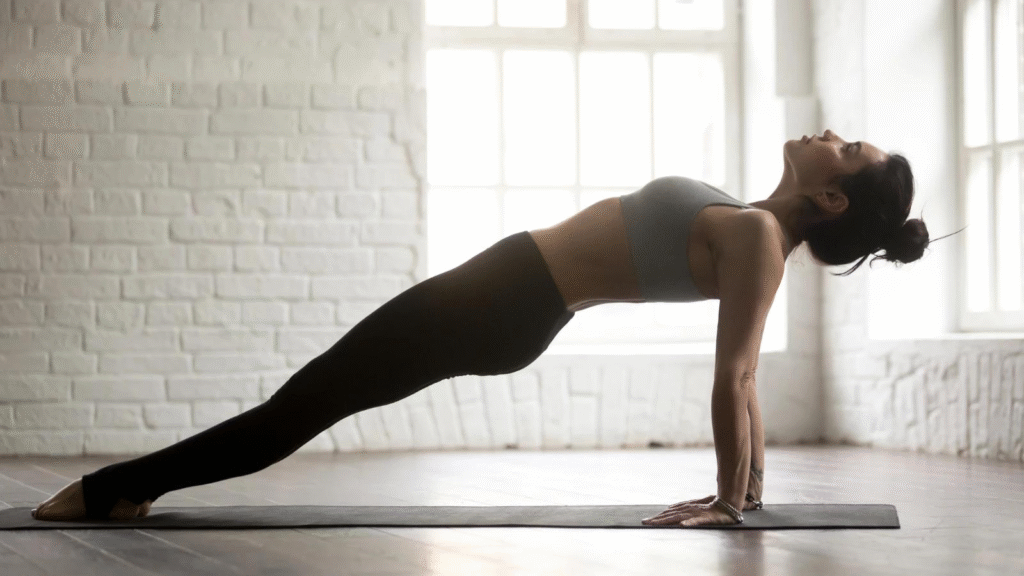
55. Chakrasana (Wheel Pose)
Benefits:
- Develops spinal flexibility
- Strengthens the body
- Opens the chest
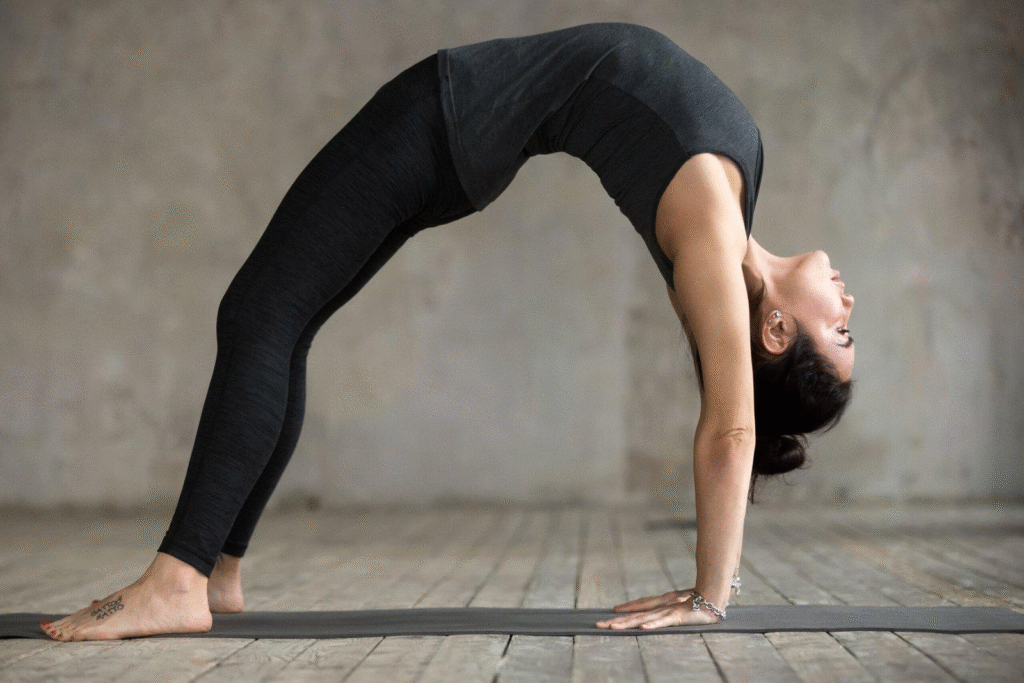
55. Chakrasana (Wheel Pose)
Benefits:
- Improves hip flexibility
- Develops concentration
- Supports advanced practice
57. Kukkutasana (Rooster Pose)
Benefits:
- Builds arm strength
- Improves balance
- Develops body control
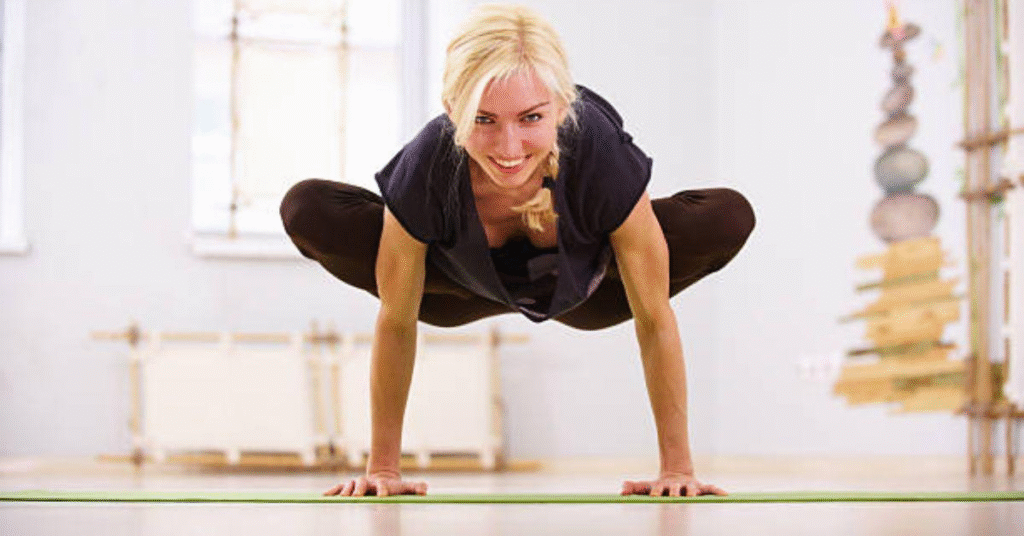
58. Tittibhasana (Firefly Pose)
Benefits:
- Strengthens arms
- Improves flexibility
- Develops confidence
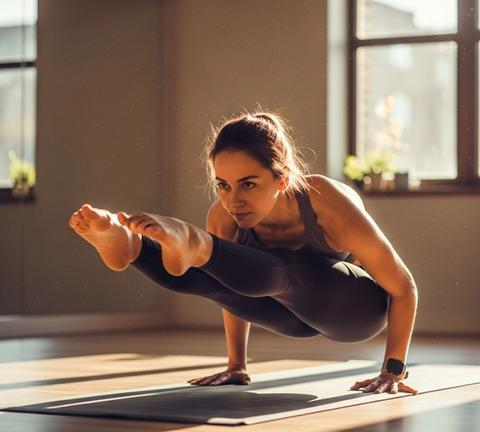
59. Lolasana (Pendant Pose)
Benefits:
- Strengthens core
- Improves arm stability
- Builds control
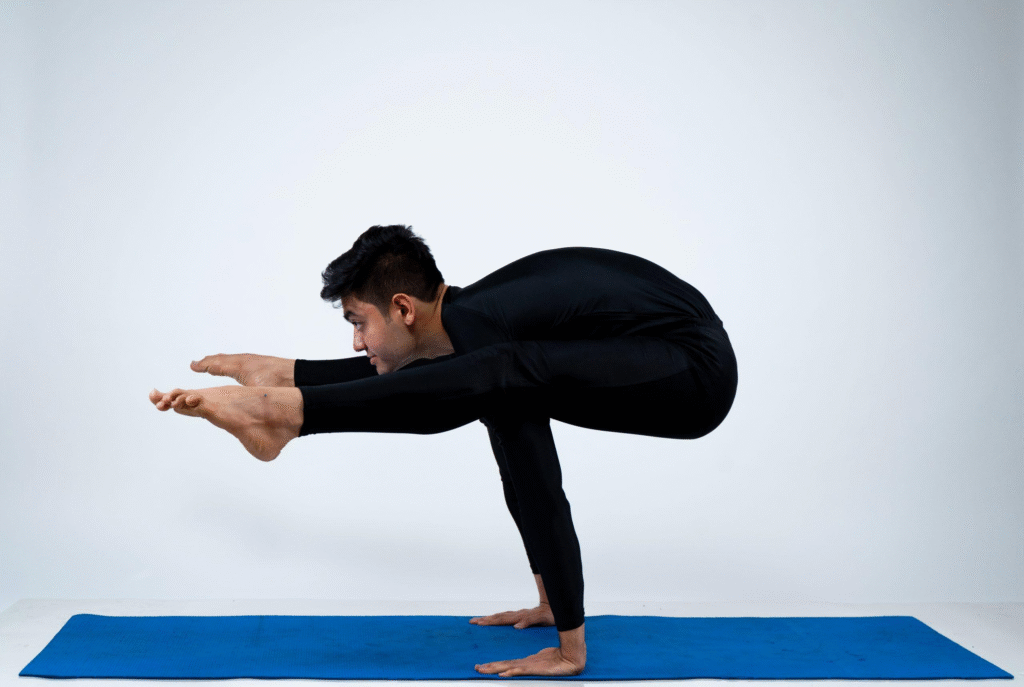
60. Shalabhasana Variation
Benefits:
A Balanced Daily Hatha Yoga Sequence
A balanced daily Hatha Yoga sequence combines breath awareness, mindful movement, strengthening postures, relaxation, and meditation. Beginners should practice slowly and focus on stability, alignment, and comfortable breathing rather than forcing advanced movements.
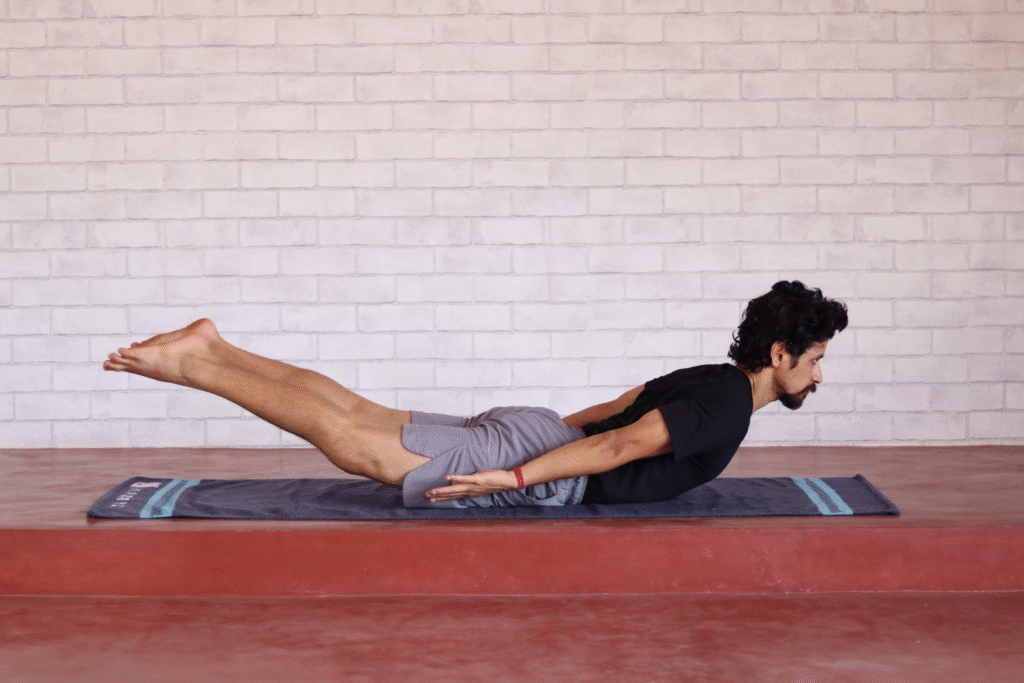
Step 1: Centering (5 minutes)
Practice:
• Comfortable sitting
• Breath awareness
• Gentle meditation
Step 2: Warm-Up (10 minutes)
Include:
• Neck movements
• Shoulder movements
• Cat-Cow movement
• Gentle hip mobility
Step 3: Standing Practice (15 minutes)
Include:
• Tadasana
• Warrior poses
• Triangle Pose
• Balance poses
Step 4: Floor Practice (20 minutes)
Include:
• Forward bends
• Twists
• Hip openers
• Backbends
Step 5: Relaxation (5–10 minutes)
Finish with:
• Savasana
• Meditation
• Breath awareness
A consistent sequence like this helps develop strength, flexibility, body awareness, and mental calmness. To understand how postures work safely within the body, students can explore [Yoga Anatomy] and learn about alignment, muscles, joints, and movement principles.
Those who wish to study Hatha Yoga in depth and learn traditional teaching methods can join our [Hatha Yoga Teacher Training Course], where students explore asanas, pranayama, meditation, anatomy, philosophy, and teaching methodology.
This section should remain a helpful beginner guide, with links guiding readers naturally toward deeper education.
Beginner Tips For Practicing Hatha Yoga Asanas
Starting a Hatha Yoga practice is a journey of patience, awareness, and self-discovery. We encourage beginners to remember:
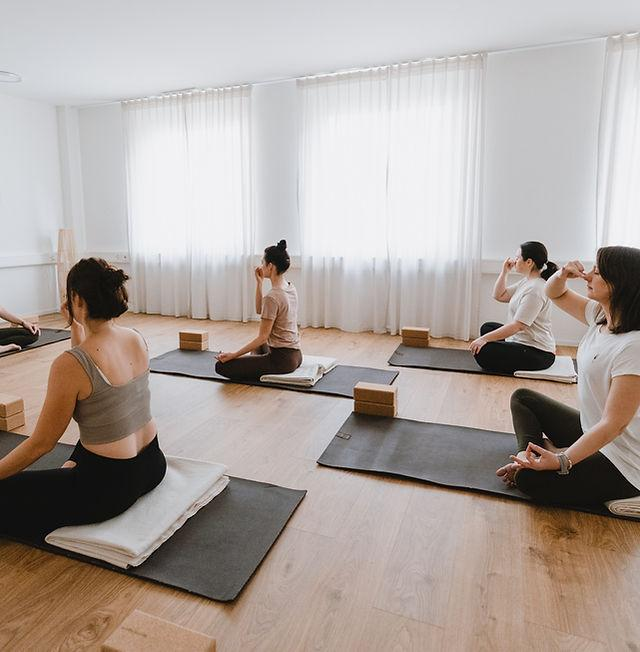
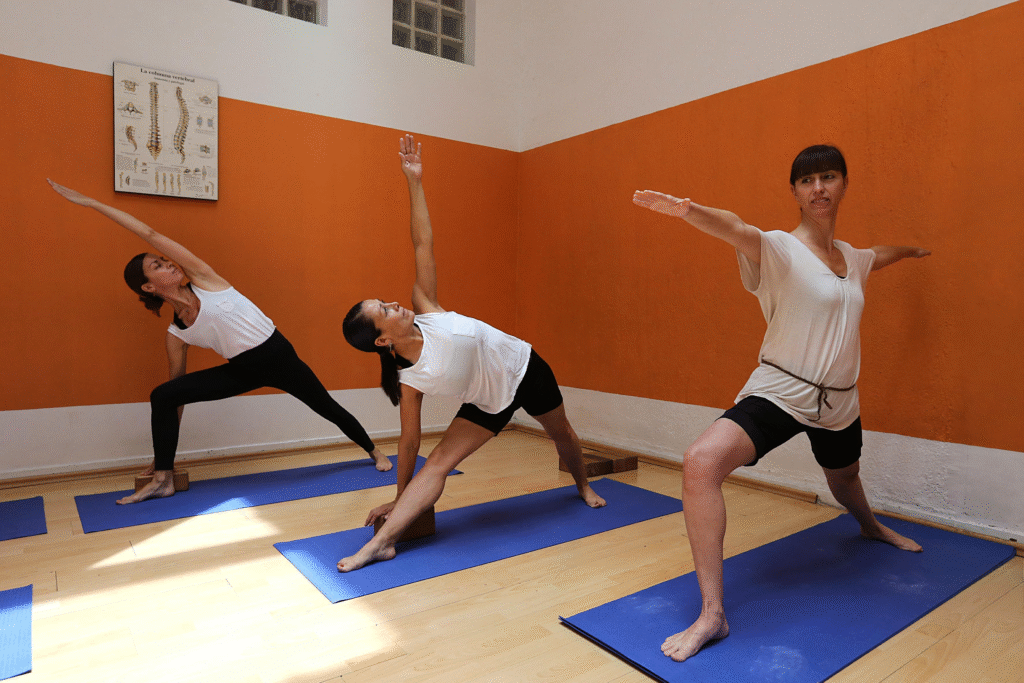
1. Practice Regularly
Consistency creates progress. A simple daily routine helps the body gradually develop strength, flexibility, and awareness.
2. Respect Your Body
Every person has a different level of flexibility and strength. Avoid forcing movements and allow your practice to develop naturally.
3. Focus On Alignment
Correct technique is more important than deeper movement. Understanding proper alignment helps create a safer and more effective practice.
4. Use Breath As Your Guide
Breath creates a connection between body and mind. Learning [Pranayama] and mindful breathing techniques can enhance concentration and awareness during yoga practice.
5. Learn From Experienced Teachers
Proper guidance helps create a safe and meaningful practice. Learning from experienced teachers allows students to understand traditional yoga methods, alignment, sequencing, and philosophy.
For those who wish to deepen their understanding of Hatha Yoga and learn authentic teaching methods, our [Hatha Yoga Teacher Training Course] provides a complete foundation in asanas, anatomy, pranayama, meditation, and yoga philosophy.
Final Thoughts: The True Meaning of Hatha Yoga Asanas
We believe Hatha Yoga Asanas are a journey of self-understanding. A posture is not complete because the body reaches a certain shape. A posture becomes yoga when we bring awareness, breathing, and presence into the experience.
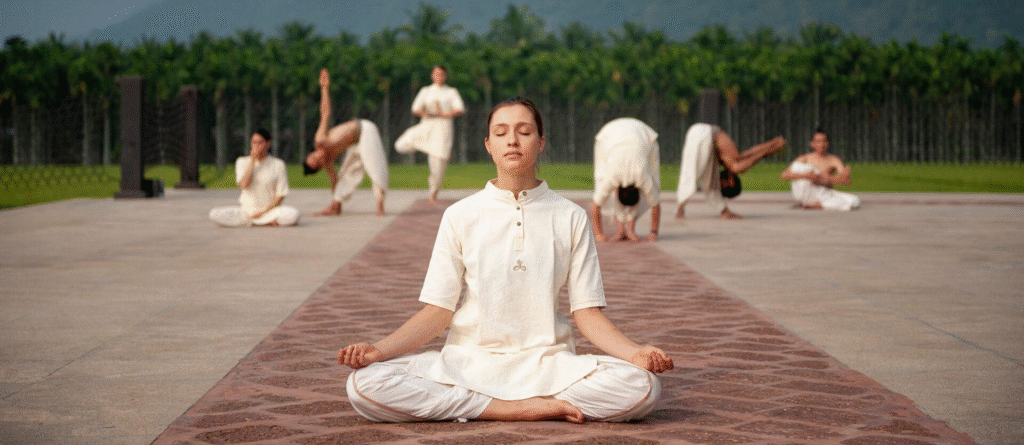
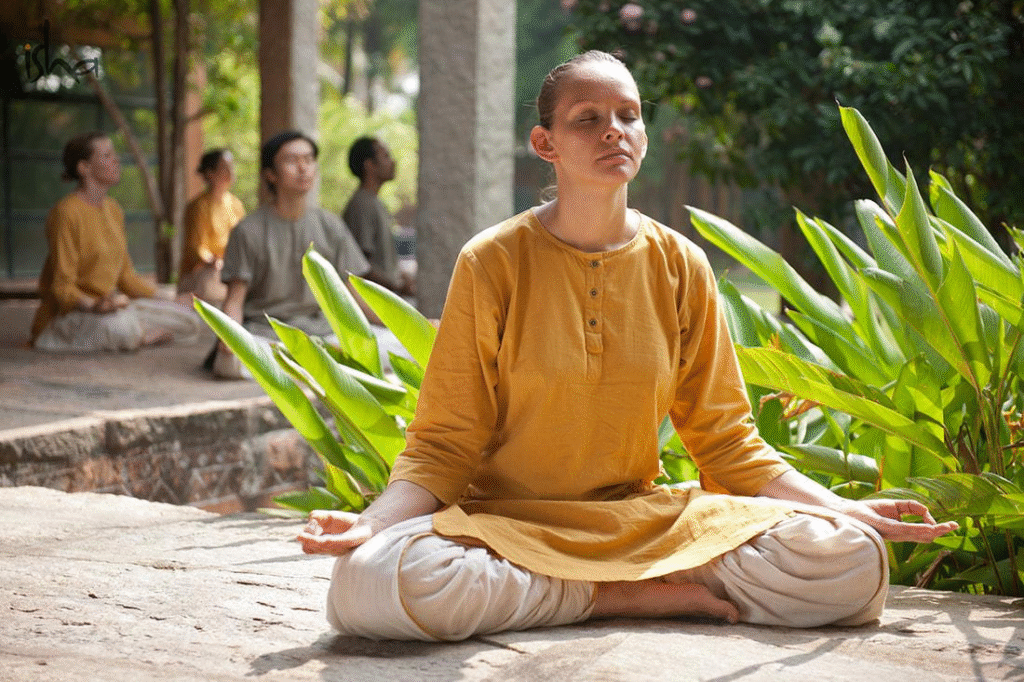
Through regular practice, Hatha Yoga helps us develop:
• A stronger body
• A calmer mind
• Greater awareness
• Emotional balance
• A deeper connection with ourselves
At Diksha Yoga School, we guide students from the foundation of traditional Hatha Yoga toward a deeper understanding of asana practice, teaching methodology, anatomy, philosophy, pranayama, and meditation.
Whether you are a beginner starting your yoga journey or a future yoga teacher building your knowledge, Hatha Yoga Asanas provide the foundation for a lifelong practice.
For students who wish to explore authentic yogic teachings in a structured way, our [Hatha Yoga Teacher Training Courses] offer deeper learning through traditional practices, alignment techniques, breathing practices, meditation, and yoga philosophy.
How to Build a Daily Hatha Yoga Practice
Learning Hatha Yoga Asanas is only the beginning. The real transformation happens through regular practice. At Diksha Yoga School, we encourage our students to focus on consistency rather than long or difficult sessions.
Even 15 minutes of mindful practice each day can gradually improve strength, flexibility, balance, breathing, and mental clarity.
If you are new to Hatha Yoga, build your practice step by step instead of trying to master every posture at once. Developing awareness, patience, and discipline creates a sustainable yoga journey.
Students who want to deepen their personal practice and learn how to teach yoga professionally can explore our [200 Hour Yoga Teacher Training Course], designed to develop strong foundations in asanas, anatomy, pranayama, meditation, and teaching methodology.
“Those looking for a peaceful experience to reconnect with yoga can also explore our [Yoga Retreats], combining daily practice, meditation, and mindful living.”
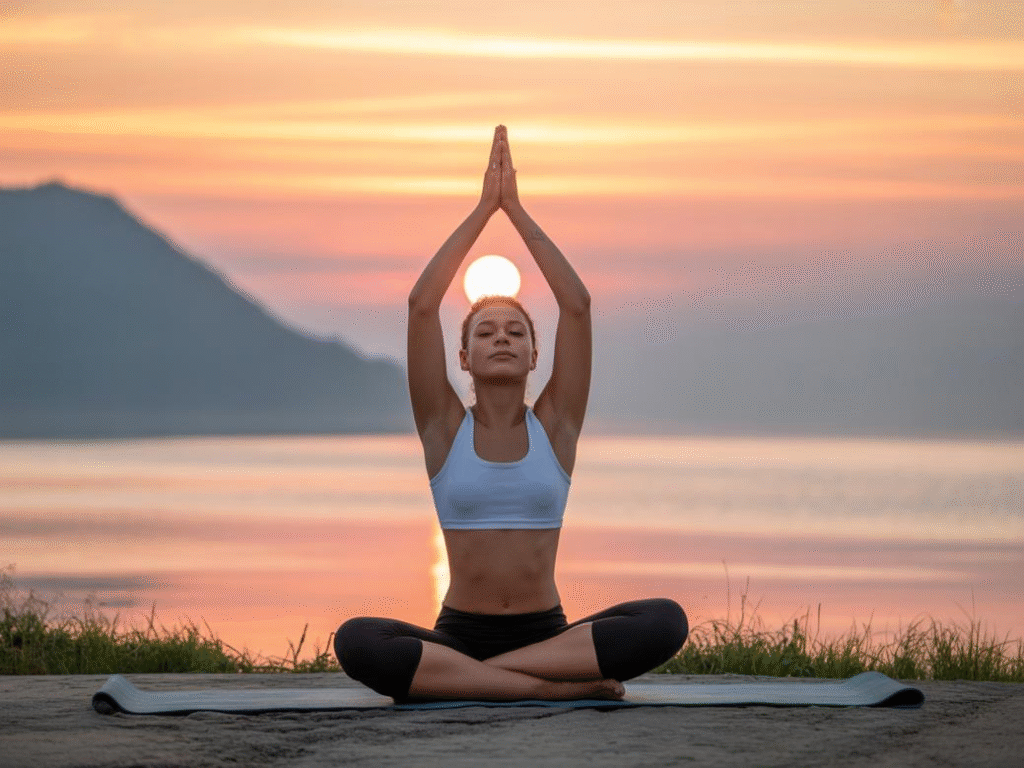
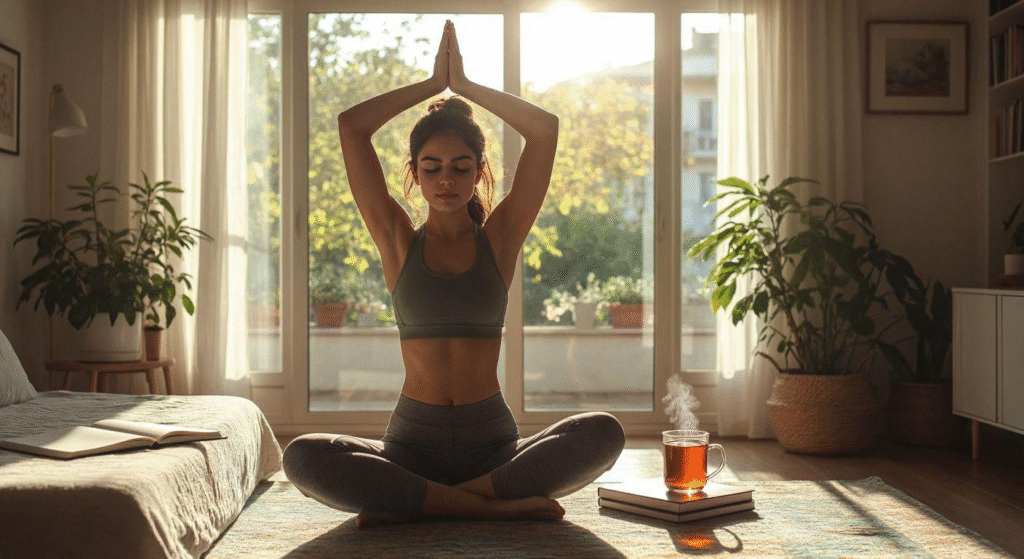
A Simple 4-Week Beginner Hatha Yoga Plan
Building a yoga practice gradually allows the body and mind to adapt safely. This simple 4-week plan helps beginners develop consistency, improve flexibility, increase strength, and create a mindful connection between breath and movement.
| Week | Practice Time | Focus |
| Week 1 | 15 minutes | Learn basic standing and seated poses with steady breathing. |
| Week 2 | 25 minutes | Add gentle forward bends, twists, and simple balance poses. |
| Week 3 | 40 minutes | Include backbends, hip openers, and longer breath awareness. |
| Week 4 | 60 minutes | Practice a balanced Hatha Yoga sequence including warm-up, standing poses, seated poses, backbends, twists, relaxation, and meditation. |
Consistency is the foundation of progress in yoga. As your practice develops, learning proper alignment, sequencing, breathing techniques, and yoga philosophy can help you practice with greater awareness and confidence.
Students who want to deepen their knowledge and learn how to guide others can explore our [200 Hour Yoga Teacher Training Course], which covers traditional Hatha Yoga, Vinyasa Flow, anatomy, pranayama, meditation, and teaching methodology.
Example 60-Minute Hatha Yoga Practice
| Practice Stage | Time |
| Example 60-Minute Hatha Yoga Practice | Example 60-Minute Hatha Yoga Practice |
| A balanced Hatha Yoga practice combines breath awareness, mindful movement, strengthening postures, relaxation, and meditation. The following 60-minute sequence is suitable for beginners and regular practitioners who want to develop consistency, flexibility, and body awareness. | A balanced Hatha Yoga practice combines breath awareness, mindful movement, strengthening postures, relaxation, and meditation. The following 60-minute sequence is suitable for beginners and regular practitioners who want to develop consistency, flexibility, and body awareness. |
| Practice Stage Time Centering and Breath Awareness 5 minutes Gentle Warm-Up 10 minutes Standing Hatha Yoga Asanas 15 minutes Seated and Forward Bending Poses 10 minutes Twists and Backbends 10 minutes Relaxation (Savasana) 5 minutes Meditation or Pranayama 5 minutes A regular practice like this helps students build a strong foundation in asanas, breathing techniques, and mindfulness. Those who wish to explore traditional yoga practices in greater depth can join our [Hatha Yoga Teacher Training Course], where students learn alignment, sequencing, pranayama, meditation, anatomy, and yoga philosophy. | Practice Stage Time Centering and Breath Awareness 5 minutes Gentle Warm-Up 10 minutes Standing Hatha Yoga Asanas 15 minutes Seated and Forward Bending Poses 10 minutes Twists and Backbends 10 minutes Relaxation (Savasana) 5 minutes Meditation or Pranayama 5 minutes A regular practice like this helps students build a strong foundation in asanas, breathing techniques, and mindfulness. Those who wish to explore traditional yoga practices in greater depth can join our [Hatha Yoga Teacher Training Course], where students learn alignment, sequencing, pranayama, meditation, anatomy, and yoga philosophy. |
Tips for Staying Consistent
We remind our students that consistency is far more valuable than intensity. A simple daily routine is easier to maintain and allows the body to adapt naturally over time.
To build a sustainable Hatha Yoga practice:
• Practice at the same time each day whenever possible.
• Begin with simple poses before progressing to advanced asanas.
• Focus on slow, steady breathing throughout your practice.
• Listen to your body and avoid forcing flexibility.
• Use yoga props when additional support is needed.
• End every session with relaxation to allow the body and mind to absorb the benefits of the practice.
Developing consistency is one of the foundations taught in authentic yoga education. Students who wish to deepen their understanding of asanas, pranayama, meditation, and yoga philosophy can explore our [200 Hour Yoga Teacher Training Course], designed for those who want to build a strong personal practice and learn the traditional methods of teaching yoga.
Remember: Progress Takes Time
Every yoga journey is unique. Some students naturally develop flexibility, while others build strength, balance, and body awareness more gradually. At Diksha Yoga School, we encourage every practitioner to celebrate small improvements rather than chase perfect postures.
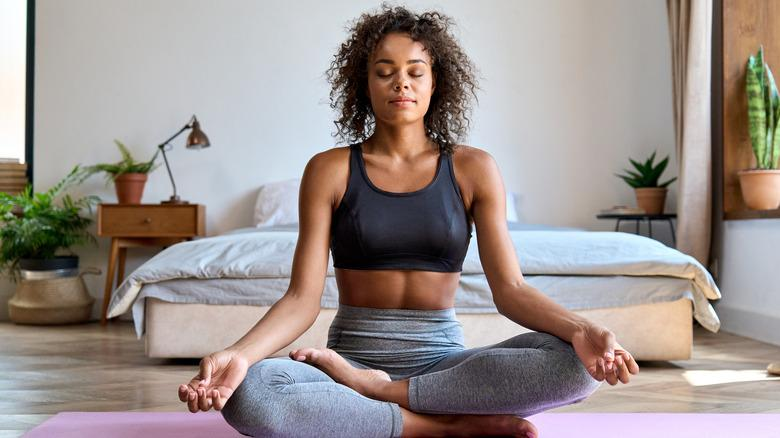
With patience, regular practice, and mindful awareness, Hatha Yoga becomes a lifelong practice that supports physical health, mental clarity, and inner well-being.
For those who wish to deepen their practice and learn authentic yoga techniques, our [Hatha Yoga Teacher Training Courses] provide a structured path to explore asanas, pranayama, meditation, anatomy, and yoga philosophy under experienced guidance.
Whether you are beginning your journey or looking to develop teaching skills, our [Yoga Retreats] offer a peaceful environment to reconnect with yourself through daily yoga, meditation, and mindful living.
Frequently Asked Questions (FAQ) About Hatha Yoga Asanas
We believe that learning yoga is a continuous journey of curiosity and understanding. Many students who begin their yoga practice have questions about Hatha Yoga Asanas, their benefits, correct techniques, and how to build a consistent practice.
Below are some of the most common questions students ask about traditional Hatha Yoga poses.
1. What Are Hatha Yoga Asanas?
Hatha Yoga Asanas are traditional yoga postures practiced with awareness, controlled breathing, and proper alignment.
The word Hatha represents the balance of opposing energies:
- Ha – Sun energy, active force, strength
- Tha – Moon energy, calming and receptive qualities
Hatha Yoga Asanas combine physical movement with breath awareness to create balance between the body and mind.
Unlike simple physical exercises, Hatha Yoga focuses on:
- Stability
- Alignment
- Conscious breathing
- Mental awareness
- Inner balance
2. How Many Hatha Yoga Asanas Are There?
Traditional yoga texts describe many different numbers of yoga postures. Some ancient references mention 84 important asanas, while modern yoga practices include hundreds of variations.
A complete Hatha Yoga practice may include:
- Standing poses
- Sitting poses
- Forward bends
- Backbends
- Twists
- Hip openers
- Balancing poses
- Inversions
- Relaxation poses
The purpose is not to master every pose but to understand the principles behind the practice.
3. Which Hatha Yoga Asanas Are Best for Beginners?
Beginners should start with foundational poses that develop awareness, strength, and flexibility gradually.
Some beginner-friendly Hatha Yoga poses include:
- Tadasana (Mountain Pose)
- Sukhasana (Easy Pose)
- Balasana (Child’s Pose)
- Vajrasana (Thunderbolt Pose)
- Bhujangasana (Cobra Pose)
- Adho Mukha Svanasana (Downward Facing Dog)
- Trikonasana (Triangle Pose)
- Vrikshasana (Tree Pose)
These poses help beginners understand:
- Body alignment
- Breathing techniques
- Balance
- Safe movement patterns
4. Is Hatha Yoga Good for Improving Flexibility?
Yes, Hatha Yoga can improve flexibility when practiced consistently and patiently.
However, flexibility is not only about stretching deeper. A healthy yoga practice develops:
- Mobility
- Strength
- Stability
- Body awareness
Hatha Yoga improves flexibility through:
- Longer posture holds
- Controlled breathing
- Conscious muscle relaxation
- Gradual progression
5. What Is the Difference Between Hatha Yoga and Vinyasa Yoga?
Both styles use yoga postures, but their approach is different.
| Hatha Yoga | Vinyasa Yoga |
| Slower and mindful practice | Continuous flowing movements |
| Focus on alignment | Focus on movement with breath |
| Longer pose holds | Shorter transitions |
| Builds foundation | Builds flow and coordination |
| Suitable for beginners and advanced students | Often more dynamic |
Many students begin with Hatha Yoga because it creates the foundation needed for other yoga styles.
6. How Often Should We Practice Hatha Yoga Asanas?
Consistency is more important than intensity.
A beginner may practice:
- 20–30 minutes daily
Intermediate practitioners may practice:
- 45–60 minutes regularly
Advanced practitioners may include:
- Longer asana practice
- Pranayama
- Meditation
- Yoga philosophy study
Even a short daily practice can create meaningful transformation.
7. Can Beginners Practice Hatha Yoga Asanas at Home?
Yes, beginners can practice basic Hatha Yoga poses at home.
However, learning correct alignment from an experienced yoga teacher is highly beneficial, especially for:
- Backbends
- Inversions
- Deep hip-opening poses
- Advanced balancing postures
A teacher helps students understand safe techniques and avoid common mistakes.
8. How Long Should We Hold Hatha Yoga Poses?
The ideal duration for holding a Hatha Yoga Asana depends on the posture, your experience level, breathing, and the purpose of your practice. Under the guidance of Yogini Manisha, founder of Diksha Yoga School, students learn that there is no fixed rule for every pose. The focus should always remain on maintaining proper alignment, steady breathing, and mindful awareness rather than simply holding a posture for a longer time.
General Guidance
| Practice Level | Recommended Holding Time |
| Beginner | 15–30 seconds |
| Intermediate | 30–60 seconds |
| Advanced | Hold longer with steady breathing, proper alignment, and full awareness |
The quality of your practice is always more important than the length of time you hold a pose. Maintaining smooth breathing through Pranayama, practicing with mindful awareness, and respecting your body’s natural limits will provide greater long-term benefits than forcing yourself to stay in a posture longer than you comfortably can.
As your strength, flexibility, and confidence improve, you can gradually increase the duration of each pose under the guidance of an experienced teacher or through a structured Yoga Alliance Registered 200 Hour Hatha & Vinyasa Flow Yoga Teacher Training.
9. What Should We Focus On While Practicing Hatha Yoga Asanas?
A meaningful Hatha Yoga practice is not measured by how advanced a posture looks but by the quality of your awareness while practicing. Under the guidance of Yogini Manisha, founder of Diksha Yoga School, students learn that every asana should be approached with mindfulness, patience, and respect for the body’s natural abilities. These principles form the foundation of a safe, effective, and lifelong yoga practice.
During your practice, focus on:
Breath
The breath should remain smooth, steady, and comfortable throughout every posture. Practicing Pranayama helps improve breath awareness, concentration, and the mind-body connection.
Alignment
Proper alignment creates safety, stability, and effectiveness in every asana. Understanding the fundamentals of Yoga Anatomy helps you move efficiently, prevent injuries, and receive the full benefits of each posture.
Awareness
Observe your body, breath, and thoughts without judgment. Combining Hatha Yoga with Meditation and Yoga Philosophy helps cultivate mindfulness both on and off the yoga mat.
Patience
Yoga develops gradually through consistent practice. Avoid comparing yourself with others and trust your own journey, allowing strength, flexibility, and confidence to grow naturally over time.
By focusing on these four principles, Hatha Yoga becomes much more than a physical exercise—it becomes a lifelong practice of self-awareness, balance, and personal growth.
10. Can Hatha Yoga Help Reduce Stress?
Yes. Hatha Yoga is widely practiced to promote relaxation, reduce stress, and improve overall mental well-being. Unlike fast-paced workouts, traditional Hatha Yoga combines gentle movement, Pranayama (breath control), Meditation, and mindful awareness to help calm both the body and the mind.
Under the guidance of Yogini Manisha, founder of Diksha Yoga School, students learn that managing stress is not about escaping challenges but about developing greater awareness, emotional balance, and inner resilience through consistent yoga practice.
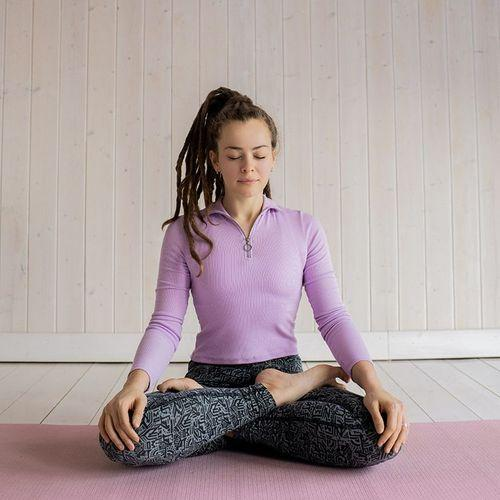
Many students experience benefits such as:
- Better relaxation
- Improved concentration and mental clarity
- Reduced mental and emotional tension
- Greater emotional balance
- Better sleep quality
- A deeper sense of inner peace
These calming effects become even more profound when Hatha Yoga is practiced alongside Pranayama, Meditation, and the teachings of Yoga Philosophy. For those seeking a complete wellness experience, our Yoga Wellness Retreats provide a peaceful environment to disconnect from daily stress, reconnect with yourself, and experience the holistic benefits of traditional yoga.
11. What Should We Avoid During Hatha Yoga Practice?
A safe and sustainable Hatha Yoga practice is built on awareness, patience, and respect for your body’s natural abilities. Under the guidance of Yogini Manisha, founder of Diksha Yoga School, students learn that yoga is not about pushing beyond your limits but about progressing gradually with proper alignment, mindful breathing, and consistent practice.
We encourage students to avoid:
❌ Comparing their body with others – Every person’s body, flexibility, and yoga journey are unique.
❌ Forcing flexibility – Allow flexibility to develop naturally over time instead of pushing into pain.
❌ Ignoring pain signals – Discomfort may be part of stretching, but sharp or sudden pain is a sign to stop and adjust the posture.
❌ Holding the breath – Maintain slow, steady breathing throughout every pose. Practicing Pranayama helps develop greater breath awareness and control.
❌ Practicing advanced poses without preparation – Build a strong foundation with proper alignment and an understanding of Yoga Anatomy before progressing to more challenging asanas.
Yoga should create awareness, not competition. By practicing with patience, mindfulness, and proper guidance, you can enjoy the lifelong physical, mental, and emotional benefits of Hatha Yoga. These principles are an essential part of our Yoga Alliance Registered 200 Hour Hatha & Vinyasa Flow Yoga Teacher Training, where students learn to practice and teach yoga safely and confidently.
12. Are Hatha Yoga Asanas Suitable for Yoga Teacher Training?
Yes. Hatha Yoga Asanas form one of the most important foundations of yoga teacher education. Before teaching others, every yoga teacher should develop a thorough understanding of how each posture is practiced, modified, and adapted for students of different abilities. Under the guidance of Yogini Manisha, founder of Diksha Yoga School, students learn to teach Hatha Yoga with confidence by combining traditional yogic wisdom with modern teaching techniques and safe alignment principles.
A yoga teacher should understand:
- Pose alignment
- Benefits and limitations
- Clear teaching instructions
- Modifications and variations
- Yoga Anatomy and biomechanics
- Breath coordination through Pranayama
At Diksha Yoga School, students study Hatha Yoga Asanas as part of a comprehensive Yoga Alliance Registered 200 Hour Hatha & Vinyasa Flow Yoga Teacher Training, which includes:
- Asana practice
- Yoga Anatomy
- Teaching methodology
- Pranayama
- Meditation
- Yoga Philosophy
This integrated approach helps students build a strong personal practice while developing the knowledge, confidence, and practical teaching skills needed to become safe, effective, and inspiring yoga teachers.
13. What Is the Most Important Hatha Yoga Asana?
There is no single “best” Hatha Yoga Asana. Every posture serves a unique purpose, and its true value depends on how it is practiced rather than how advanced it appears.
Under the guidance of Yogini Manisha, students at Diksha Yoga School learn that the most important asana is the one practiced with mindfulness, patience, and respect for the body’s natural abilities. Whether you are practicing Tadasana or an advanced inversion, the quality of your awareness matters more than the complexity of the posture.
The most important asana is the one practiced with:
- Awareness
- Proper breathing through Pranayama
- Correct alignment supported by an understanding of Yoga Anatomy
- Presence of mind
A simple pose practiced consciously can be far more beneficial than an advanced pose performed without awareness. This principle lies at the heart of traditional Hatha Yoga and is explored in greater depth through our Yoga Philosophy teachings and Yoga Alliance Registered Yoga Teacher Training, where students learn to practice and teach yoga with confidence, safety, and authenticity.
14. Can Hatha Yoga Build Strength?
Yes. Hatha Yoga is not only about flexibility—it is also an effective way to develop functional strength, stability, and body awareness. Unlike repetitive gym exercises that often isolate individual muscles, Hatha Yoga strengthens the body through controlled movements, sustained postures, and mindful breathing.
Under the guidance of Yogini Manisha, students at Diksha Yoga School learn how to build strength safely through proper alignment, breath awareness, and progressive practice. Understanding the principles of Yoga Anatomy also helps practitioners activate the correct muscles and reduce the risk of injury.
Strength-Building Hatha Yoga Asanas Include:
- Warrior Poses
- Chair Pose
- Plank Variations
- Boat Pose
- Crow Pose
- Bridge Pose
These postures help strengthen:
- Legs
- Core
- Back
- Shoulders
- Arms
With regular practice, these poses improve muscular endurance, posture, balance, and overall functional fitness while creating a strong foundation for more advanced Hatha Yoga Asanas
15. How Is Hatha Yoga Different From Exercise?
How Is Hatha Yoga Different From Exercise?
Many people begin practicing yoga to improve their physical fitness, but they soon discover that Hatha Yoga offers much more than exercise. While conventional exercise often focuses primarily on strength, endurance, or weight management, Hatha Yoga combines physical movement with conscious breathing, mental awareness, and inner balance to create a holistic approach to well-being.
Under the guidance of Yogini Manisha, students at Diksha Yoga School learn that every Hatha Yoga Asana is practiced with intention, mindfulness, and respect for the body’s natural abilities. This traditional approach helps practitioners cultivate not only physical health but also emotional resilience and mental clarity.
Unlike a typical workout, Hatha Yoga integrates:
- Body movement
- Pranayama (breath awareness)
- Meditation and mental focus
- Relaxation techniques
- Yoga Philosophy and inner awareness
The goal of Hatha Yoga is not simply to build a stronger body but to create a healthier, calmer, and more balanced life. This holistic approach is at the heart of our Yoga Alliance Registered Yoga Teacher Training and Yoga Wellness Retreats, where students experience yoga as a complete lifestyle rather than just a form of physical exercise.
Final Conclusion: Begin Your Hatha Yoga Journey With Awareness
We believe that Hatha Yoga Asanas are much more than physical postures—they are a lifelong journey of understanding ourselves through movement, breath, and awareness. Every posture offers a unique opportunity to cultivate strength, flexibility, patience, and inner balance while creating a deeper connection between the body and mind.
Every category of Hatha Yoga Asanas teaches an important life lesson:
Standing poses develop stability and confidence.
Balancing poses cultivate concentration and focus.
Twisting poses improve awareness and mobility.
Backbends encourage openness and courage.
Forward bends teach patience and surrender.
Relaxation poses promote stillness, recovery, and inner peace.
A consistent Hatha Yoga practice helps build a healthier relationship with both the body and the mind. However, true progress comes not from achieving the most advanced posture but from practicing with proper alignment, mindful breathing, and self-awareness.
Under the guidance of Yogini Manisha, founder of Diksha Yoga School, students from around the world learn traditional Hatha Yoga through a structured approach that combines Yoga Anatomy, Pranayama, Meditation, Yoga Philosophy, and safe teaching methodology. This holistic approach helps practitioners build a sustainable practice while preserving the authentic principles of classical yoga.
Whether you are a beginner taking your first steps on the yoga mat, an experienced practitioner looking to deepen your personal practice, or an aspiring yoga teacher seeking internationally recognised certification, our Yoga Alliance Registered 200 Hour Hatha & Vinyasa Flow Yoga Teacher Training provides a strong foundation for lifelong learning and confident teaching.
If you would like to experience authentic yoga before committing to a teacher training program, our Yoga Wellness Retreats offer the perfect opportunity to enjoy daily yoga classes, meditation, pranayama, healthy meals, and peaceful surroundings while reconnecting with yourself.
Yoga is not about achieving the perfect posture. It is about becoming more aware, more balanced, and more connected through every breath, every movement, and every moment of practice.
Begin your yoga journey with awareness, and let your practice become a path of lifelong growth.